
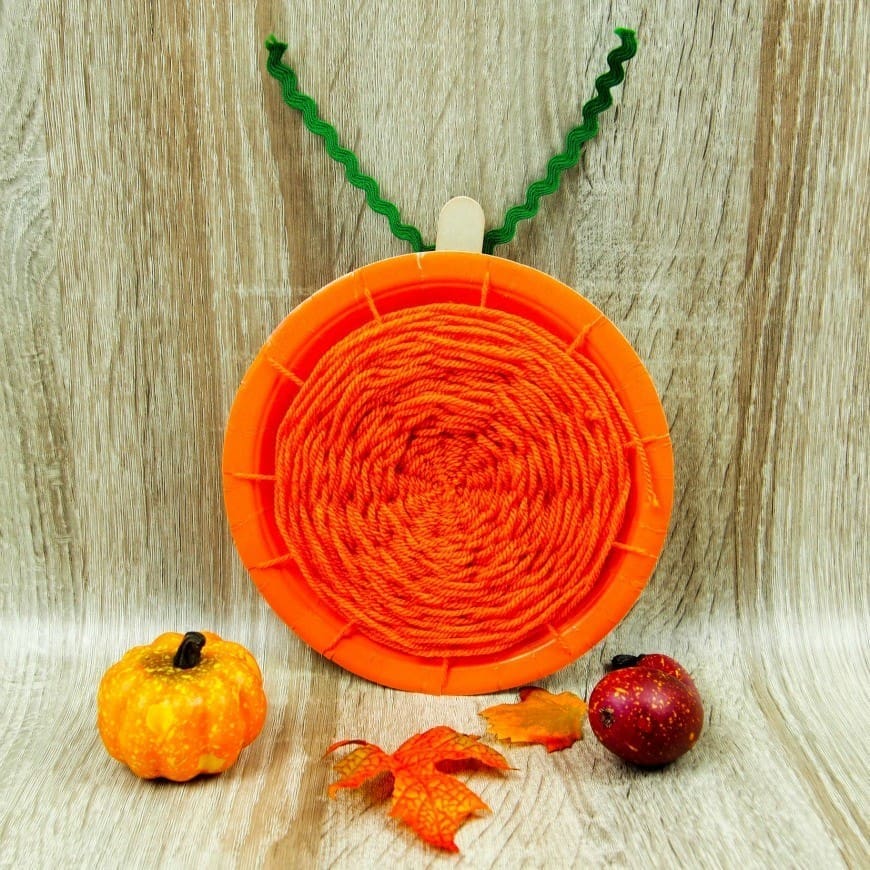
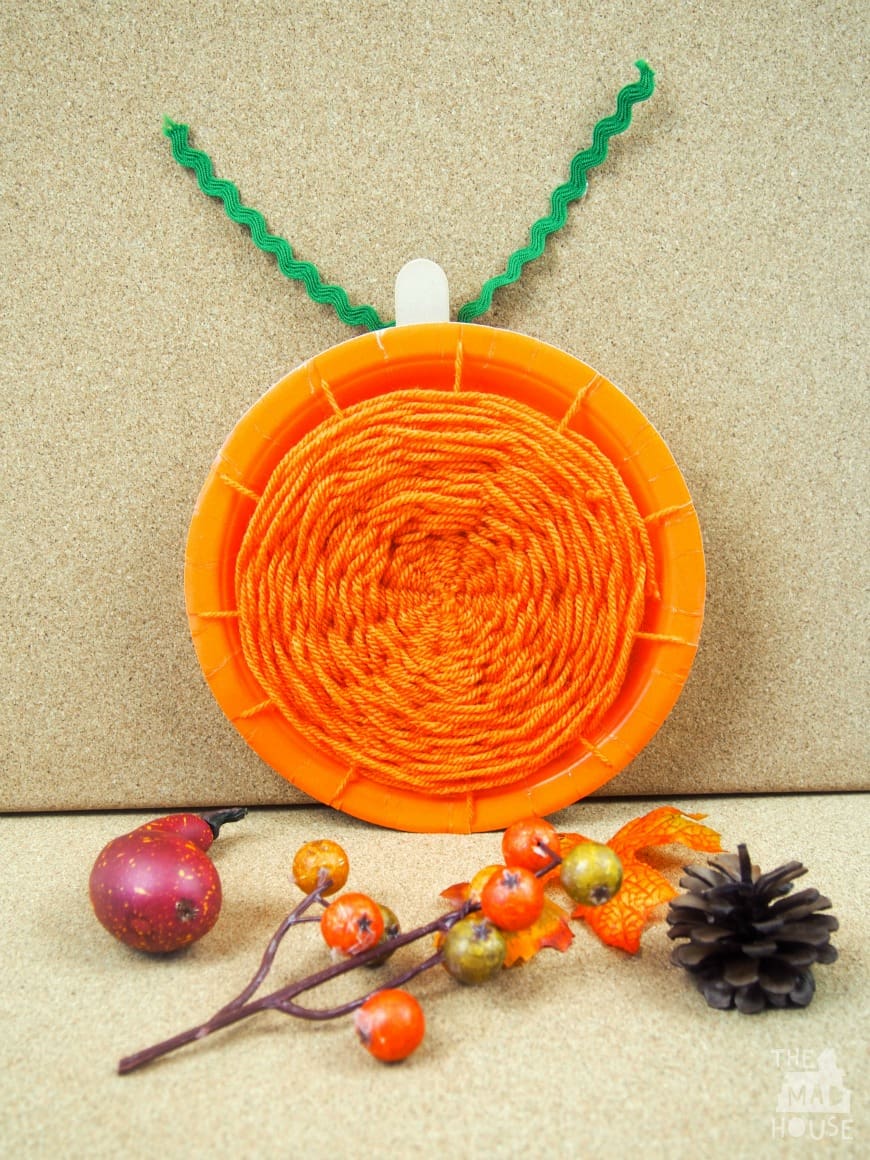
Are you feeling all autumnal yet? We certainly are. We picked the last two butternut squash from our garden this week and are enjoying lots of pumpkin soup. We are also still in the mood for pumpkin craft and I had some orange yarn left over from our pumpkin paper plate lacing craft, so we came up with a variation on our Sunflower paper plate weaving, Pumpkin paper plate weaving.
This is such a fun weaving craft and perfect for screen free time. Plus it is a great activity to help improve fine motor skills, which Mini has an issue with.
This post contains affiliate links. If you make any purchases after clicking one of these links, I will make a small commission (hopefully enough to keep me in tea all year) – at no extra cost to you! This allows me to keep creating and sharing free tutorials and content for you. Thank you!
Materials
Wool – (UK Link/US Link)
Paper plates – UK Link/US Link
Plastic needle – UK Link/US Link
Scissors – UK Link/US Link
Large craft sticks (UK Link/US Link)
Ricrac
360 degree protractor (UK Link/US Link)


Instructions
The secret to a nice even weave for your paper plate pumpkins is to make sure that you have an UNEVEN number of spokes. You can chose any number, less for younger children and more for older kids, but it always needs to be uneven.
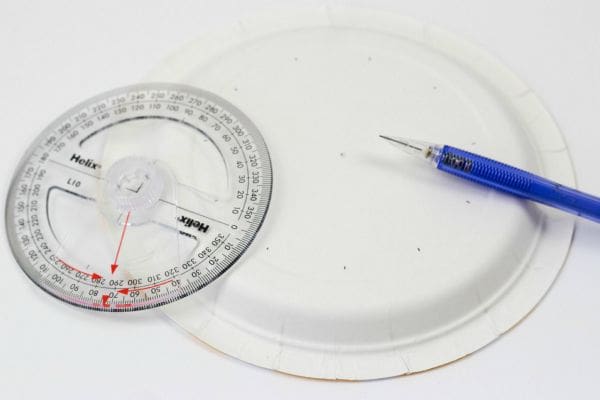
Maxi loved working out the math for the spokes. It is a simple maths project. We decided on 11 spokes. So he divided 360 (the number of degrees in a circle) by 11 and then marked them out on the rear of the circle. It helps to find the center of the plate to do this. We then extended our marks to the edge. We love our 360 degree protractor (UK Link/US Link).
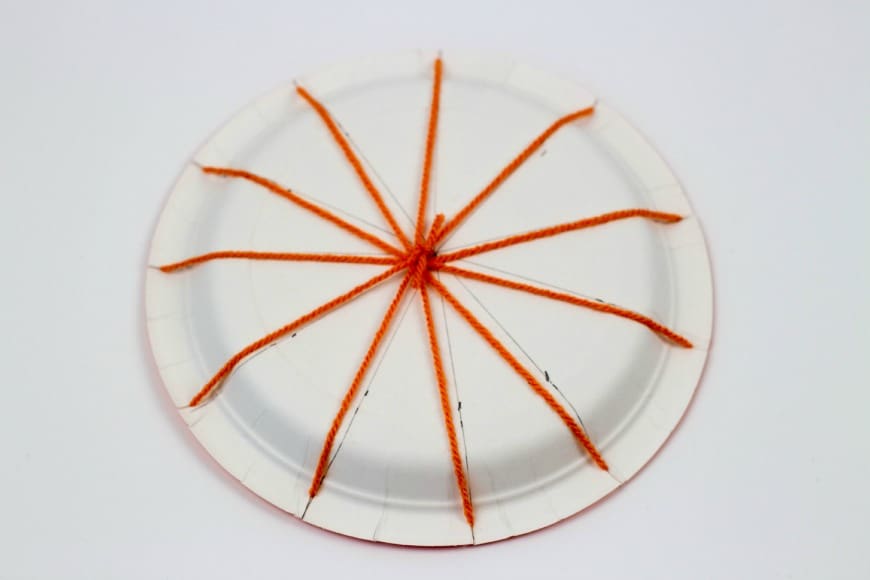
Using those marks, we then cut a small slit in the enge of the plate to secure the wool in. If you have younger children then you might want to do this for them.
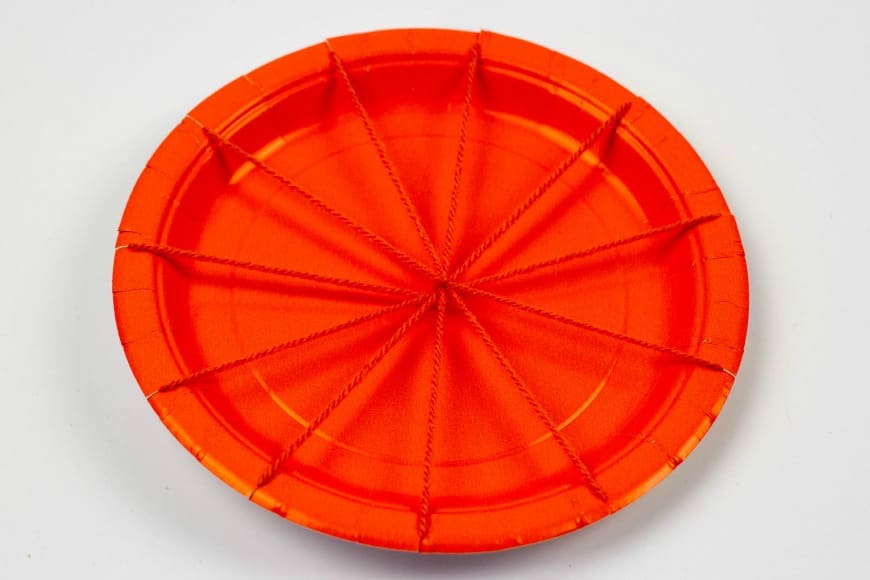
Now is the time to add the warp threads (spokes) to your paper plate. We made a small hole in the center for the wool and then wrapped it through each of the slits across the plate before tying it off at the back. We used orange plates, so the wool blended, but if you have white plates you could use them.
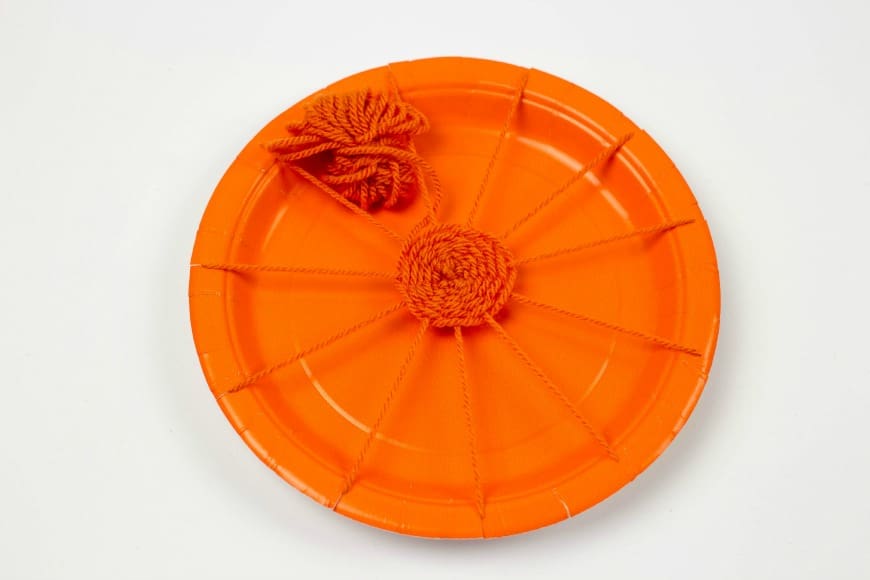
Then we started with the weaving. To make it simpler for children we used a plastic needle with a large eye for the wool. You could use a bobbin for older children (you make one by anchoring the end of a 5- or 6-yard length of yarn by winding it around your forefinger a couple of times. Then wrap the rest of the yarn around your whole hand. When you have about a foot left, carefully pull the wound yarn from your hand. Wrap the loose end around the center of this yarn a few times and tie it to secure). Tie the end of the wool to one of the spokes to secure it.
The weaving process is simple. You go under and over the warp (spoke) thread.
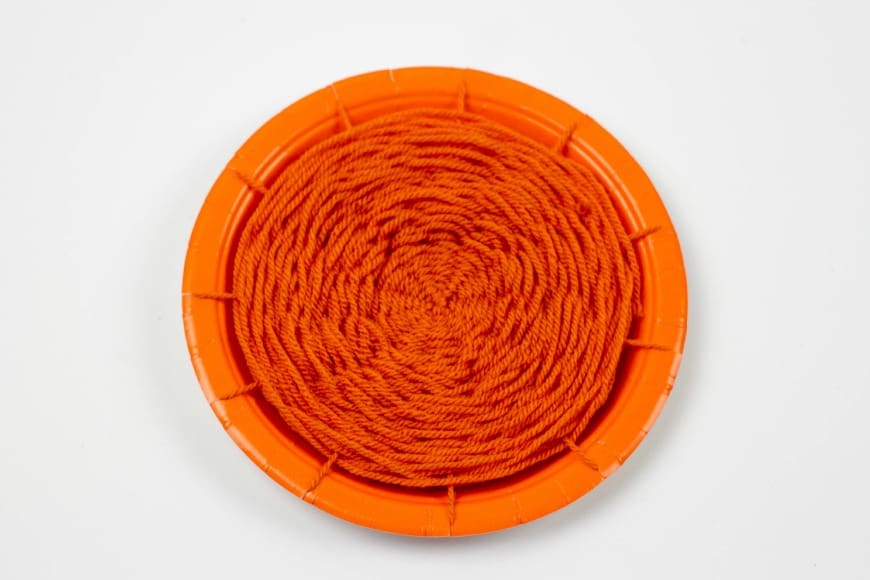
The boys then continue weaving until they got the pumpkin the size they wanted it.

Comments are closed.