If your little one is afraid of the dark, a night light might be just the thing to help them get to sleep. The gentle glow is also very helpful when you’re checking in during the night as there will be no need to turn on the overhead light and disturb them.
Making a nightlight is a very straightforward DIY project and you can make it unique to your children by adding individual touches. Follow our step-by-step instructions and handy tips on how to make a cube-shaped night light using
Requirements:
Most of the requirements needed for this DIY night light project can be
obtained from Plasticsheetsshop.co.uk:
• Cast acrylic sheet for cube shaped night light
• Cast acrylic sheet for lamp holder
• Acrifix adhesive for acrylic sheet
• Block hook or hooks
• Rubber gloves
• Right-angle support, e.g. one or more bookends
• HSS drill bits, 3 and 5mm
• Masking tape
• Drill
• Round hole saw
• Water spray
Step 1: Decide on the size
How big do you want your night light to be? This depends entirely on the space
you have. As a minimum, we recommend that your cube night light should measure
at least 30 x 30 x 30cm.
Because you’re going to be constructing the cube, a few calculations are necessary. The underside of the cube will be left open so that you can change the light bulb easily, so you will need five acrylic sheets. When calculating the measurements, you must include the thickness of the sheets or the night light will not be a proper cube. We recommend using 5mm thick acrylic sheets.
You will need the acrylic to form two long and two shorter side walls. In
this example, the shorter pieces must 2.5mm narrower than the long ones and
will be placed between them. The measurement of the longer pieces is added to
that of the shorter ones, so you end up with a total width of 30cm. This will
also apply when considering the height of the sides – because of the depth of
the top sheet, they should be cut 5mm shorter.
So, for a night light measuring 30 x 30 x 30cm, you will need:
- 2 sheets for the side walls of 29.5 x 29cm
- 2 sheets of 29.5 x 30cm
- 1 top piece measuring 30 x 30cm
Step 2 Choose the colour and finish
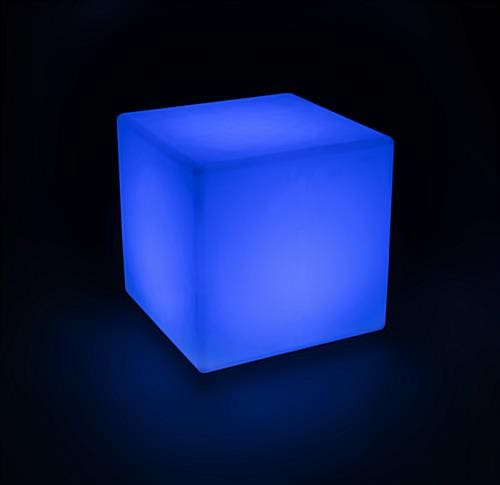
Acrylic sheet is available in an array of colours and finishes to suit every
taste. Top tip: blue is not generally recommended for children’s night lights
as this colour tends to keep infants awake and alert.
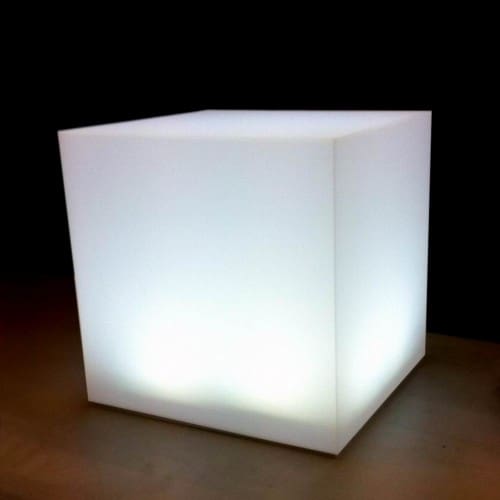
Frosted acrylic is particularly suitable for a night light as it provides a
soft, even light distribution or you could choose clear plexiglass in your
child’s favourite colour. It’s worth bearing in mind that any imperfections
will be more visible with crystal clear acrylic sheet so all the glued edges
must be very neat: this can be tricky but is possible with a little extra
care.
If you opt for coloured acrylic, these sheets are only available in 3mm thick
so your calculations will need to be adjusted accordingly. For a 30 x 30 x 30cm
cube night light, you will need:
- 2 side pieces measuring 29.7 x 29.4cm
- 2 side pieces measuring 29.7 x 30cm
- 1 top piece measuring 30 x 30cm
For the lamp holder, you will need a strip of 5mm thick acrylic, measuring
29.7 x 7cm, as well as two small pieces measuring 7 x 7cm.
Step 3: Careful prepping is the key to a
good result
You only need a few basic tools to create your charming acrylic night light,
including a block hook and a couple of bookends.
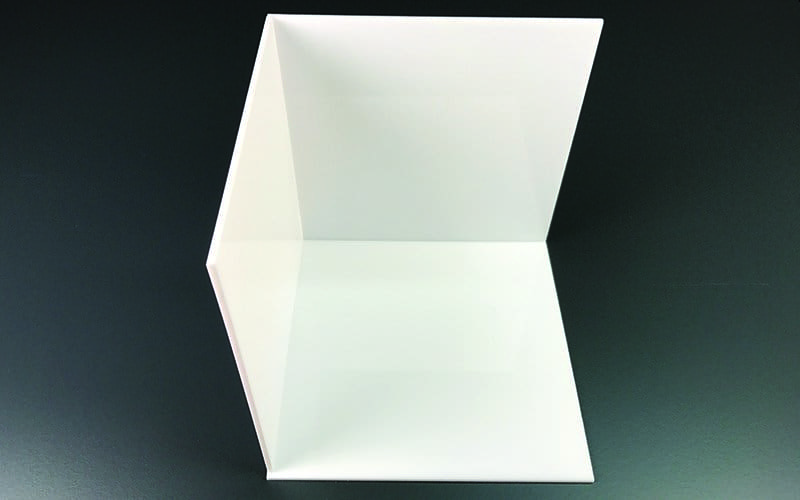
First, take a longer and a shorter side wall and remove the foil from one side
of each piece – they will be on the inside. Lay the long piece flat on your
working surface and apply the special Acrifix glue to the edge of the side
piece. The glue is quite runny, so it’s worth practicing by spreading it on a
piece of scrap first. When working with adhesive, always ensure adequate
ventilation and wear rubber gloves.
Next, position the top piece which you have glued on the longer side wall and
position the shorter wall perpendicularly to the longer wall. Use the book ends
and block hook to support the walls while the adhesive hardens – this will take
around 20 minutes. Acrylic binding is rather like the process of welding: both
pieces melt and fuse together so that once the glue has set, they are
impossible to take apart without breaking. Take your time over this part of the
process as getting everything perfectly positioned is essential.
While the first glued pieces are curing, you can drill a hole in the second
side wall for the cable. The hole should be at least 15mm away from the bottom edge
as any closer could risk the hole splitting. Apply a scrap of masking tape on
the place where the hole will be and mark the spot before drilling. Be sure to place
the acrylic sheet on a wooden board so that the drill bit does not damage the
surface underneath. Begin with a 3mm drill bit, then change to 5mm.
Once the first side wall has hardened, position the second shorter wall in exactly the same way. Wait until this second glued joint has set before placing the second longer side on top.
Lastly, position the top piece. Remove the foil from one side of the last acrylic sheet and apply the Acrifix glue to the ends of the night light cube before setting the top piece in position. Hold it in place with masking tape. Placing a weight on top will also help to hold it more securely while hardening.
Step 4: Constructing and placing the lamp holder
The lamp holder is made from narrow pieces and is suitable for a standard lamp fitting which will take many different light bulbs. First, stick masking tape on one side of the 29.7 x 7cm strip, marking the exact centre and drilling a 45mm hole.
Cut the hole for the fitting with a round hole saw and a drill. Keep the drill running at a low speed and allow the saw blade to do the work. Use a plant mister occasionally to stop the acrylic from overheating and melting.
Once you have drilled the hole, strip the foil from both the shorter 7 x 7cm strips and the long strip. Apply the acrylic adhesive on to the ends of the shorter strips and glue the longer strip to them. Ensure a perfectly aligned join with the aid of the bookends and block hook. While waiting for the glue to set, connect the cord and lamp fitting. Once everything has hardened, mount the lamp fitting in its holder by clamping it to the long strip with a swivel.
The lamp holder is held securely within the cube because the long strip of the lamp holder has the same measurements as the inside of the cube. Now, choose a light bulb and screw it into place and then position the lamp holder within the night light. Voila: your DIY night light is complete!