

I have invited Sara Davies the founder of North East-based Crafter’s Companion to come and share with us some tips for getting our creative juices flowing in the New year and a fab Happy Days Card, Gift Box and Tag craft here at The Mad House.
Hello and a Happy New Year to you all!
I’m delighted to have been invited by the lovely Jen to kick off 2016 with a guest post for Mum in the Madhouse. As you’ll all know Jen is a fantastic crafter and it’s safe to say that she understands the pleasure that can be gained from creating something beautiful and unique from scratch. Take her gorgeous white clay Christmas fingerprint ornaments that she blogged about last month – just lovely!
I’m also a mum, to two year-old cheeky chappie Oliver, and there’s nothing that I love more than having a crafty afternoon with him when I’m not working. However, I’m really passionate about encouraging mums to look beyond the gloopy glitter glue and messy handprints lovingly created by their children and discover what crafting can hold for us adults.
Every mum knows that it’s difficult to find time for yourself but I’m here to tell you that crafting can be a brilliant escape from the never-ending eat, sleep, change nappy routine! Not only will time put aside for yourself provide a mental break, if it is spent creating something then the satisfaction of doing so can both stimulate and refresh even the most tired of baby brains!
But where to begin? If you’ve never crafted before (beyond children’s paint pots and the likes) then it can be easy to be a little overwhelmed by the craft projects showcased on various websites.
Here are my five top tips for getting your creative juices flowing:
- Start simple – For those that would like to try their hand at crafting but don’t know where to start, I would give card making a go. I love making cards and it has the added bonus of being an inexpensive hobby to start as the equipment needed is minimal. This time of year is a great time to benefit from the cost-saving element of crafting – on the horizon we have Valentine’s Day, Mother’s Day, Easter and spring weddings. All of these calendar dates can start to take their toll on the purse strings, which being a mum are likely to already be stretched. So, rather than spending upwards of £4.00 on a shop-bought card, why not create something that is completely unique and has the added value of the personal touch?
- Start small – card making is a great hobby that can start as just a spare drawer of bits and bobs and the sky is the limit to where it can be taken. What I like about making cards is the instant gratification which can be gained from them – within half an hour you can have made a lovely card, it’s that quick and easy.
- Creativity loves company – crafting is a great hobby to share with your friends, particularly other mums. It can be great to meet your new mum friends for coffees and lunches but these soon add up and the opportunity to meet and do something different in each other’s homes is a great money-saver. In addition, learning from others’ techniques/being able to ask for help if you get stuck is invaluable as your start experimenting with more advanced crafting.
- Create space – ensure you set aside an area, however small, that will act as your ‘workspace’. This is important so that you can lay out everything you need for your project and not get over-faced when starting a new task.
- Enjoy yourself! – don’t beat yourself up if you cut too deep or use too much adhesive – crafting is about creating something unique that is not run off a factory line and is full of heart, so embrace any faux pas and concentrate on enjoying yourself.
To help you on your way here is a perfect nap time make for you to have a go at:
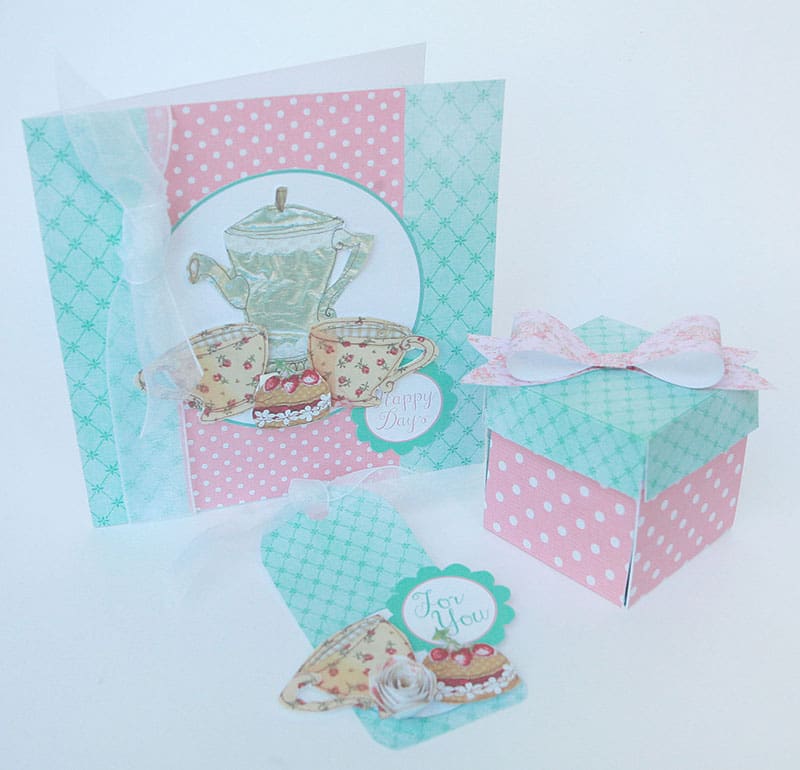
Happy Days – Card, Gift Box and Tag

Birthdays tend to be occasions where we give cards and gifts in abundance. But how about sending a card and gift ‘just because’? Perhaps to cheer someone up or reconnect with an old friend. Either way, I’ve created a gorgeous set to make that will brighten up the dullest of days. This box project may be small but it can conceal a whole host of small gifts ranging from earrings to chocolates to tea-light candles, like I’ve used here. Add a matching tag too and you’ve got it all wrapped up for a spontaneous or planned occasion
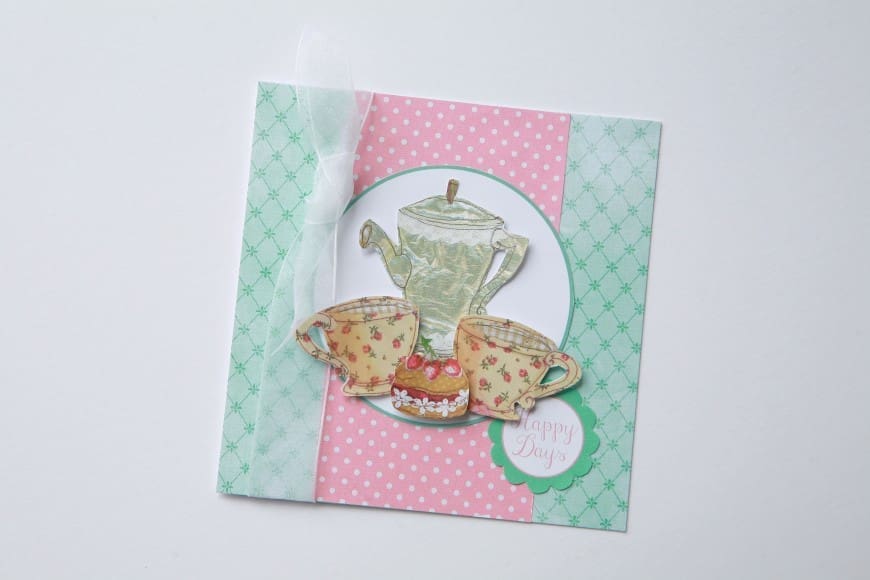
Happy Days Card
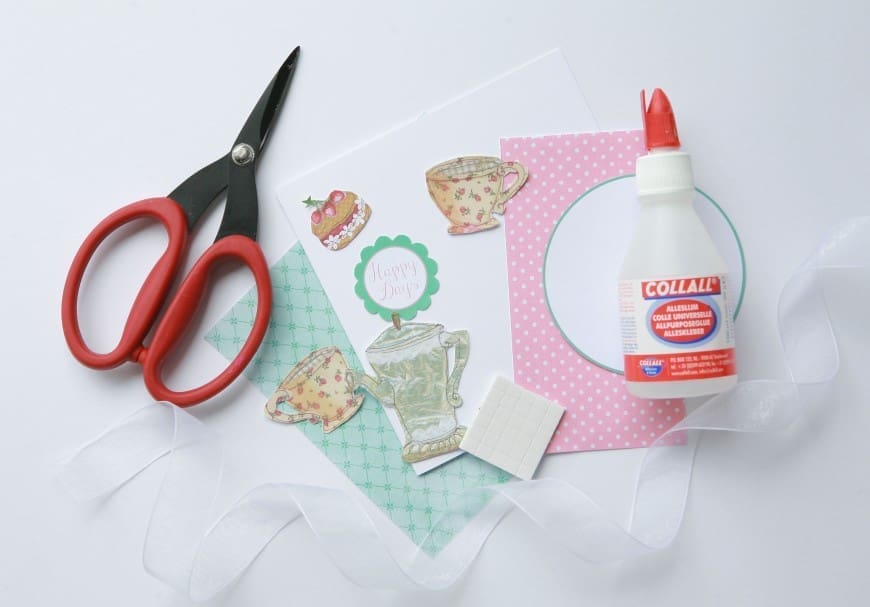
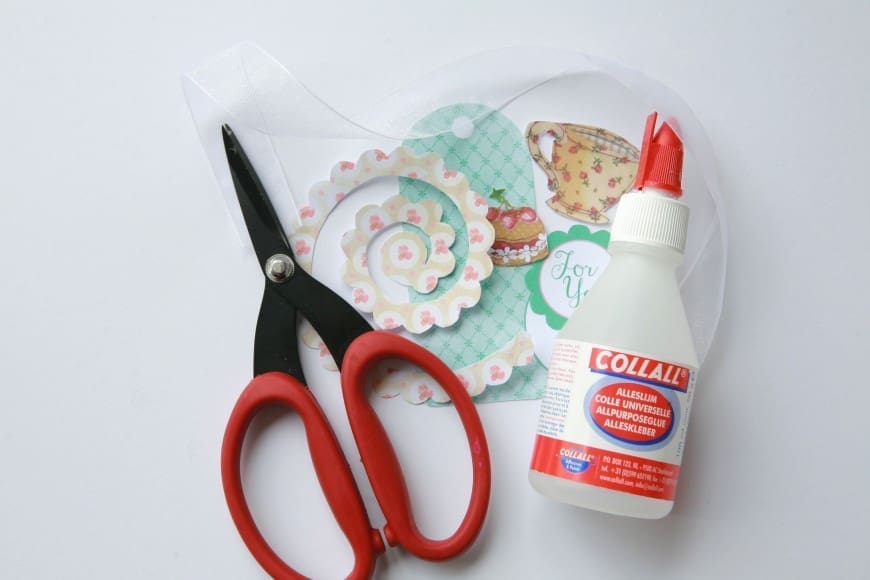
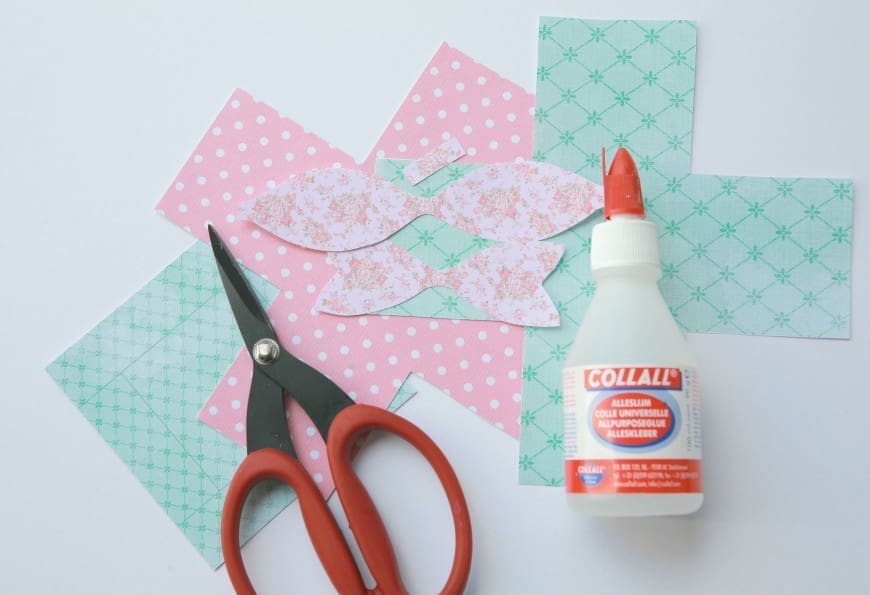
Supplies:
- 15x15cm card blank
- Card download sheet
- White organza ribbon
- Scissors
- Double-sided tape or glue
- 3D foam pads
To create:
- Cut out all the elements on the download sheet.
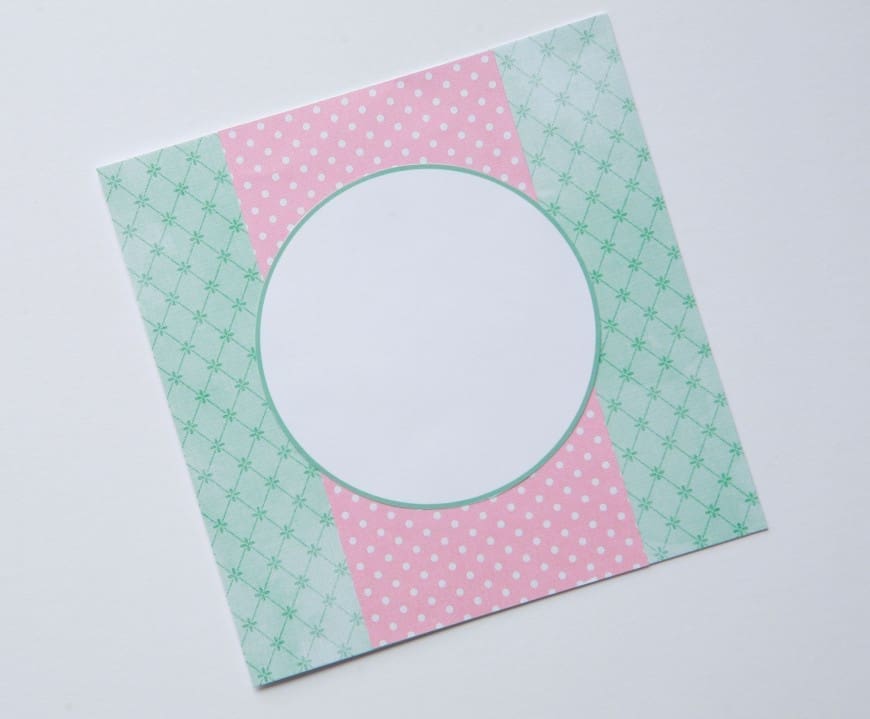
- Working with the card blank, take the green patterned paper piece and line the front of the card by adhering with glue or double-sided tape. Add the pink strip in the centre then add the white large circle on top of that.
- Adhere the tea service and cupcake on top using 3D foam pads (if you have them, if not – just glue) along with the greeting.
- Finally add organza ribbon (if you have any) and wrap around the front of the card and tie in a chunky knot.
…………………………………………………………….
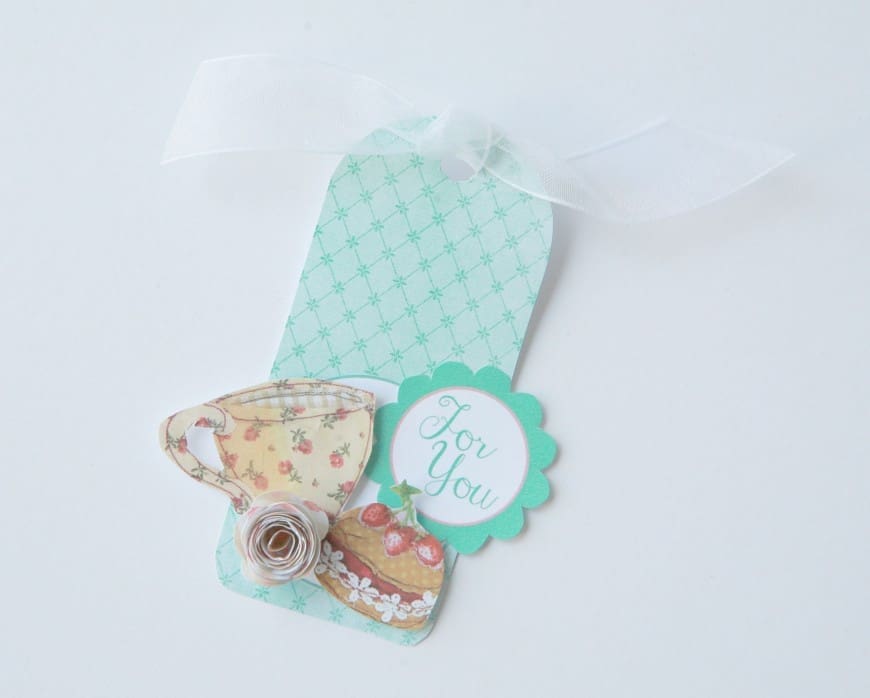
Happy Days Tag
Supplies:
- Tag sheet download
- White cardstock
- Scissors
- White organza ribbon
- Double-sided tape or PVA glue
To create:
- Cut out all the pieces from the download sheet. Adhere the tag to white yardstick and cut around again.
- Adhere the circle towards the bottom of the tag then apply the cup and cupcake using 3d foam pads. If no 3D pads, just use glue.
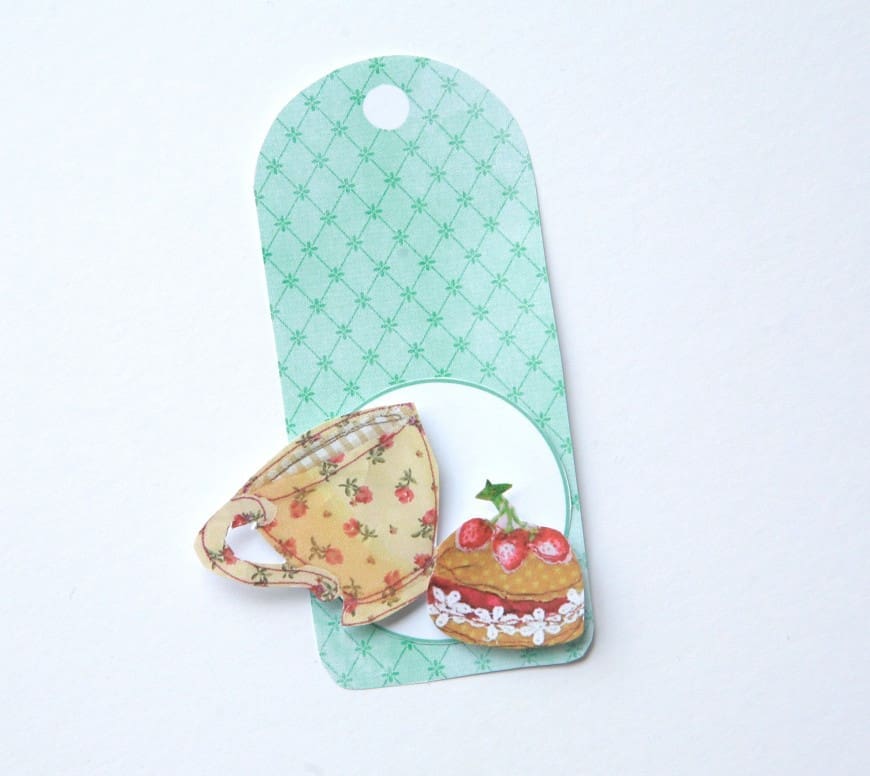
- Adhere the ‘for you’ greeting to the top right of the cup cake ensemble.
- Take the scalloped swirl. Starting with the long end, wrap the shape back in on itself as shown in the picture.
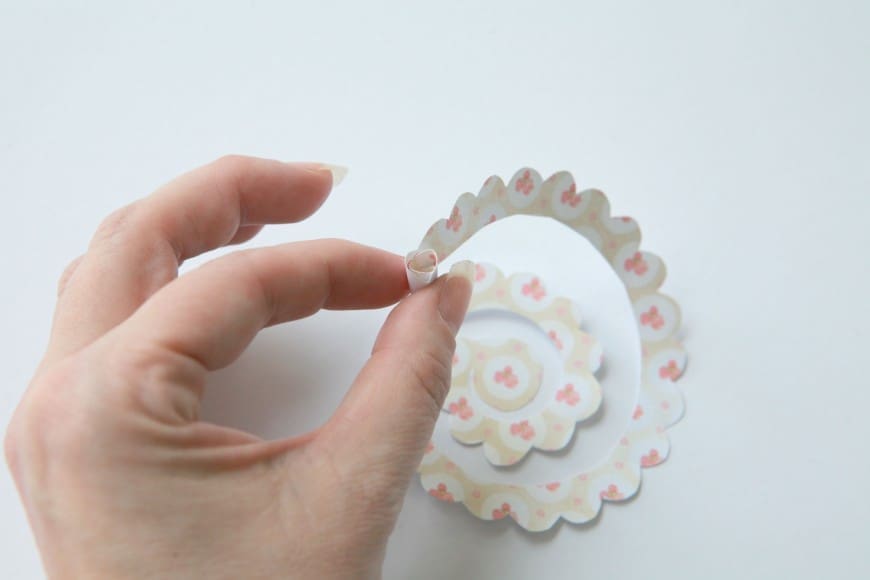
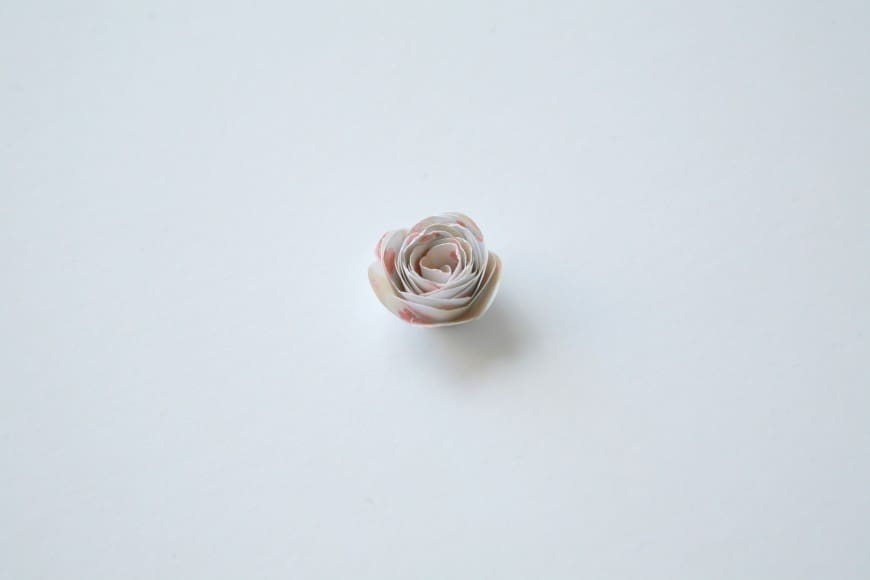
- Keep going round until you reach the circular edge. Apply glue to secure the spiralled shape to form a ‘rose’ – attach to the tag.
- Wrap ribbon through the tag hole to finish
…………………………………………………………….
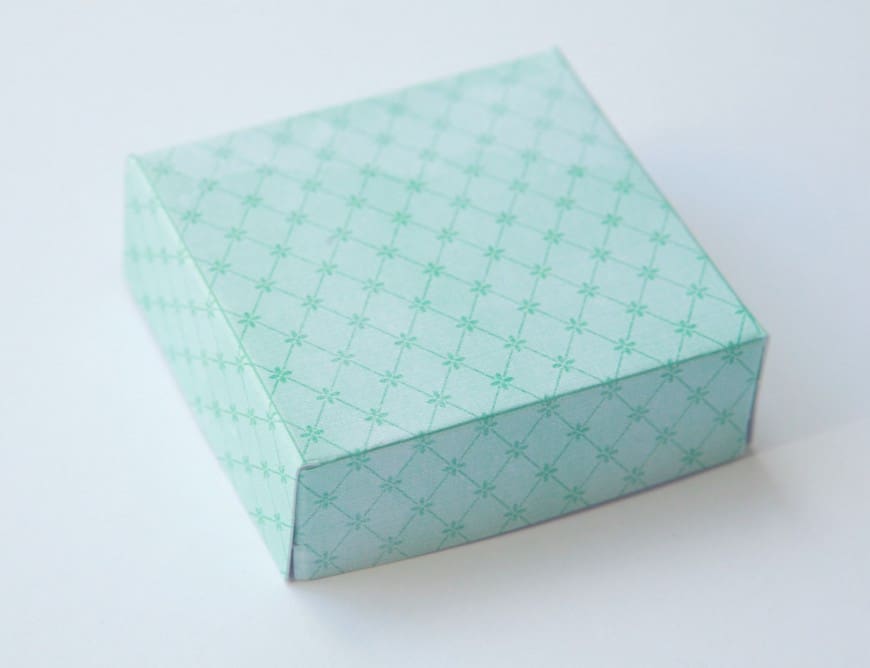
Happy Days Box
Supplies:
- Box download sheets
- A4 white cardstock
- Scissors
- Double-sided tape or PVA glue
To create:
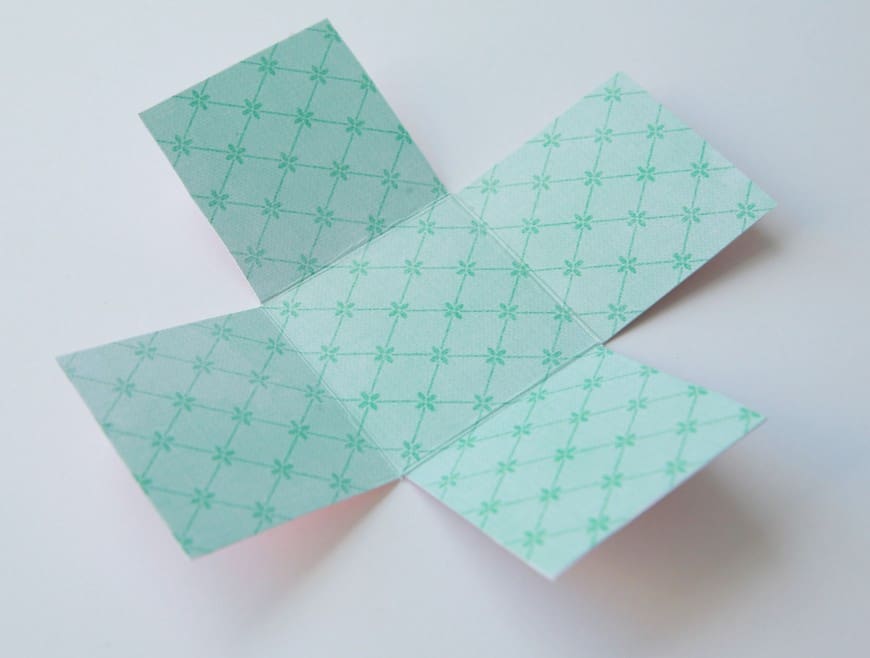
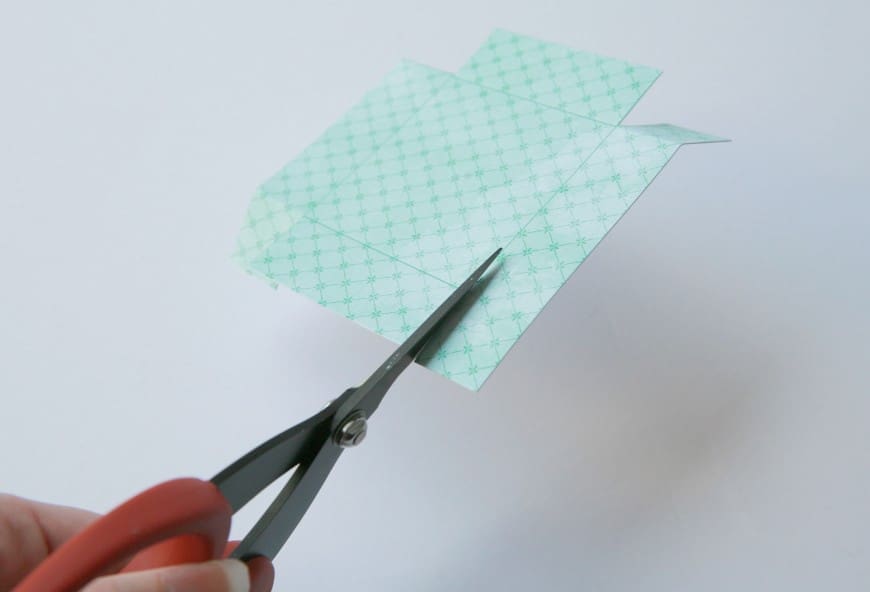
- Cut out all the pieces from the download sheet. Adhere one box ‘plus sign’ shape to white cardstock. Cut around and then adhere the other box ‘plus sign’ shape to the other side. Manipulate the folds as shown in the picture below.
- Take the box lid paper and adhere to white cardstock. Cut out along the snip lines, fold the ‘flaps’ inwards.
- Add glue and adhere to the inside of the lid.
- Assemble the bow as shown in the pictures below.
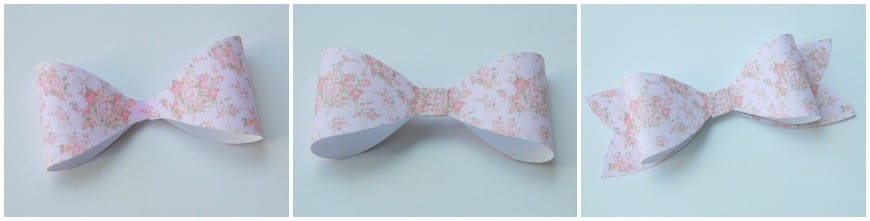
- Adhere the bow to the lid.
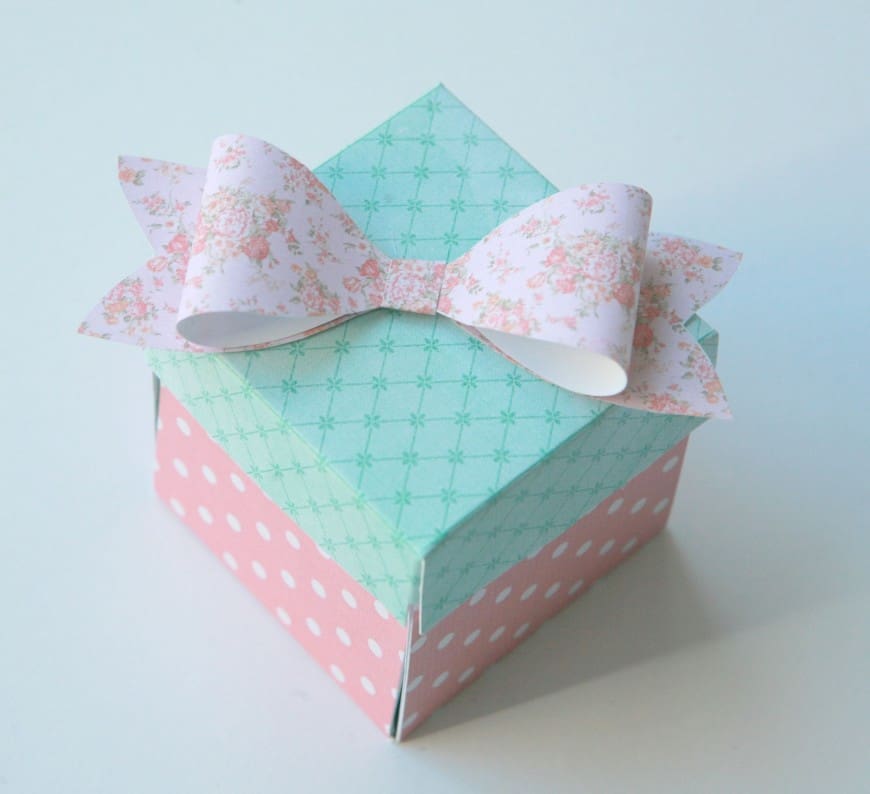
- Add a tea-light candle in the central part of the ‘plus sign’ shaped box. Fold up the sides of the ‘exploding’ box and put the lid on to prevent the sides falling down.
So why not make your New Year’s resolution to make time for yourself and craft yourself a happy 2016! Good luck and enjoy! xx
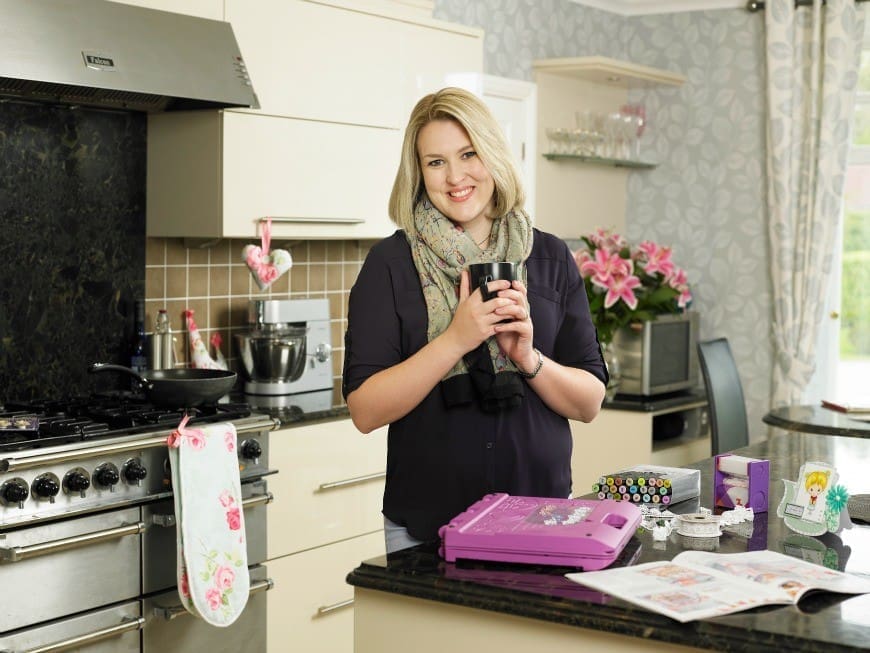
Sara, 31, is the founder of North East-based Crafter’s Companion after setting up the company from her bedroom whilst at university. The £10m company now designs, manufactures and sells craft-related products to people across the world through retail outlets, online and TV shopping channels. Sara regularly features on the Create & Craft TV channel and presents craft show ‘Be Creative’ on prime-time, national mainstream TV.
Disclosure: This post in brought to you in collaboration with Crafter’s Companion
Comments are closed.