Autumn is the perfect time to slow down and savour cosy afternoons with your children. When the weather turns crisp and the leaves begin to change, a good craft can keep little hands busy and spark imaginative play. This cute autumn village cut‑and‑paste craft turns simple paper into a whimsical world of candy‑inspired houses, mushrooms and snails. Kids will colour, cut, fold and glue their way to a mini village that can be used for pretend play or as a colourful table decoration.
What’s in the free printable
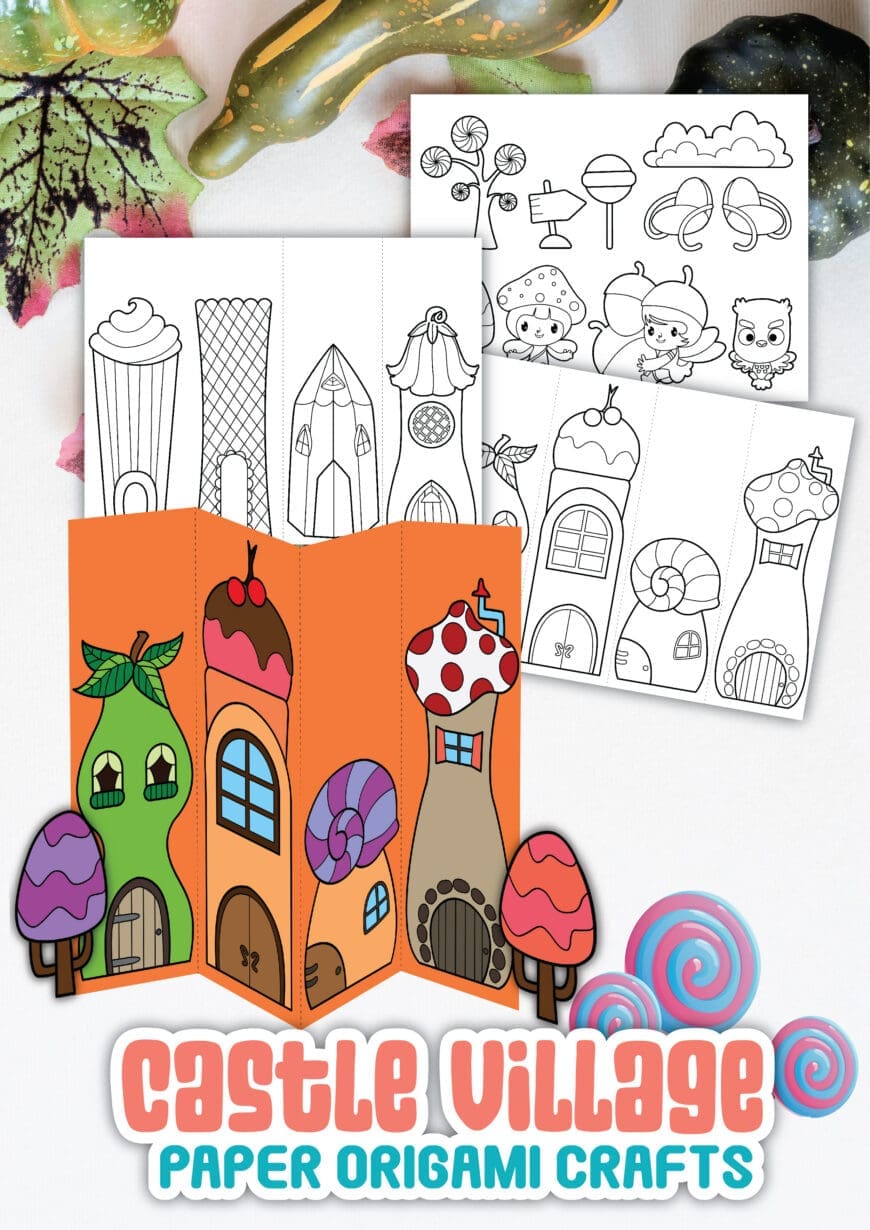
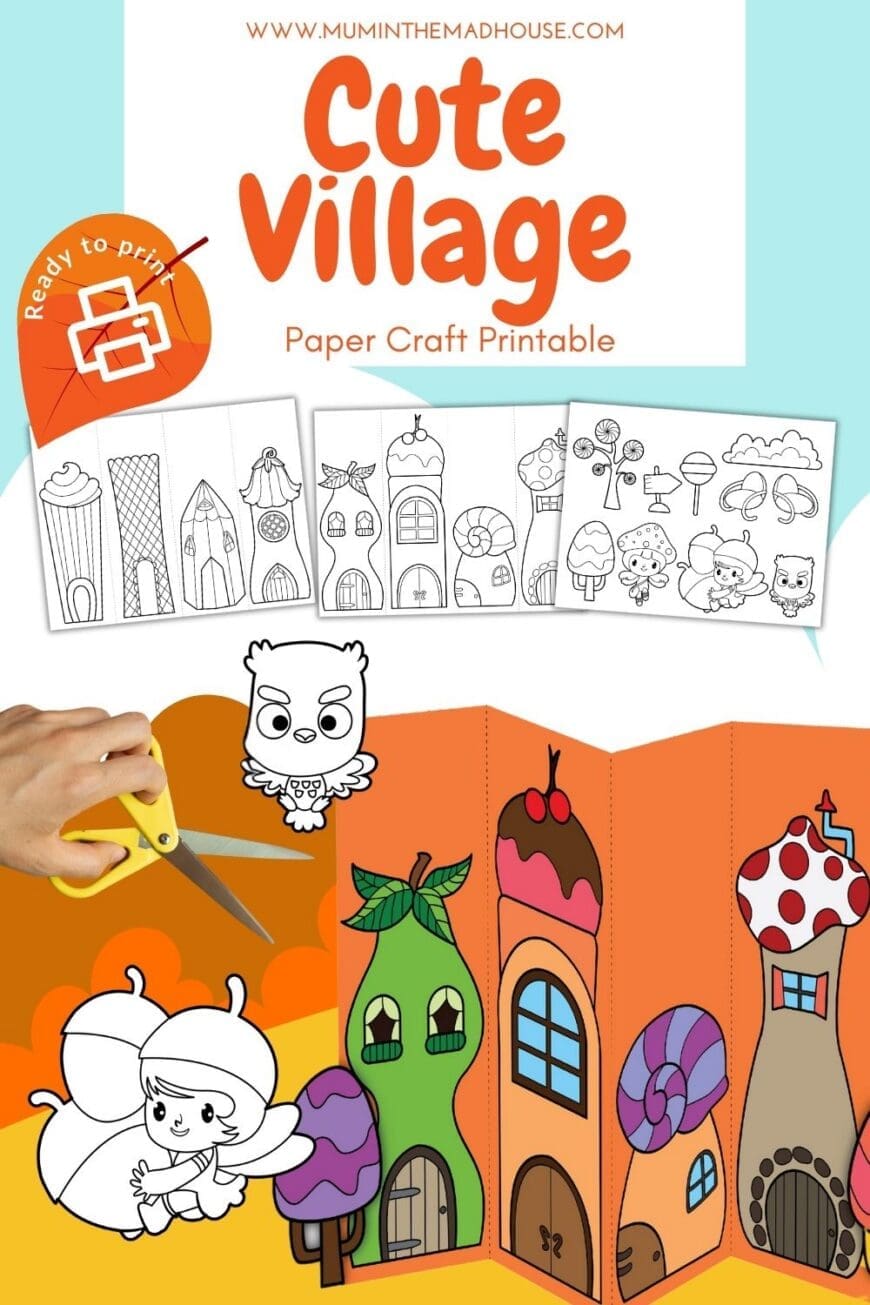
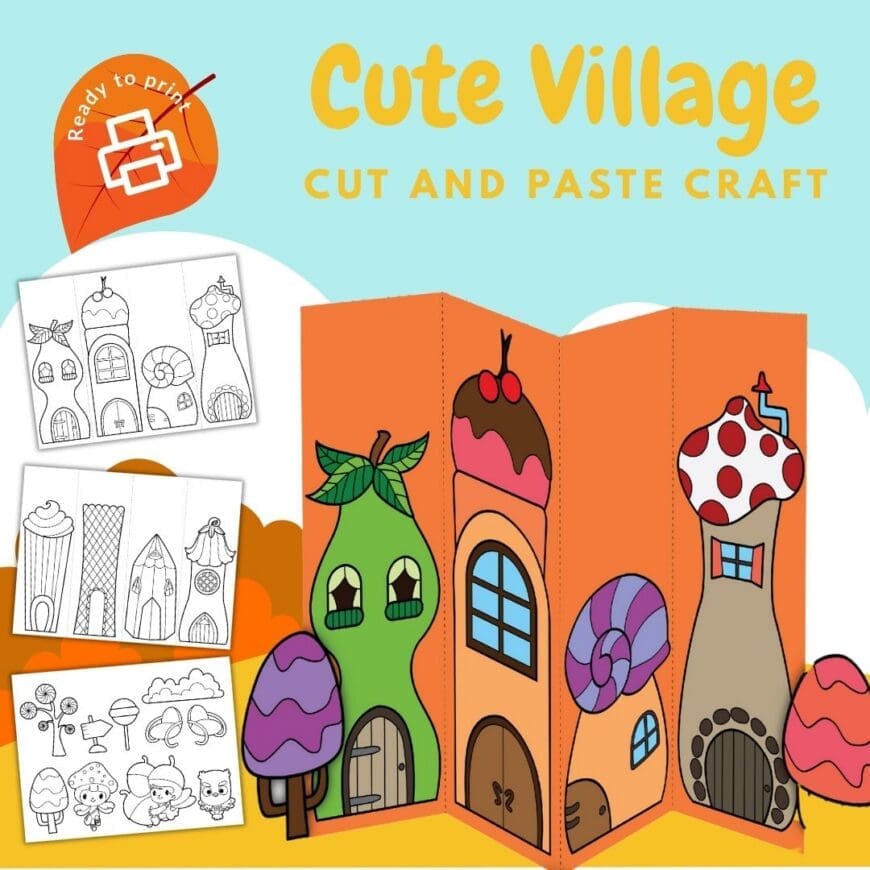
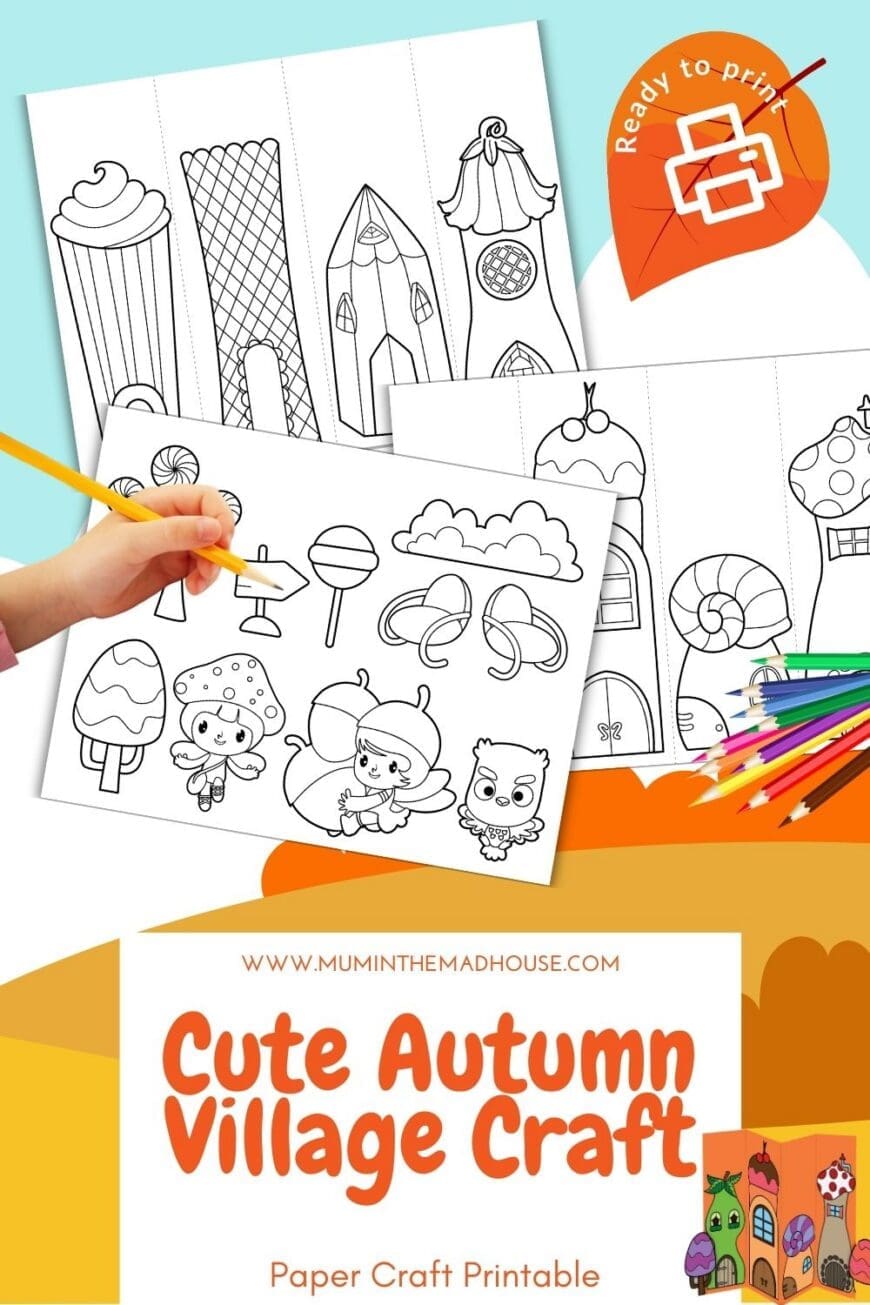
The printable includes a series of fold‑out panels featuring four different houses on each sheet. The designs look like something from a fairy tale: a waffle‑cone tower topped with a cupcake swirl, a tall ice‑cream cone building, a rocket‑like tower, and a rounded house with a roof that resembles a mushroom cap. Another sheet has a pear‑shaped cottage with leafy eaves, a tall sweet‑shop house topped with cherries, a snail‑shell cottage and a toadstool tower. A separate page contains accessories – trees with lollipop tops, street signs, clouds, lounge chairs and cute characters to cut out and add to the scene. Once coloured and assembled, the panels connect to form a charming street.
Supplies you’ll need
- Printable template – download and print the castle village template on standard A4 or US Letter paper (card stock works best for durability).
- Colouring tools – crayons, coloured pencils, markers or even water‑colours give each house a personality.
- Scissors – younger children may need help cutting along the solid lines.
- Glue or tape – to secure the tabs when folding the houses into shape.
- Optional extras – scrap paper for making a base, glitter, stickers and real autumn leaves for embellishment.
This post contains affiliate links. If you make any purchases after clicking one of these links, I will make a small commission (hopefully enough to keep me in tea all year) – at no extra cost to you! This allows me to keep creating and sharing free tutorials and content for you. Thank you!
No products found.
How to assemble your village
- Print and color – Print the pages on sturdy paper. Let your child colour each house and accessory. Encourage them to use autumnal shades like warm oranges, reds, browns and golds, but remind them that candy villages can be as colourful as they like.
- Cut along the lines – Help your child carefully cut out each house and accessory along the solid outer lines. Cutting builds hand strength and coordination.
- Build your scene – Arrange the houses in whatever order your child likes. They can add the lollipop trees, benches, signposts, mushrooms, fairies or owls to bring the village to life. For extra stability, glue the village onto a strip of cardboard or a shoebox lid.
- Play and display – Once dry, the village can be used for storytelling, imaginative play or as seasonal decor. Fold it flat to store or mail to grandparents!
Tips and variations
Arts and crafts aren’t just a way to pass the time; they build important developmental skills. When children colour, cut and glue, they use their hands and fingers in coordinated ways, which helps improve hand‑eye coordination, fine motor skills and dexterity. Handling scissors and folding paper also encourages patience and concentration. Crafting gives kids space to make creative choices and solve problems – skills that carry over into other areas of learning. As they arrange the houses and invent stories about who lives in them, children practice narrative thinking and language development.
- Create a fall landscape: Glue your village onto a large sheet of craft paper and draw rolling hills, paths and a river. Add real leaves, twigs or acorns for texture.
- Add personal touches: Encourage children to draw extra details like curtains, flowers, jack‑o’‑lanterns or wreaths. They can even write names above the doors to give each house an owner.
- Use as a math activity: Turn the panels into a counting exercise by numbering the houses or hiding small objects inside each one for children to find and tally.
- Make a storybook: Photograph the finished village and have your child dictate a short story about it. Print and bind the photos to create a keepsake book.
Download the Cute Village
These printables are offered for your non-commercial personal use only. Mass-production of this printable is not permitted, even for non-profit purposes. Please do not upload the Autumn Village Cut‑and‑Paste Printables to other sites – instead, if you want to let people know about these freebies, post a link to this page. Pinning is okay as long as the pin links back to this page. Thanks!
All you need to do is add click on add to cart and the free printable Fall Village craft will be added to your shopping cart. When you are finished click on the orange cart menu at the top right of your page and follow the instructions on the screen. You will not be charged and the free pdf file will be available for you to download immediately and will also be emailed to your inbox.

This free autumn village cut‑and‑paste craft is a delightful project for rainy days or weekend afternoons. It’s simple enough for preschoolers with adult help and engaging enough for older kids to enjoy on their own. Best of all, it turns ordinary paper into a miniature world that encourages creativity, storytelling and fine motor development. Download the template, gather your supplies and let your child’s imagination stroll through a candy‑coated village this fall.