
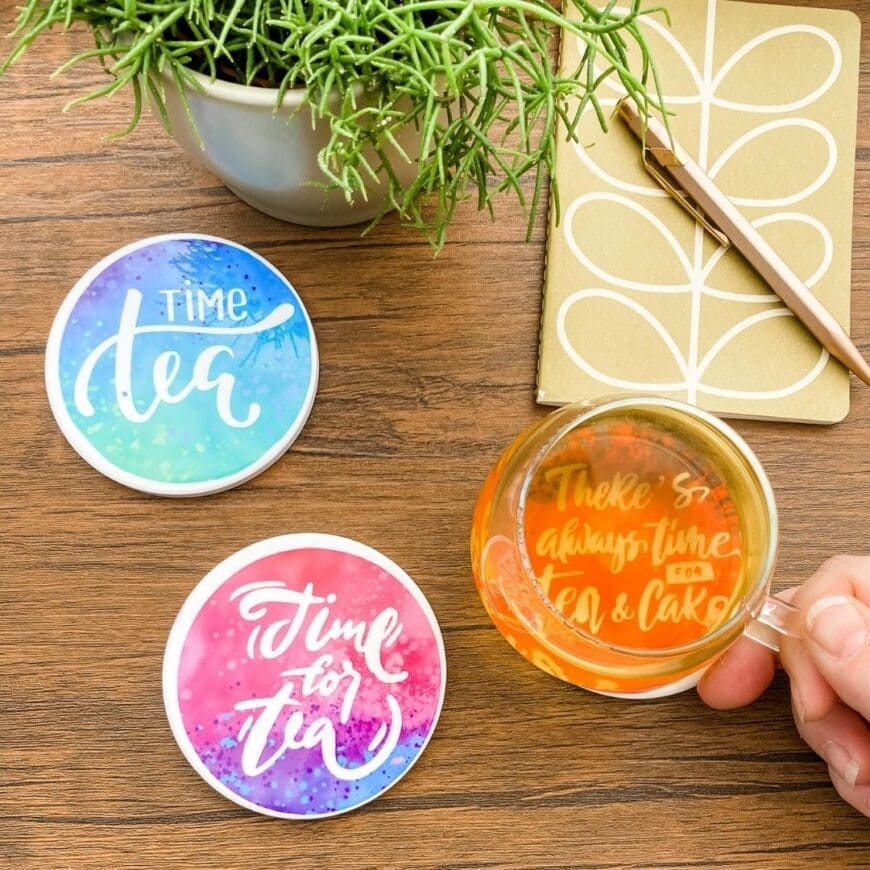
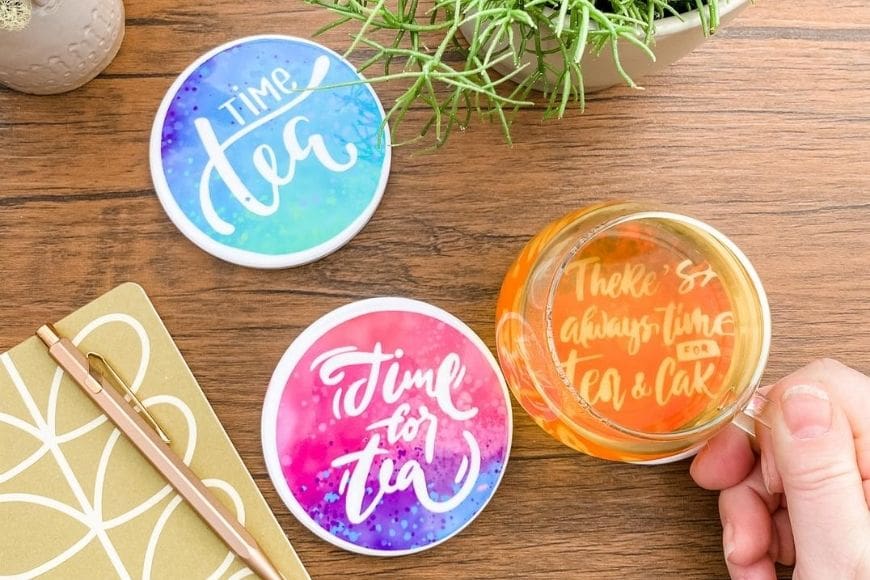
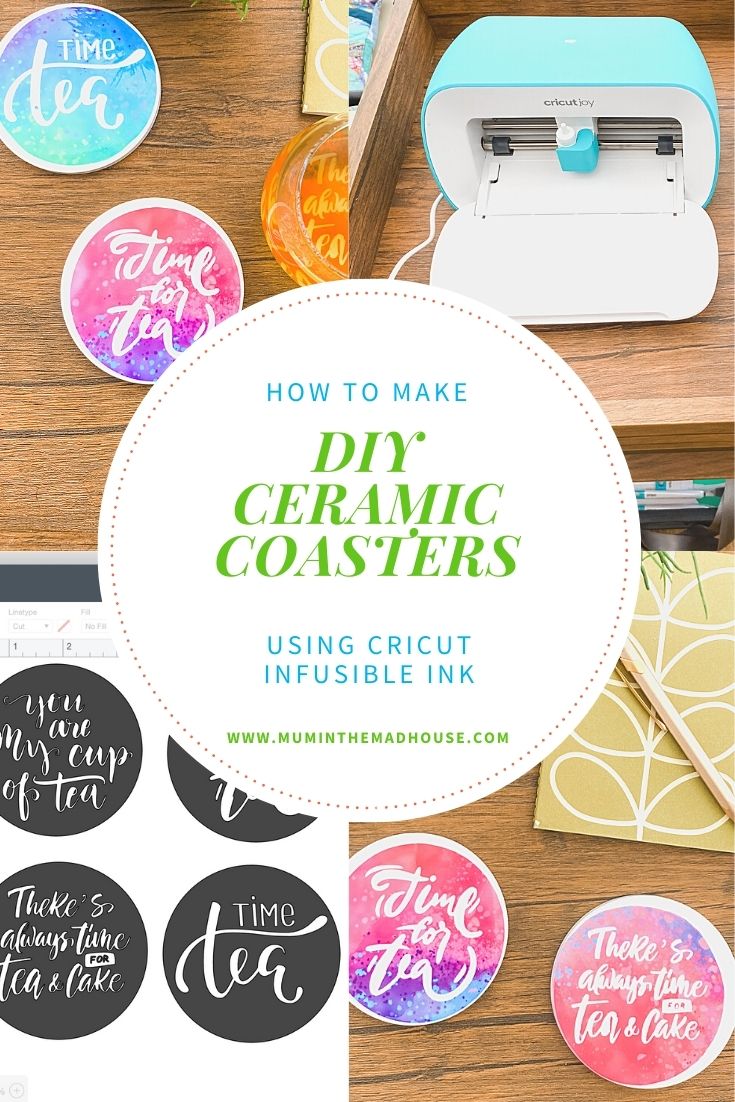
I love tea, it is my drink of choice so I made some DIY coasters using Cricut infusable ink that are dedicated to my favourite beverage. I am delighted at how these turned out and I learned some valuable lessons that I wanted to share with you.
First off, I know these are not perfect, but you are going to learn from MY mistakes, so you do not make any of your own.
Secondly, Infusible ink blew me away – seriously this stuff is amazeballs. I can not believe how fab these DIY coasters are.
What is Infusible Ink?
Here’s what Cricut has to say about their Infusible Ink…
“Infusible Ink is an all-new system of Cricut DIY products that make it possible to achieve pro-level, personalized heat transfers on T-shirts and more at home for the first time. Unlike the vinyl or HTV process, where artwork is attached on top of a base material using adhesive, an Infusible Ink transfer becomes one with the material itself. The results are bright, beautiful, seamlessly smooth transfers that never flake, peel, wrinkle, or crack. “
Cricut has created a line of Infusible Ink compatible blanks including round coasters (UK Link/US Link), square coasters (UK Link/US Link), t-shirts (UK Link/US Link) and tote bags (UK Link/US Link). Look for the compatibility badge when purchasing your supplies to ensure that the infusible ink melts into the products.
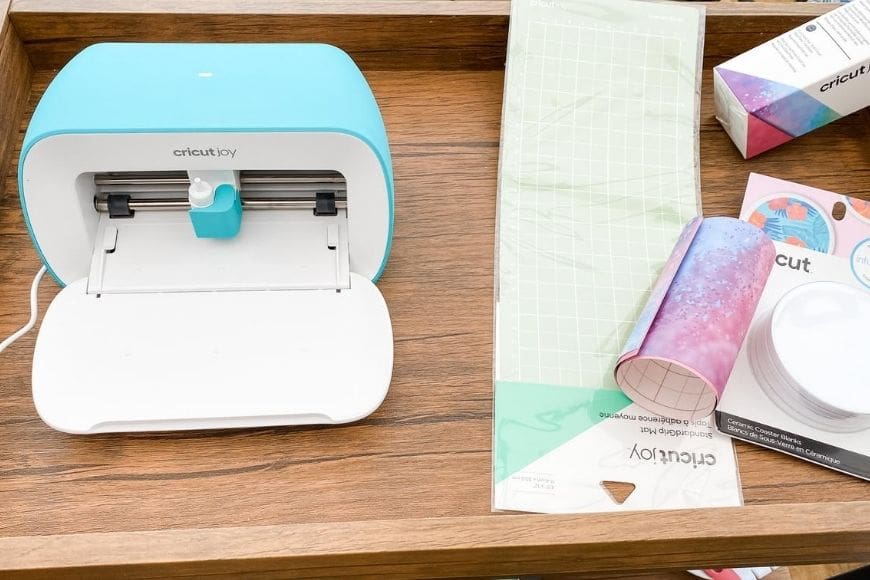
Materials You Need to Make Ceramic Coasters with Cricut Infusible Ink
This post contains affiliate links. If you make a purchase after clicking one of these links, I will make a small commission (hopefully enough to keep me in tea all year) at no extra cost to you! This allows me to keep creating and sharing free tutorials for you to try. Thank you!
- Cricut Joy (UK Link/US Link)
- Cricut Standard Grip Mat (UK Link/US Link)
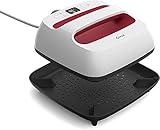
- Cricut EasyPress 2 (UK Link/US Link)
- Cricut EasyPress Mat (UK Link/US Link)
- Cricut Heat Resistant Tape (Important – I didn’t use this and my image isn’t central, so this is KEY) (UK Link/US Link)
- Cricut Infusible Ink Transfer Sheet I used watercolour splash (UK Link/US Link)
- Cricut Ceramic Coaster Blanks (UK Link/US Link)
- Lint Free Cloth
- Butcher Paper (comes inside of Transfer Sheet package)
- White Cardstock


How to make Ceramic “Tea Pun” DIY Coasters
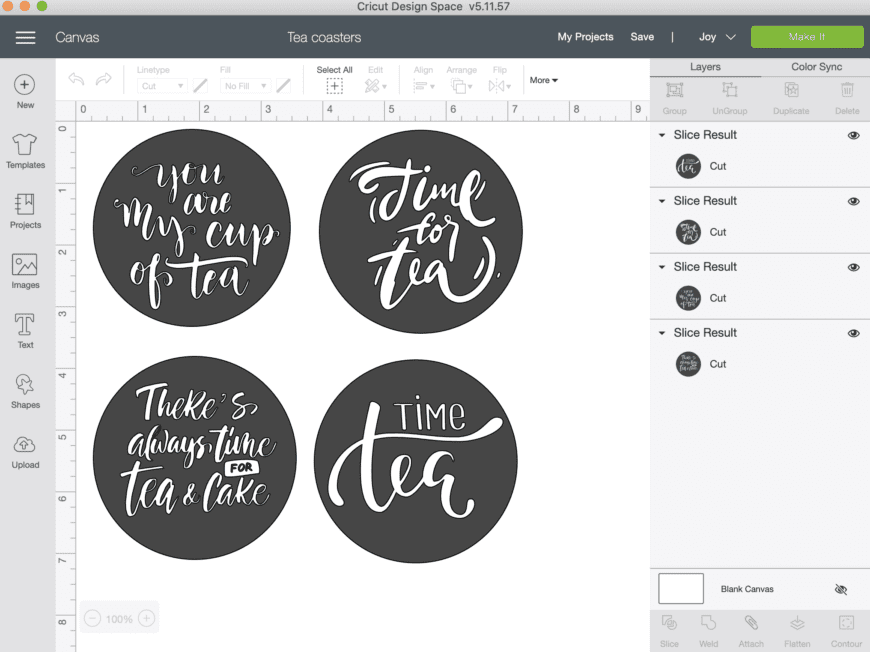
In order to make it simpler for you, I have already designed the coasters and spliced them into circles.
Place your Infusible Ink Transfer Sheet on the Standard Grip Mat, liner side down. You may think the Infusible Transfer Sheet colour seems dull now, but wait until you see the finished project. The process of transferring the infusible ink makes the colour so vivid, it really pops!
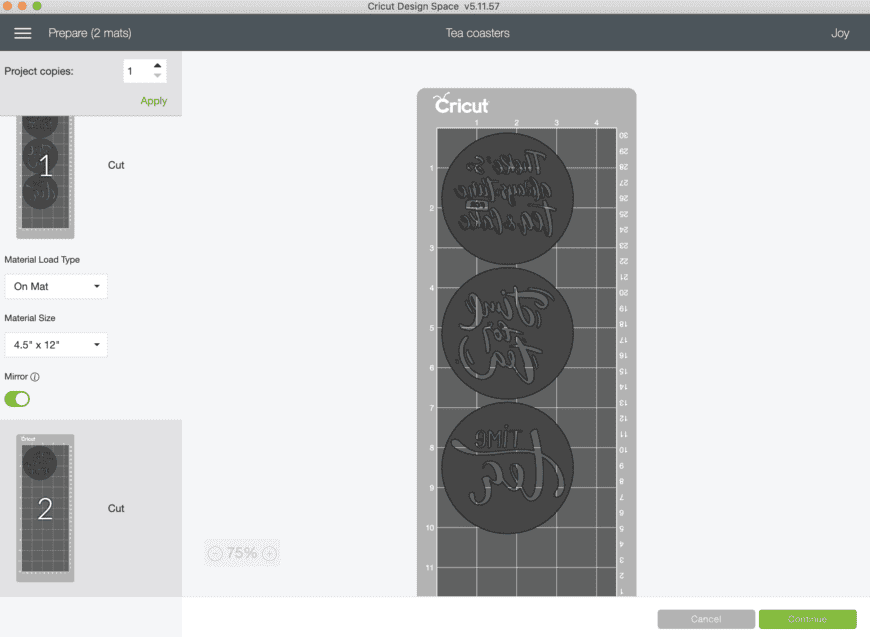
When you’re ready to cut, click the “Make It” button. You need to make sure that you click the “Mirror” function. Select “Infusible Ink Transfer Sheet” from the list of materials.
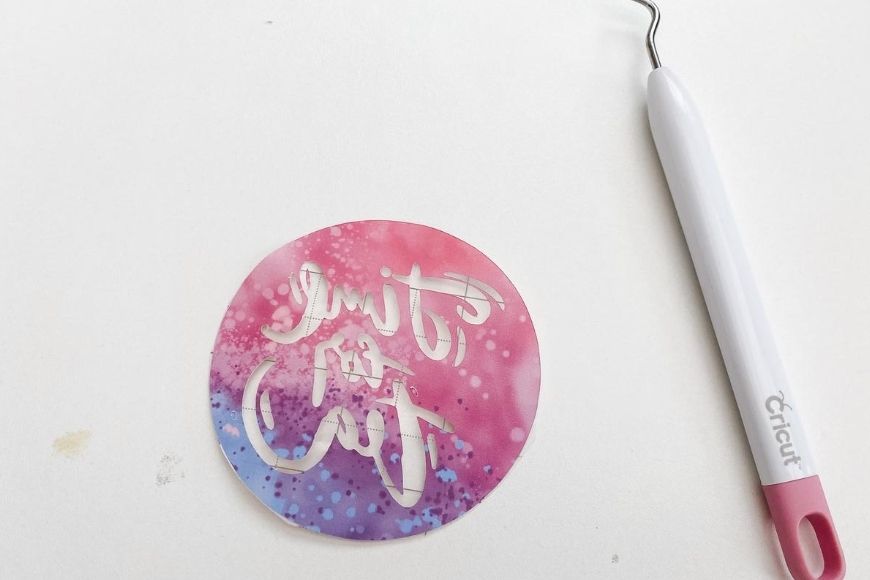
When it’s finished cutting, then you need to weed away the extra material from the transfer sheet liner.
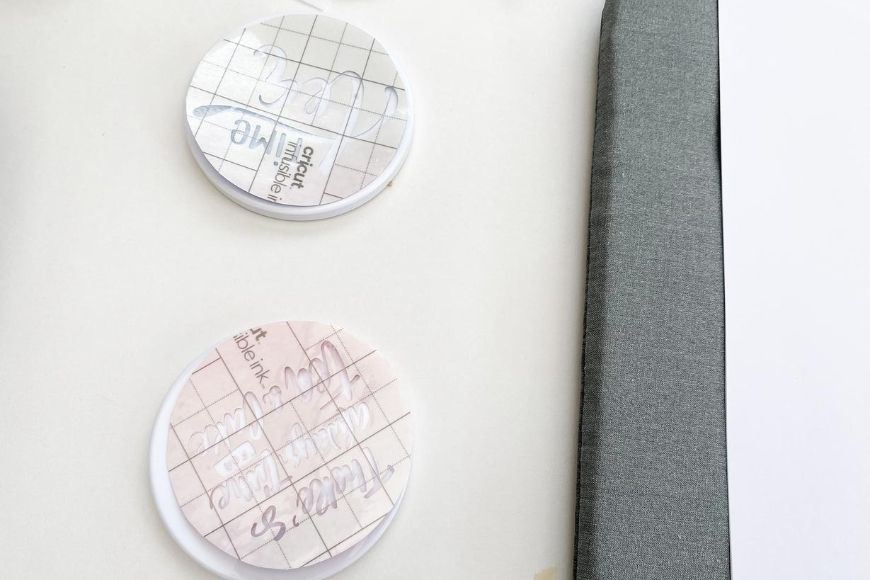
Use the lint-free cloth which comes with the infusable ink to clean the surface of your coaster. It’s important to remove all lint, I use rubbing alcohol first to ensure that they are totally clean and place a piece of white cardstock on your Easypress Mat to protect it.
IMPORTANT: This is where I should have used the heatproof tape to make sure the infusible ink sheet was central on each of the coasters. Do not miss this step.
Next, lay the infusible ink face up and then the shiny side of your coaster face down on top of that. Line them up and cover it with the butcher paper that comes with the infusible ink.
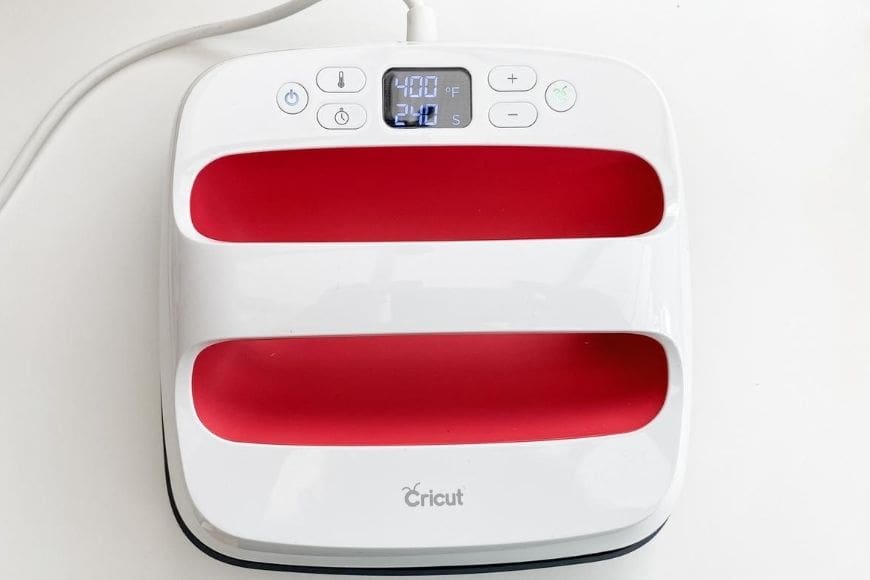
Prep your EasyPress 2: For this project, you will preheat your EasyPress 2 to 400 degrees F and set the timer for 240 seconds.
After the 4 minutes is up (you don’t need any pressure), lift up the easy press off the coaster. The coaster will be RED HOT so let it cool before you touch it and remove the heat resistant tape and ink sheet.
I can not stress enough just how amazing and vivid infusible ink is. I think it is a total game changer for the Cricut and home crafter. Also, I love the portability and small size of the Cricut Joy (full review here).
If you like these DIY Coasters, make sure you check out my other Cricut Projects and Reviews:
- Cricut Maker Review and Unboxing
- DIY Applique Monstera Leaf Cushions using The Cricut Maker
- My two weeks with the Cricut Explore – An interim review and thoughts
- Silhouettes made easy using the Cricut Explore
- A spring collection with the Cricut Explore
- DIY Customised Umbrella using iron-on vinyl
- How to make a DIY Leather Wrapped Hip Flask
- DIY Cord Tacos or Cord Organisers
- Folk Flower Mason Jar Luminaries
- DIY Lag Kills TShirt made on the Explore One
- Toilet Monster for Halloween
- Leather lace-on shoe mustaches
Comments are closed.