
This is a sponsored conversation written by me on behalf of Cricut. The opinions and text are all mine.
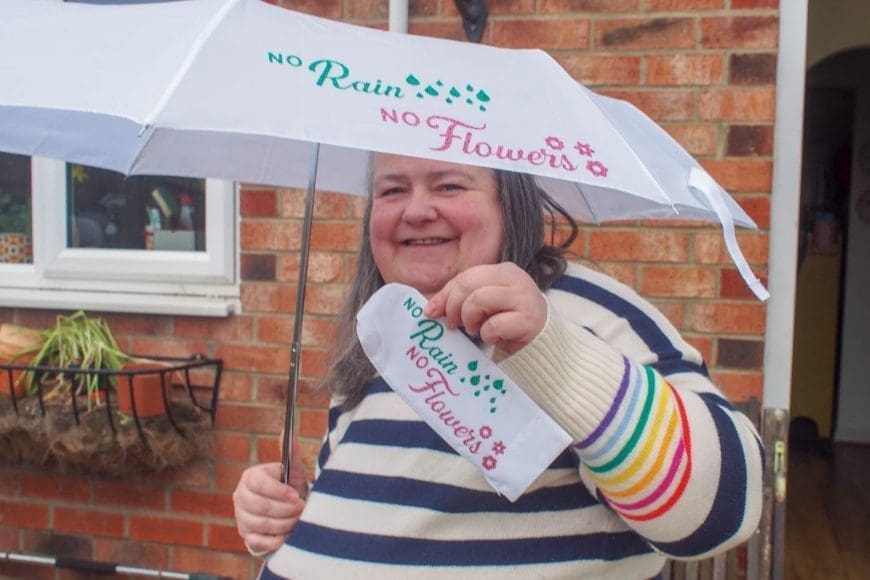
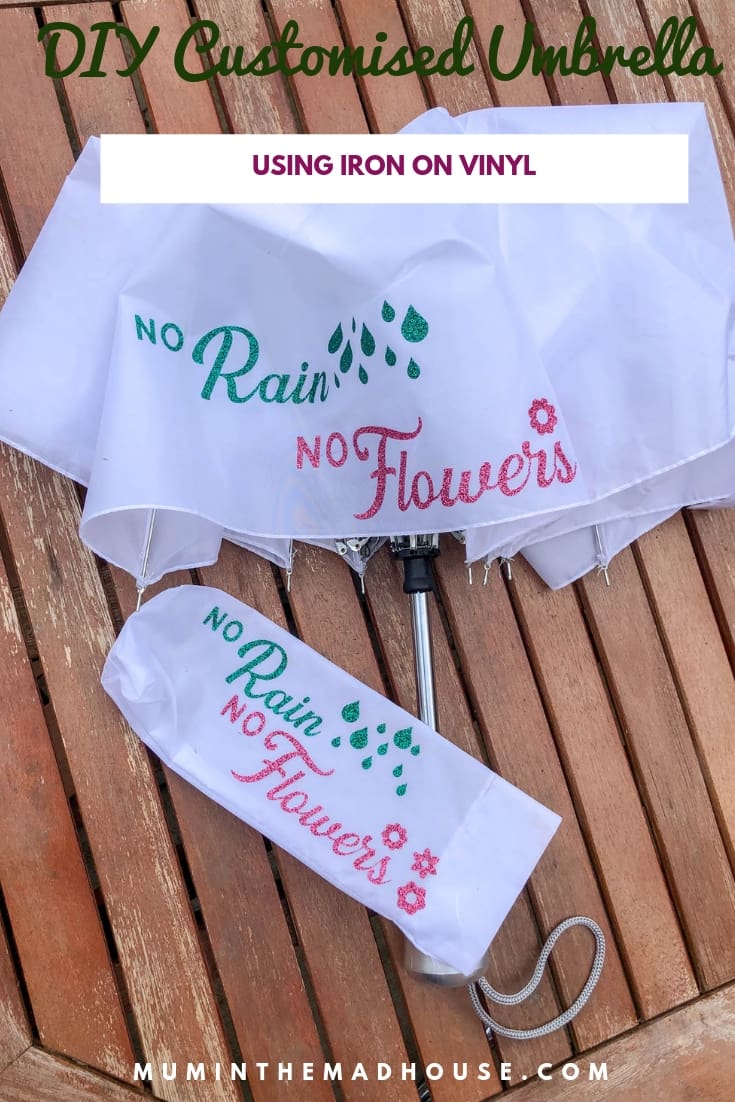
This Iron on Umbrella DIY is a quick project and a great way to put a happy slant on a rainy day. I have always been a fan of personalised items and love how easy and quick it is to make my own customised umbrella using
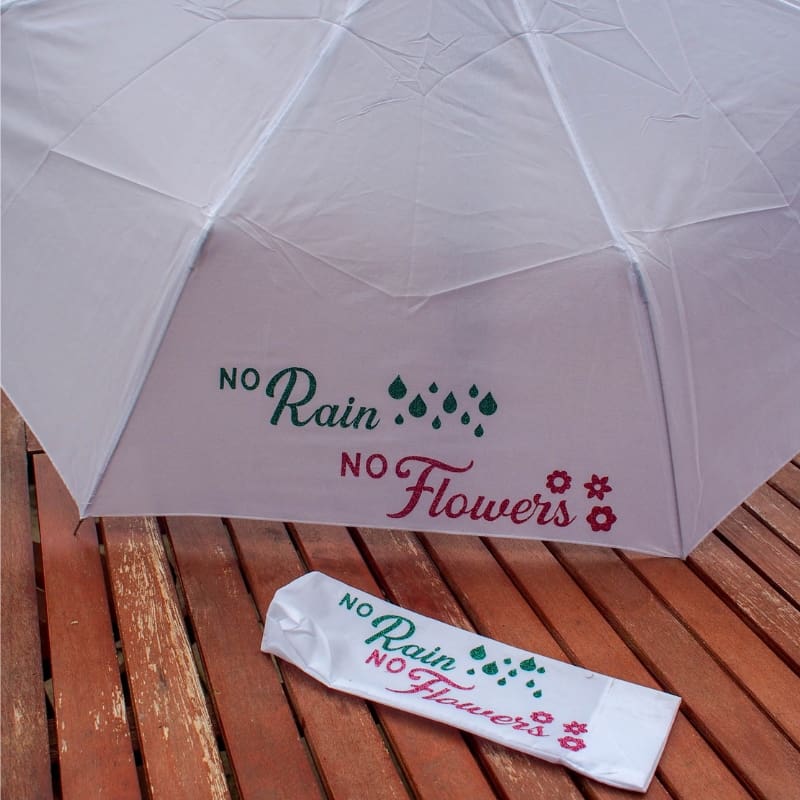
I was recently send a EasyPress 2 to review and I really wanted to put it through its paces, so I thought that using glitter iron on and an umbrella would be a good test.
I have previously used Glitter iron on before and I am not going to lie I have found getting the adherence right has been hard, well the EasyPress 2 makes iron on a really simple and permanent measure.
Materials:
This post contains affiliate links. If you make a purchase after clicking one of these links, I will make a small commission (hopefully enough to keep me in tea all year) – at no extra cost to you! This allows me to keep creating and sharing free tutorials for you to try. Thank you!
- Glitter Iron on – I used green and pink (UK Link/US Link)
- Plain Umbrella (UK Link/US Link)
- Cricut EasyPress 2 (UK Link/US Link)
- Cricut Maker (UK Link/US Link)


How to make a DIY Customised Umbrella
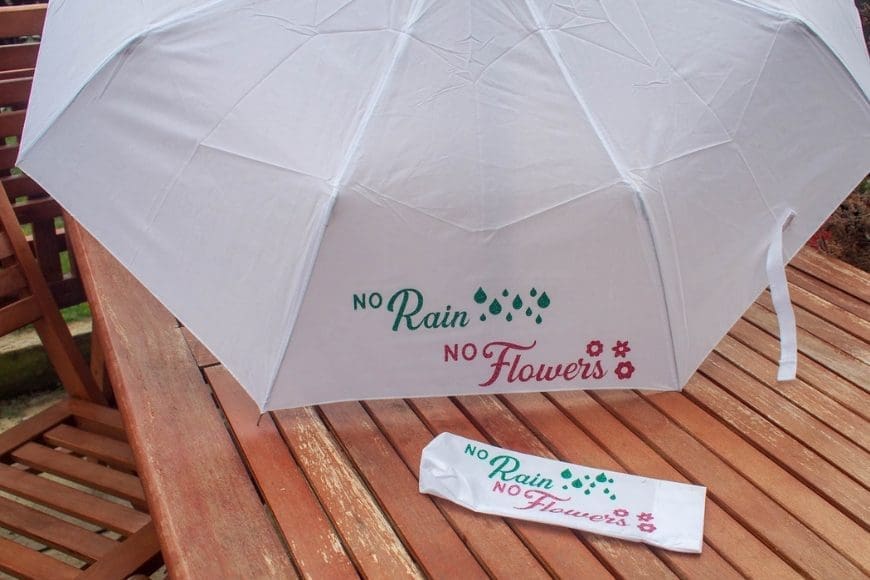
I created my design using design studio. I used specific fonts that I had previously purchased from Creative Market – a duo called Greatly. I really love the combination and it cuts really well. I use it a lot.
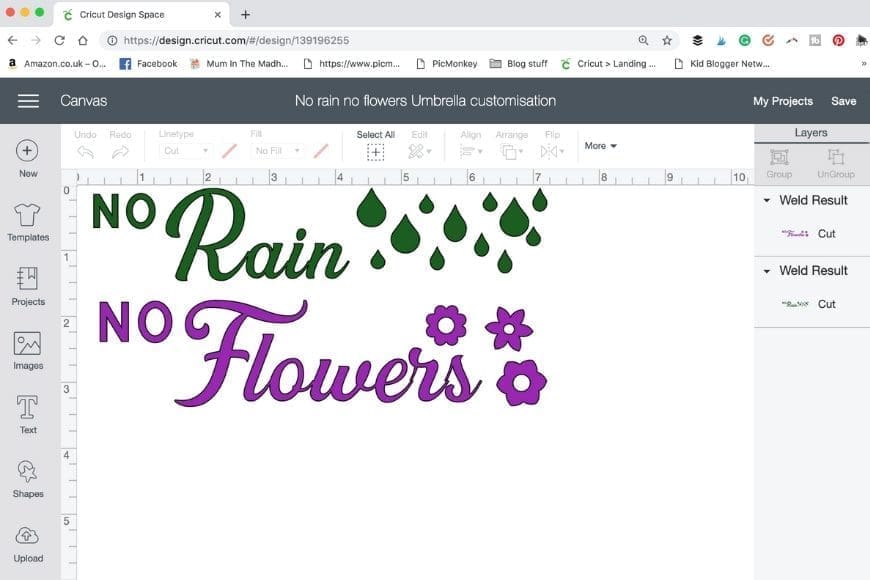
When using a cursive font, I often change the spacing and then make sure I weld the text, so that it prints out in one. I cut and then weeded the vinyl and yes I made sure that I mirrored the cut for both mats.

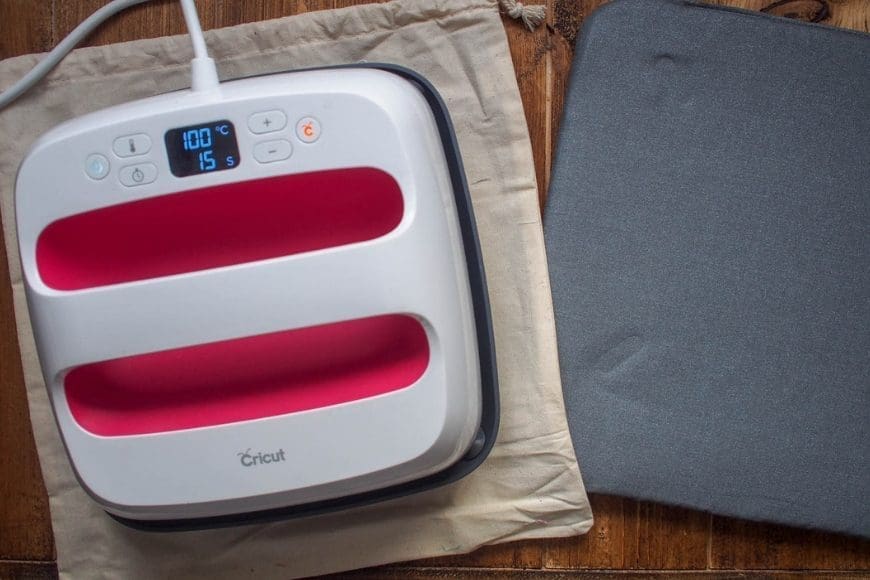
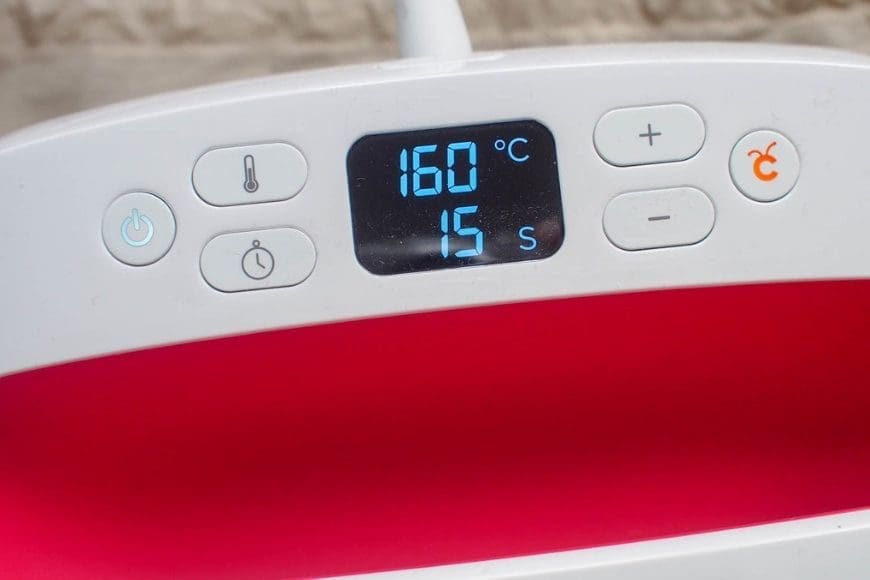
Then it was time to use the EasyPress 2 and I have to say that it was really simple and I am a convert from an iron. There is even an interactive guide to help you choose what temperature to use and how long to press for. It also advised that I used fabric between the umbrella and glitter iron on.
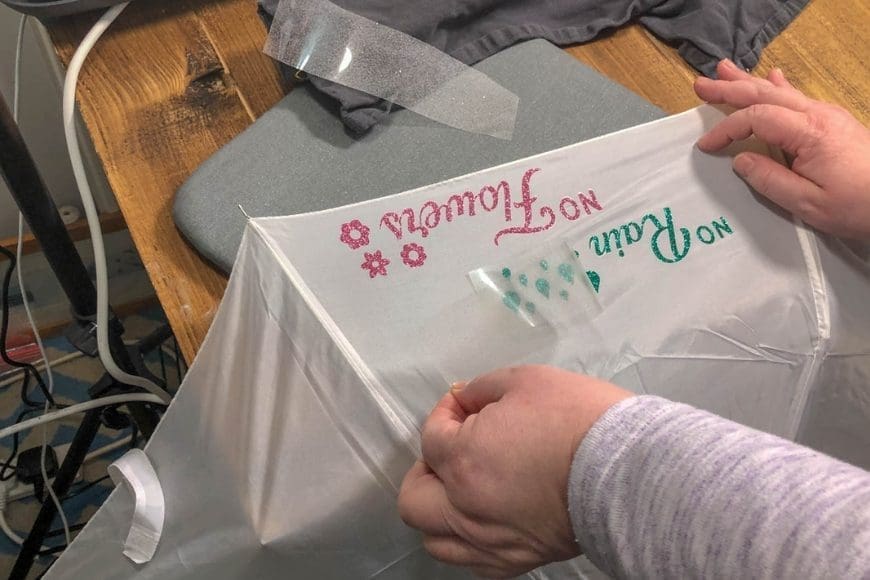
Then it was time to remove the protective coating – for glitter vinyl you remove it warm.
I was really impressed and I even tested the umbrella and the iron on with a watering can to see if it stayed on and yep it did.
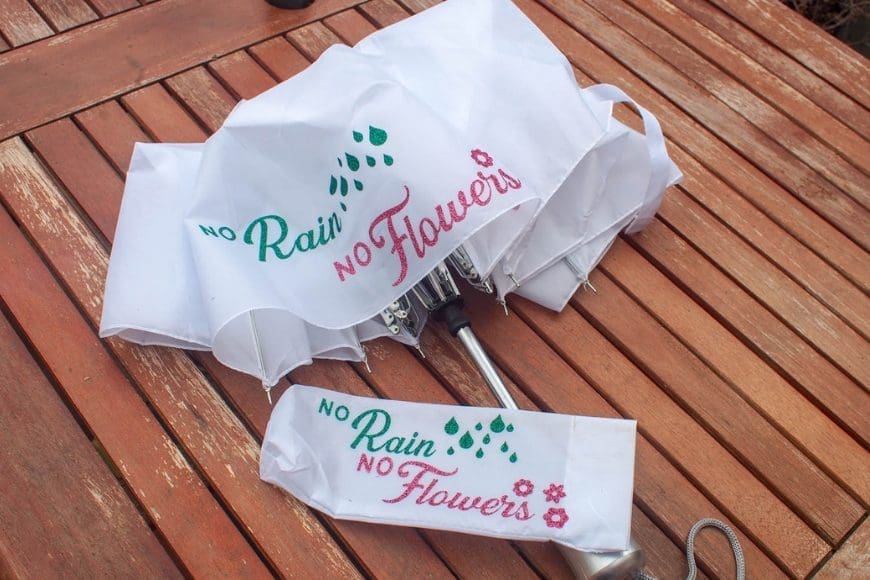
I also used the design on the cover, although I did make it slightly smaller to fit.
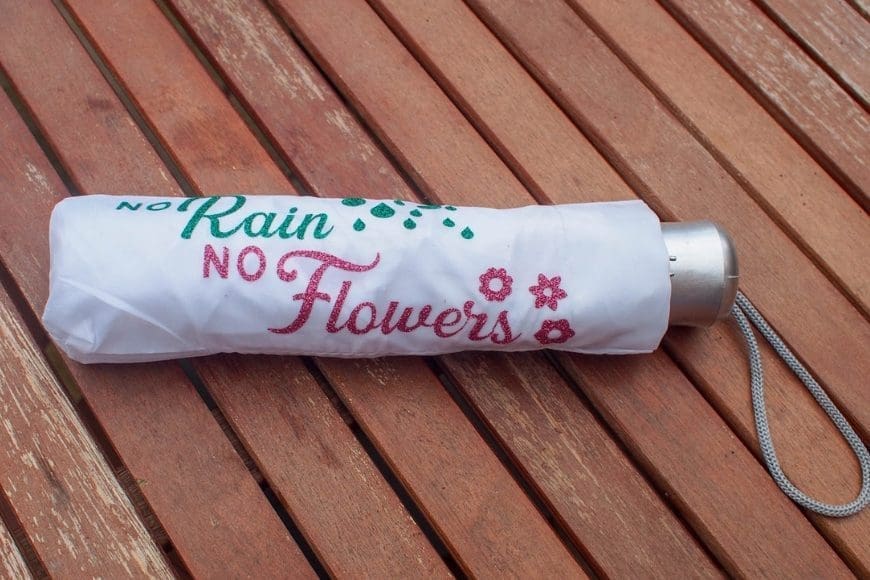
I am delighted at how it turned out and also at how quick it was – around 15 minutes from start to finish.
So what do I think about the EasyPress 2 and what is the difference from the first one?
Well, I LOVE the EasyPress and I have been using for all my quilting too. Yep, I am a quilter and often still find myself ironing rather than pressing, but no longer. I have been doing some foundation paper piecing and am a total convert and have pressed each and every piece with the EasyPress. I am so
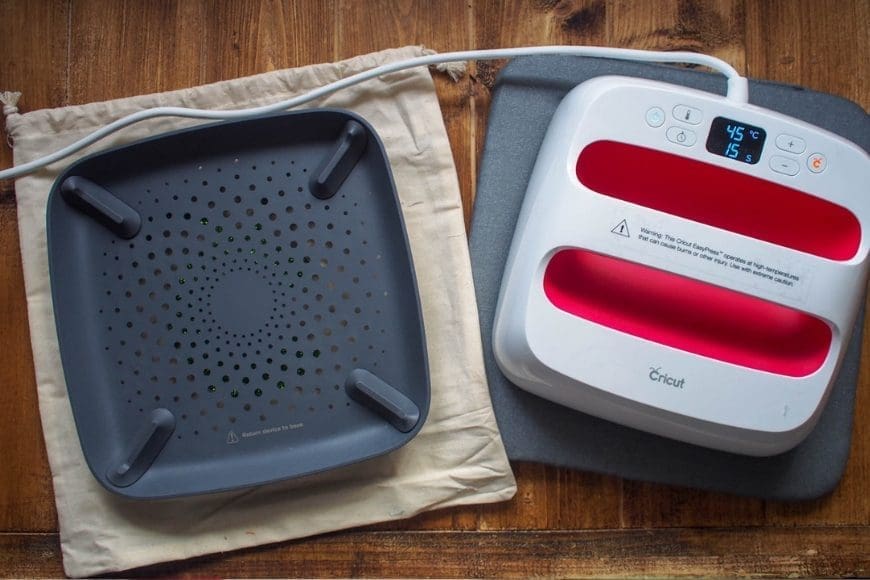
- The EasyPress 2 comes in three different sizes – 6×7, 9×9, and 12×10.
- The EasyPress 2 has a max temp of 200 degrees centigrade compared to the original’s max temperature of 175.
- It heats up really fast – around 2 minutes for the size I have (medium).
- It is so simple to use with a button for temperature and countdown timer.
- The plate has an even heat
distrubution all over with no hot spots.
The EasyPress 2 has very quickly become a craft room must have and I wouldn’t be without it.
Comments are closed.