

Looking for a creative way to reuse your recyclables? These DIY lanterns made from an empty plastic bottle are a fun and eco-friendly project for kids and families. Instead of tissue paper, we’ll be using permanent markers like Sharpies (or acrylic paint) to decorate the bottles. It’s quick, colourful, and a great way to turn what might otherwise be trash into beautiful lanterns.

This DIY garden lantern was inspired by a couple of garden ornaments that I had seen including these water bottle wind spirals and this plastic bottle wind spinner.
What you need to make your own plastic bottle lantern
This post contains affiliate links. If you make any purchases after clicking one of these links, I will make a small commission (hopefully enough to keep me in tea all year) – at no extra cost to you! This allows me to keep creating and sharing free tutorials and content for you. Thank you!
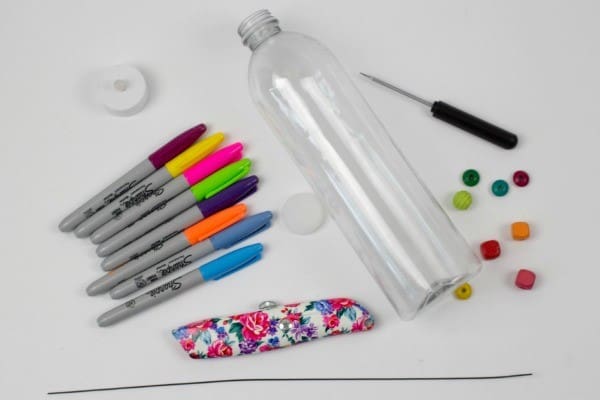
- 1 plastic bottle
- Permanent markers (Sharpies or similar) in different colours or acrylic paint
- Optional: spray paint to coat the inside for an opaque base
- Ribbon or yarn for a handle
- Battery-operated tealights or solar garden lights (never use a real candle inside plastic)
- Hole punch or craft knife (adults only)
No products found.
How to make a DIY Garden lantern
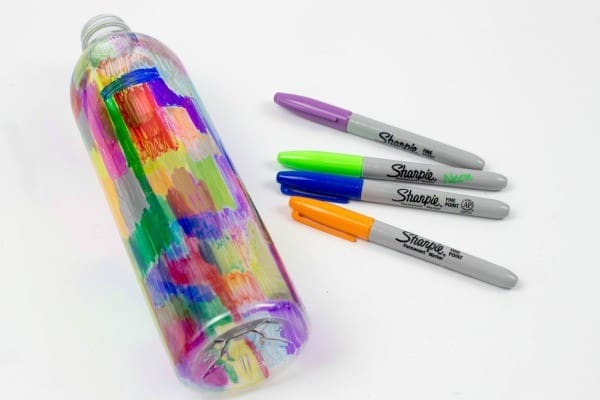
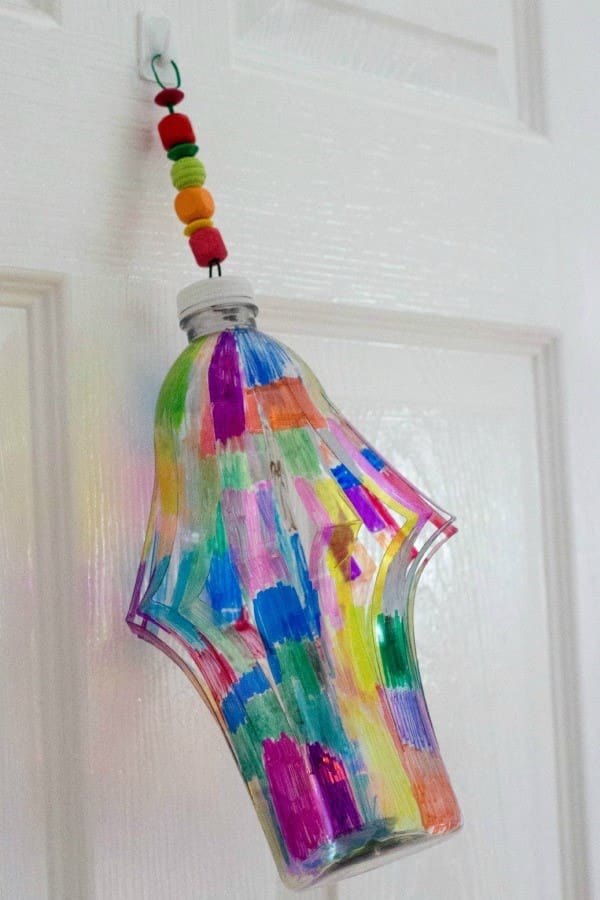
Wash and dry your bottle. Then let the kids loose with the pens. There is no right or wrong way to do this. The boys went mad and used every permanent marker that I had. You could, however, choose a smaller number or even add a pattern to your bottle such as stripes, stars, flowers, or doodles. For younger kids, let them colour the whole surface. Alternatively, coat the outside in acrylic paint for bold, bright coverage. Metallic or glow-in-the-dark paints make especially fun lanterns.
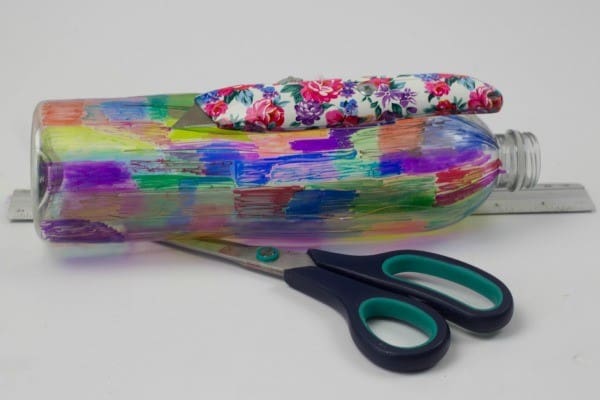
Cut lines down the bottle using a craft knife to start, and then my scissors. My lines are not all the same thickness, but you could measure them if you wanted too.
Once you have cut the strips, then you need to crease them. You do this by pushing the top of the bottle toward the bottom. This will cause the slits to collapse. Hold it in place and fold each slit in the centre, creating a crease.

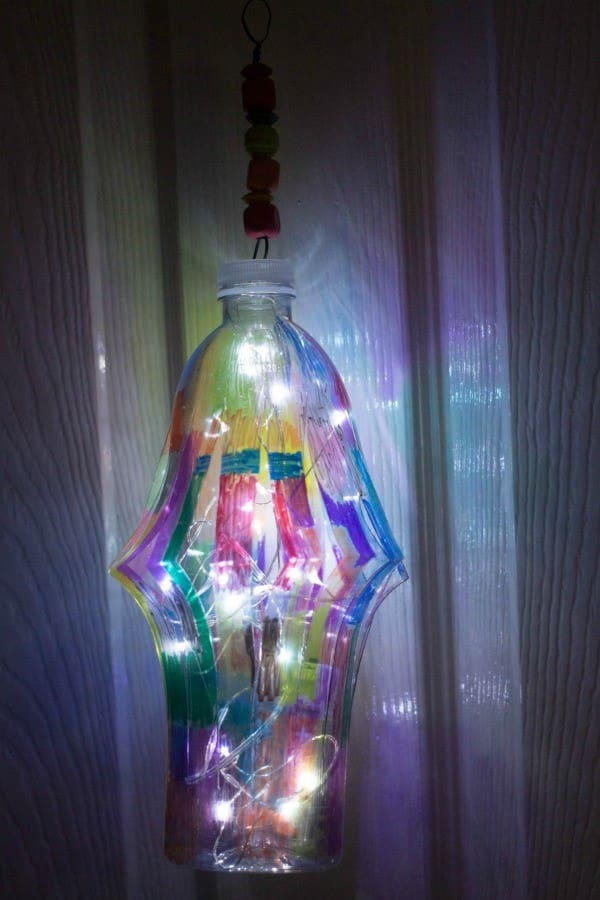
Then using a bradawl or a small screwdriver make two holes in the bottle lid, before taking your wire and threading it through to create a loop.
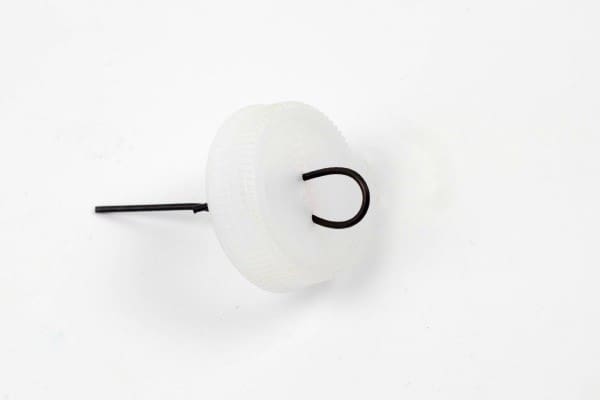
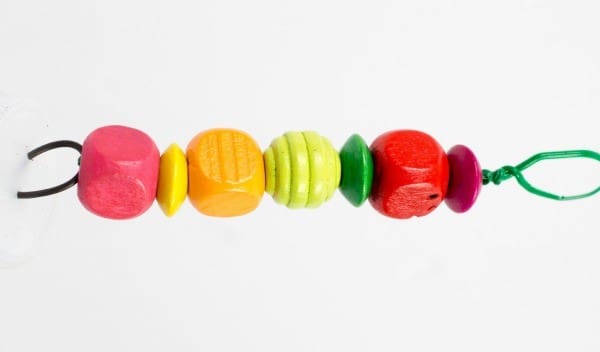
Then I threaded some beads onto some more wire and twisted that on to the cap.
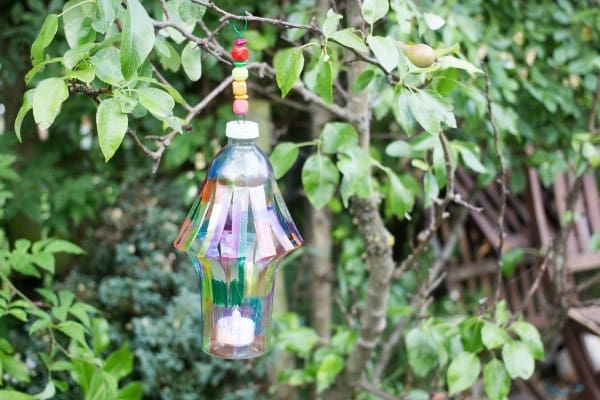
You can easily add your light by pushing the top of the bottle down towards the bottom and slipping it in. Alternatlve to srong lights you could pop in an LED tealight or battery-powered candle. A mini solar garden light works perfectly.
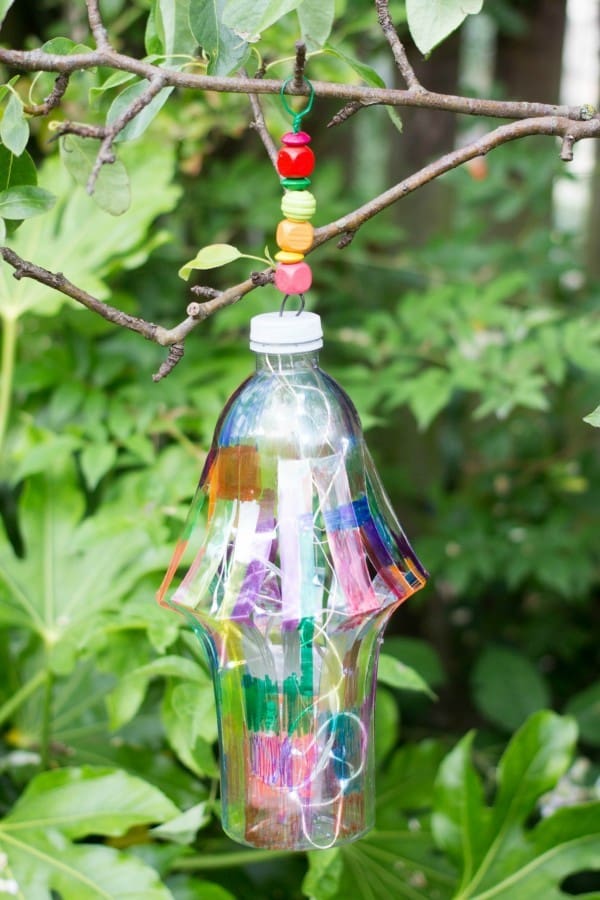
It looks wonderful in the garden during the day and spins as the wind catches it.
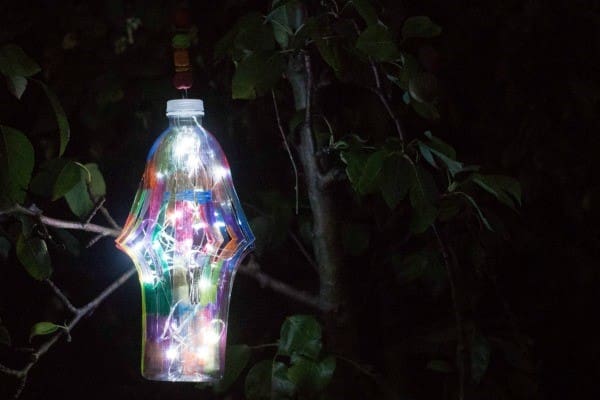
However, it really comes into its own as the night starts to fall. The lantern just glows with beautiful colours and I can not capture its beauty in any of the photographs I took.
It really is beautiful.
And it cost next to nothing.

I now want to fill my garden with them!
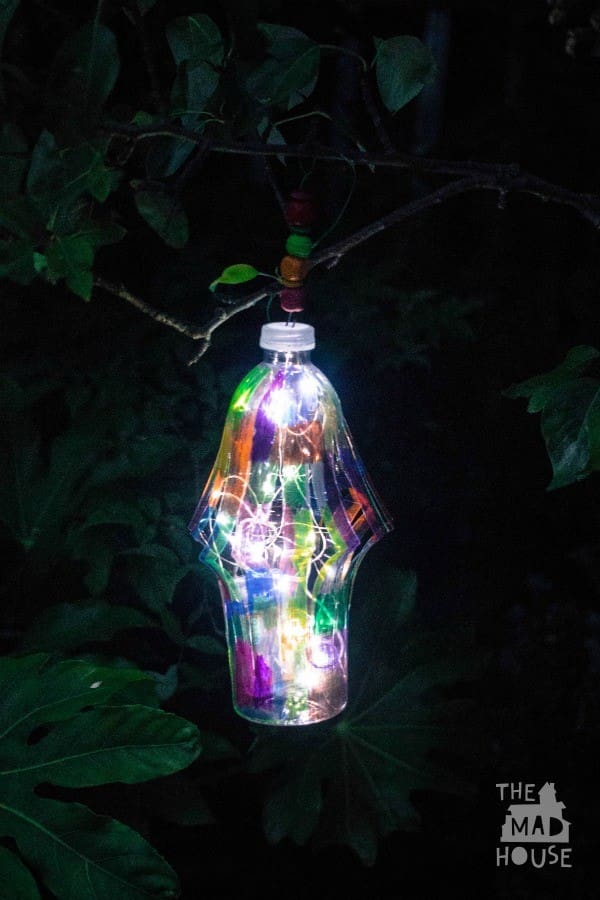
The boys had great fun making these and we are going to make a lot more so that we can see them all lit up in the apple tree.

Check out our other Plastic Bottle Crafts
- DIY Recycled Plastic Bottle Poppy Craft
- How to make a bubble snake maker
- Drink Bottle Skittles
- Plastic Bottle Wind Spiral Mobile
Seasonal Inspiration
- Christmas Lanterns – Draw holly, snowflakes, or stars with red, green, and gold markers.
- Chinese Lantern-Inspired Designs – Use bold red and gold paint or marker patterns for Lunar New Year.
Comments are closed.