

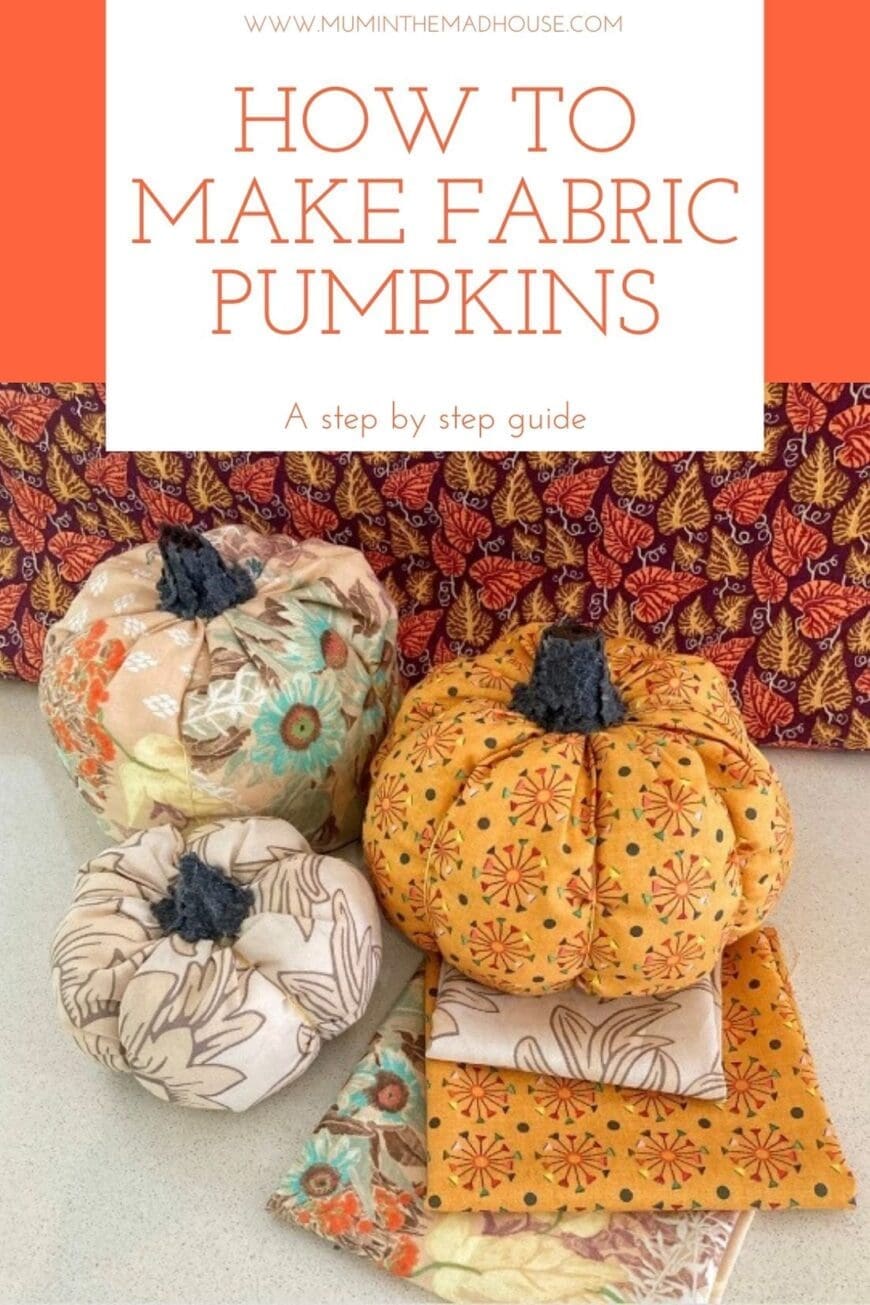
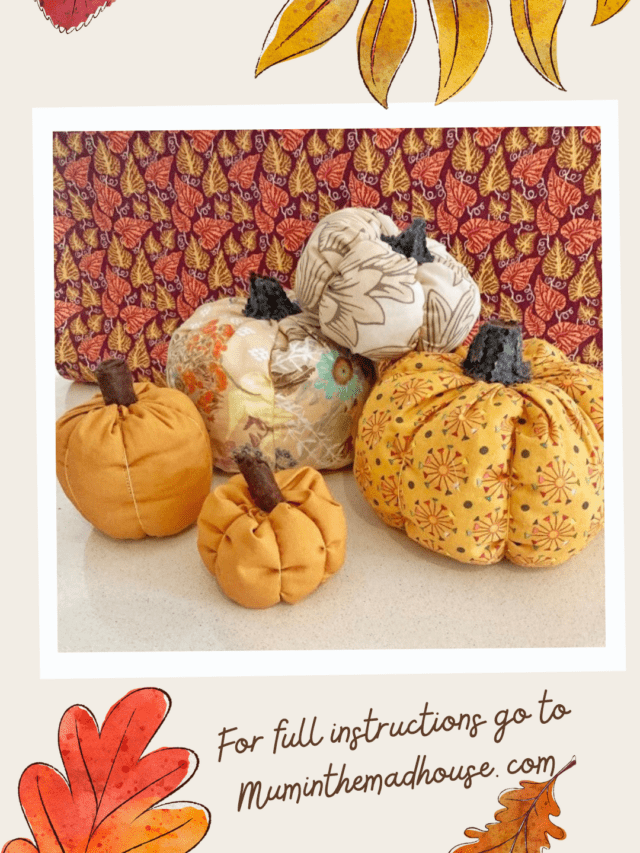
I have asked my friend Mel from Sugar Bowl Crafts to share with us how to make her easy DIY fabric pumpkins. Seasonal decorating is becoming more and more popular in the UK and this simple craft activity of stuffed fabric pumpkins is a fun Autumn craft. What I love about this is that you can adapt the colours to coordinate with your home and they are super simple and fun to make.
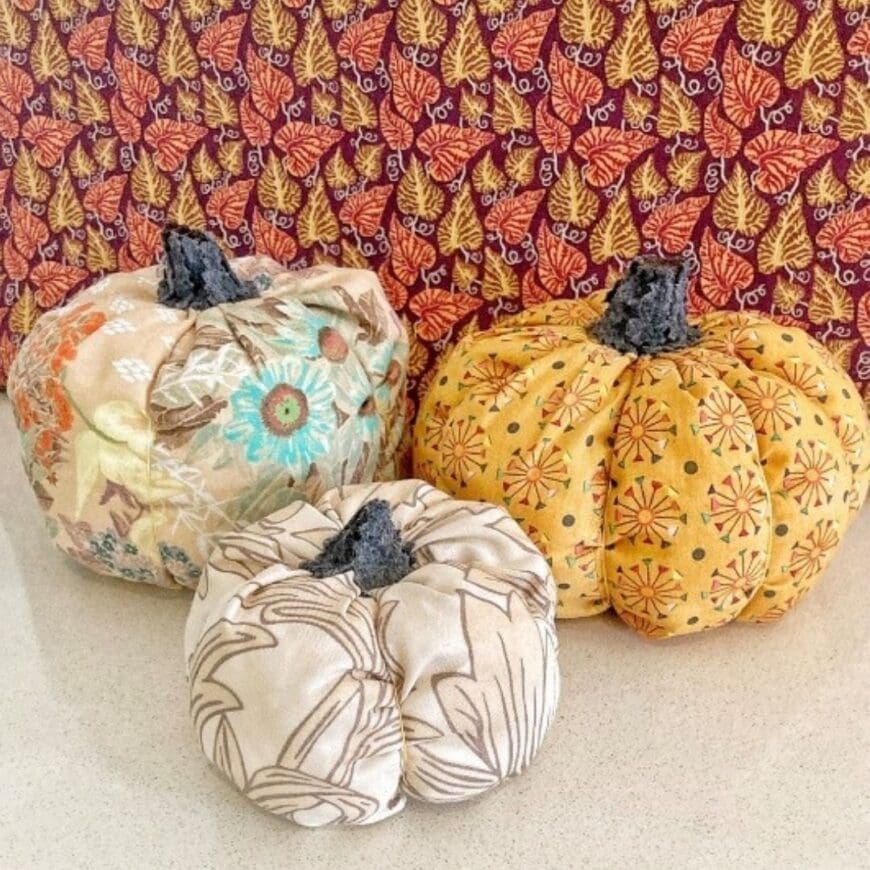
Simple seasonal crafting fun! Making pumpkins can be fun for the whole family. I remember making fabric pumpkins with my mum when I was little and I love that I can now make them again with my little one. Once you learn the basics you can make pumpkins in all shapes and sizes. You’ll find this is a great scrap buster too!
Gather the materials and equipment you will need to create the Stuffed Fabric Pumpkins:
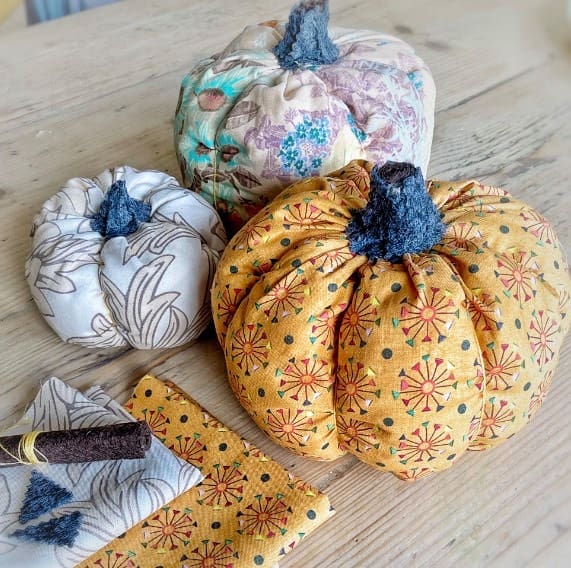
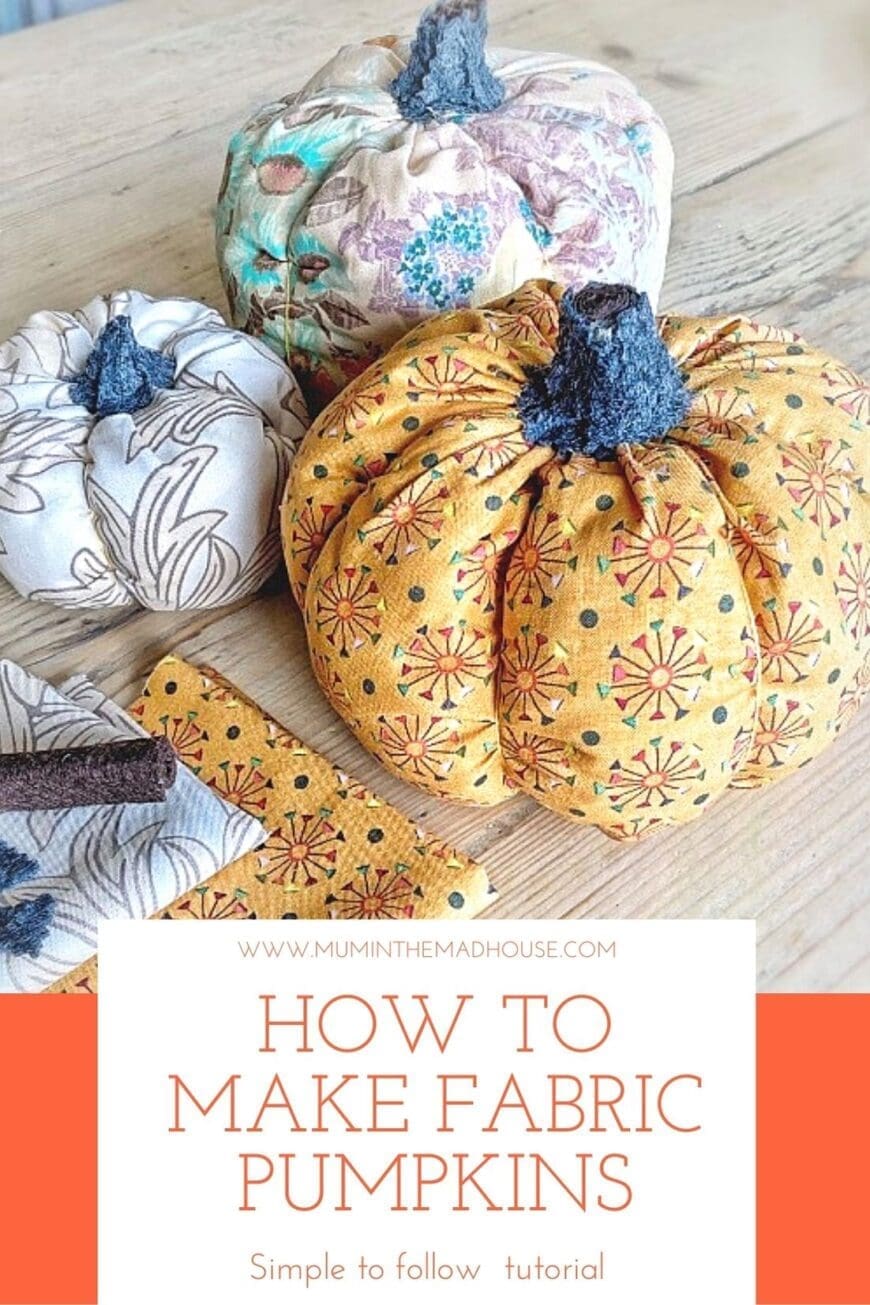
- Fabric – Grab a pumpkin trio pack direct from Sugar Bowl Crafts with fabric, felt, stuffing and thead to make three pumpkins.
- Felt
- Embroidery Thread
- Stuffing (you can use a bag of stuff or even fabric scraps to stuff)
- Scissors (pinking shears optional)
- Pins & Needle
- Ruler
- Chalk or Removable Fabric Pen
- Glue Gun or Fabric Glue
Material Sizes
- Large Pumpkin – 25cm x 55cm fabric piece
- Medium Pumpkin – 20cm x 50cm fabric piece
- Small Pumpkin – 20cm x 40cm fabric piece
- Stem felt – 50cm x 50cm (you could use more if you want to make longer stems
Tip – If you cut your fabric on the bias that you’ll get more of a stretch (The bias of the fabric is 45 degree against grainline)
How to Make Fabric Pumpkins
You start by sewing the two shorter ends of your fabric together to form a cylinder. I like to use my sewing machine for this, but you could sew by hand just as easily. Fold the fabric in half – with right sides together (this means you should be looking at the ‘inside’ of the pumpkin). Sew together using a half-inch seam allowance. I’ve used a wider allowance to make it easier for beginner sewers, but you can choose any allowance that works for you just keep it consistent.
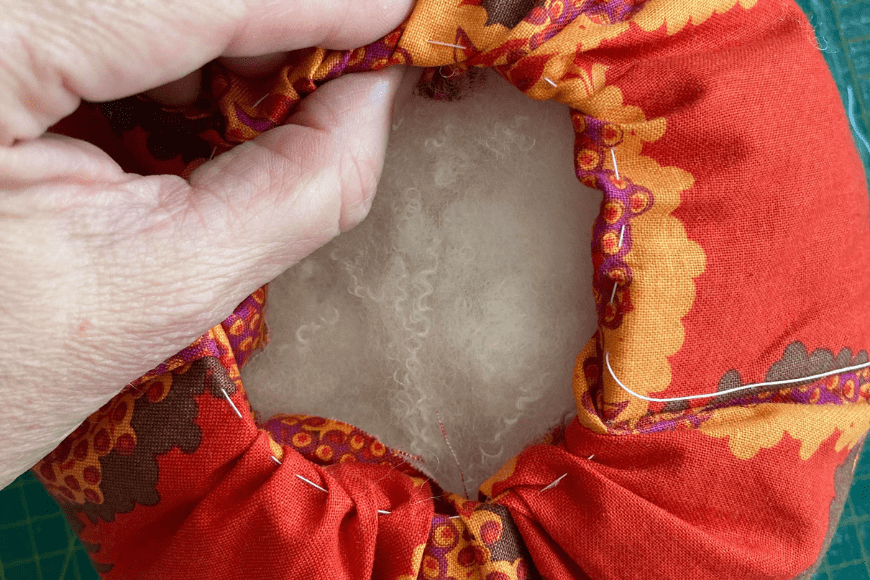
Sew the bottom of the pumpkin. I like to hand sew this part but you could use your machine just as easily. I knot one end and sew a running stitch across the bottom. I sew 1” away from the edge. Then pull tight to gather the end. Knott again and turn inside out. If there is a hole still visible you can go back and stitch it closed.
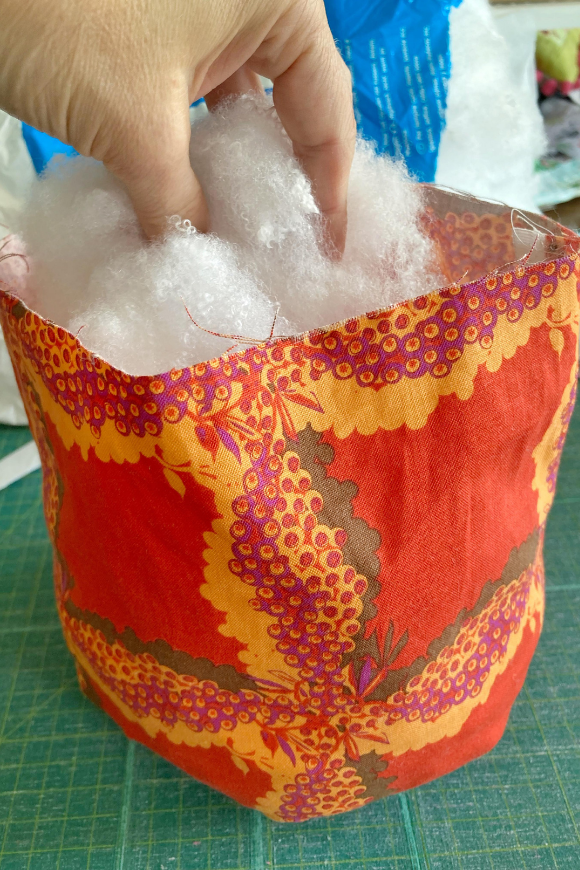
Add your stuffing. This can be toy stuffing or I find scraps of fabric make excellent wadding too. How you stuff the pumpkin will determine the shape, so spend a couple of minutes added and subtracting stuffing to check of size and shape. Personally, I liked a little less filling as the top closes nicely and you get really nice creases on the sides which makes for a more realistic pumpkin shape.
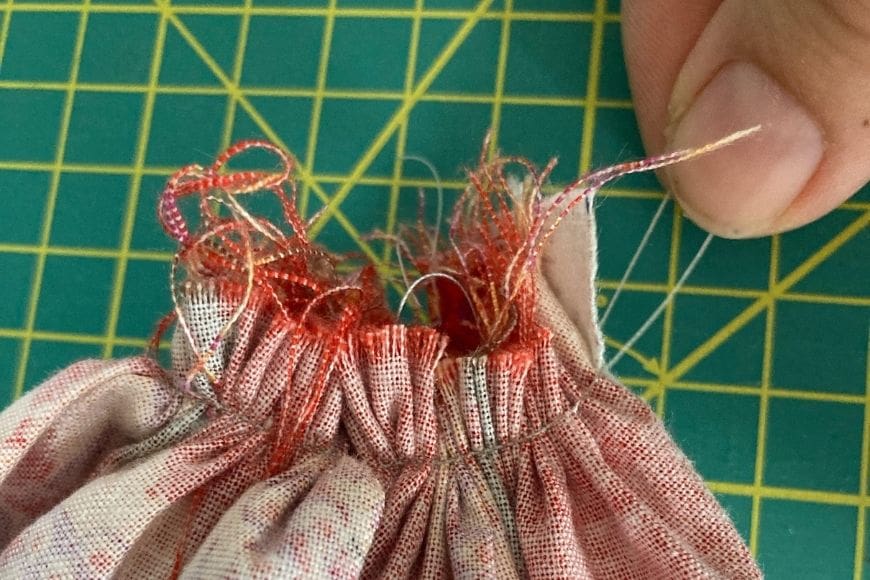
For smaller pumpkins, add another running stitch to the top of the pumpkin an inch away from the selvedge (the edge of the fabric).
This time you want to pull the gathers leaving the raw edges visible at the top of the pumpkin. This forms the base of the stalk. When the hole is closed, tightly knot your thread and remove loose ends.
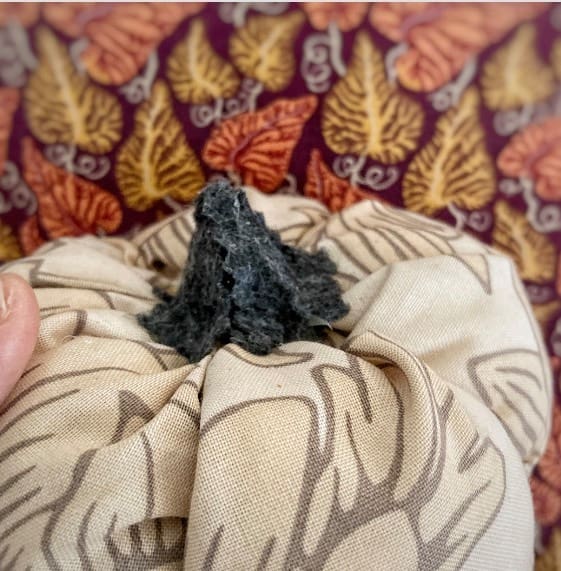
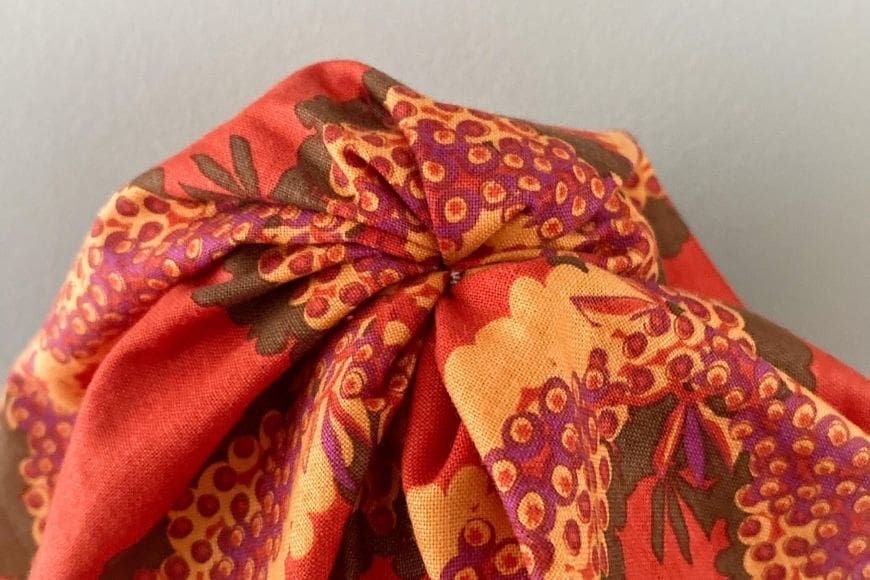
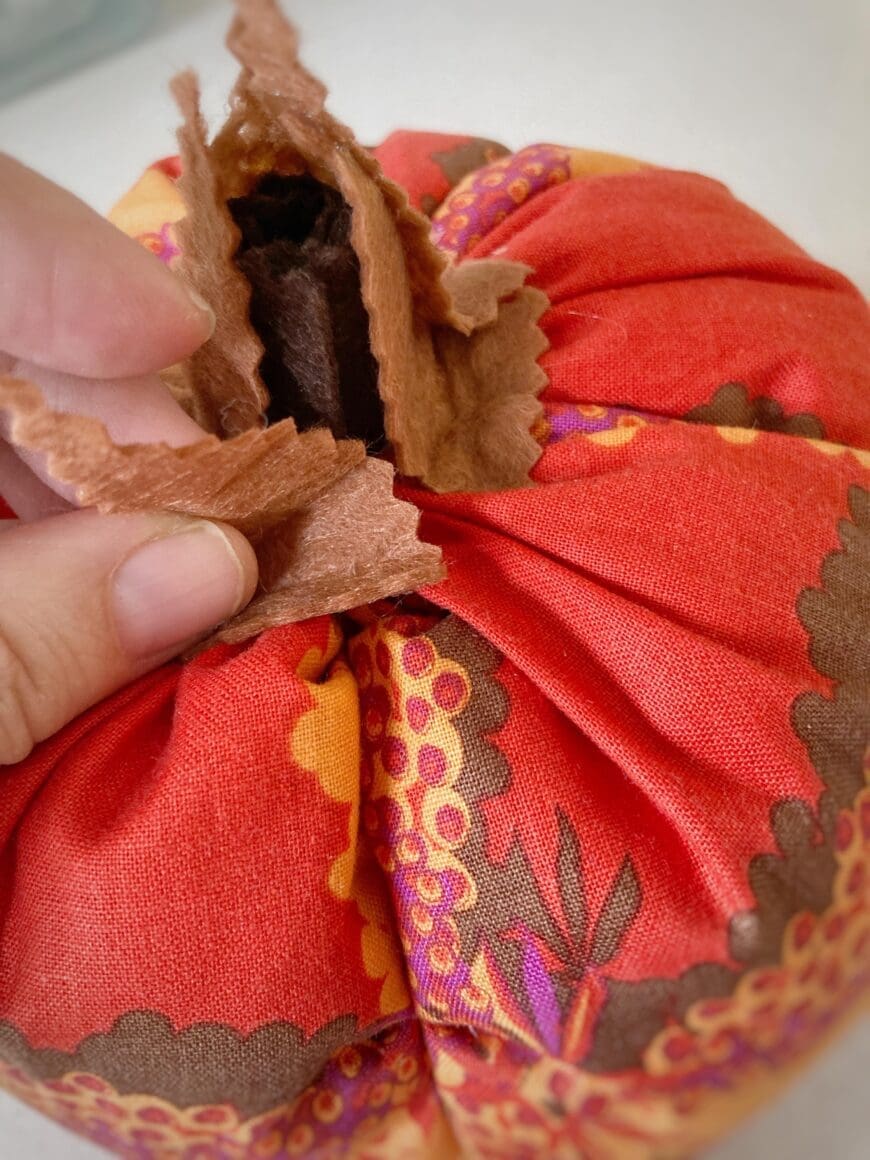
For larger pumpkins, take a piece of felt (6cm x 20cm) and roll tightly to form a stiff ‘stick’, glue so that it doesn’t unravel (you can always use glue to stop it unravelling). Place the felt stick into the top hole, push the raw edges of the pumpkin fabric into the pumpkin so that they are hidden and pull the gathers around the stick to secure it and close the gap.
Knot securely. This forms the structure of the stalk. There shouldn’t be any raw edge or knots visible.
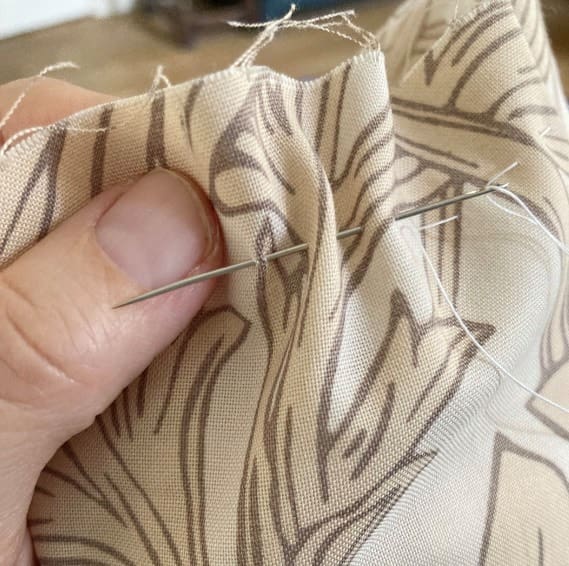
Use your thicker thread, I use quilting or embroidery thread to make and define the creases in your pumpkin. First squish the pumpkin into the desired shape. Then knot the thread by the stalk and follow a natural gather in the fabric to the base.
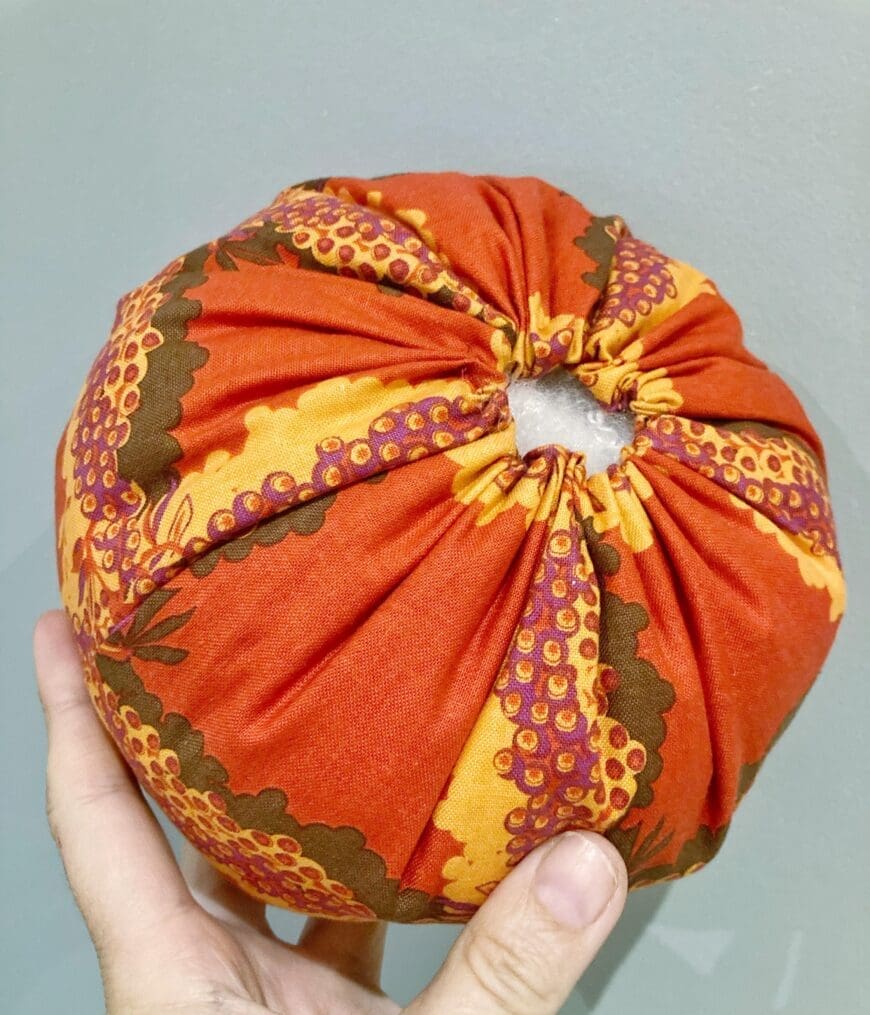
I pull the thread in through the hole at the bottom and come up in the next place I want the crease to form. I then take the thread back up to the stalk and knot again at the stalk. So each strand of thread I want to start and finish at the stalk. I’ve learned to only do one pumpkin ‘segment’ at a time as the thread tends to snap with the tension and doesn’t hold its shape as well. Carry out this process 6 times.
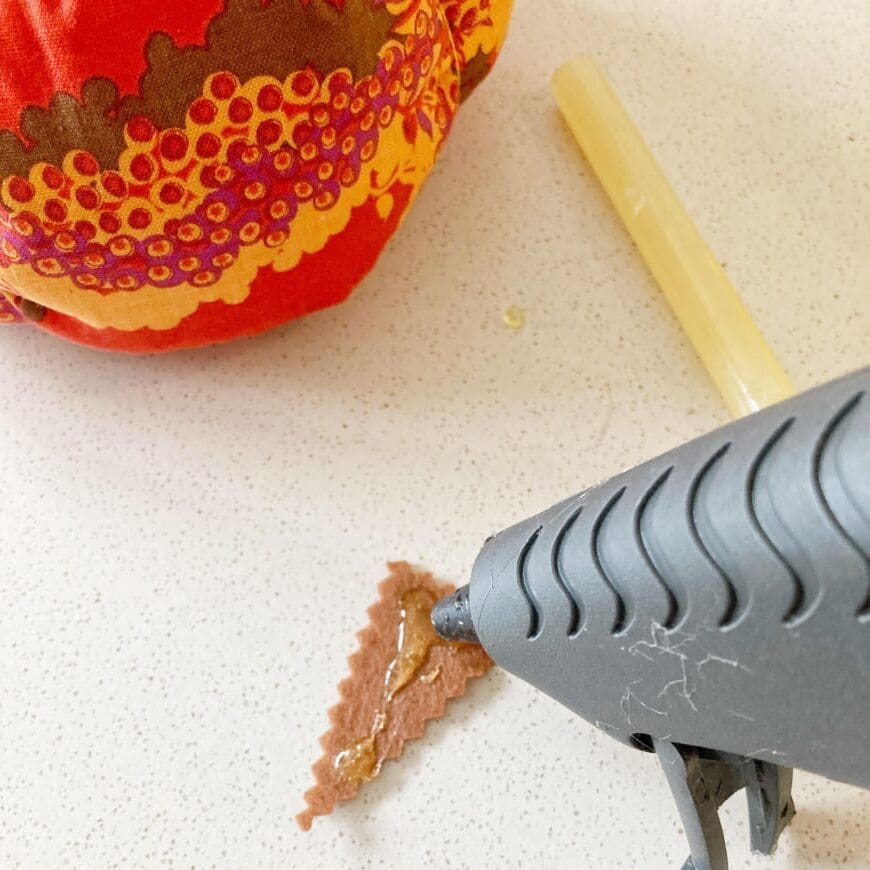
Step six. Cut out a minimum 6 triangles from felt that will form the stalk. I use pinking shears to create a more organic look but straight edges work fine too. I cut the triangles very roughly 1 inch tall, but you can create much bigger stalks if you like them. Now glue the triangles into place. The base of the triangle should cover the base of your fabric stalk, hiding the join of fabric to the stalk. Add as many triangles as you need to cover the fabric stalk and make sure the points of the triangles meet.
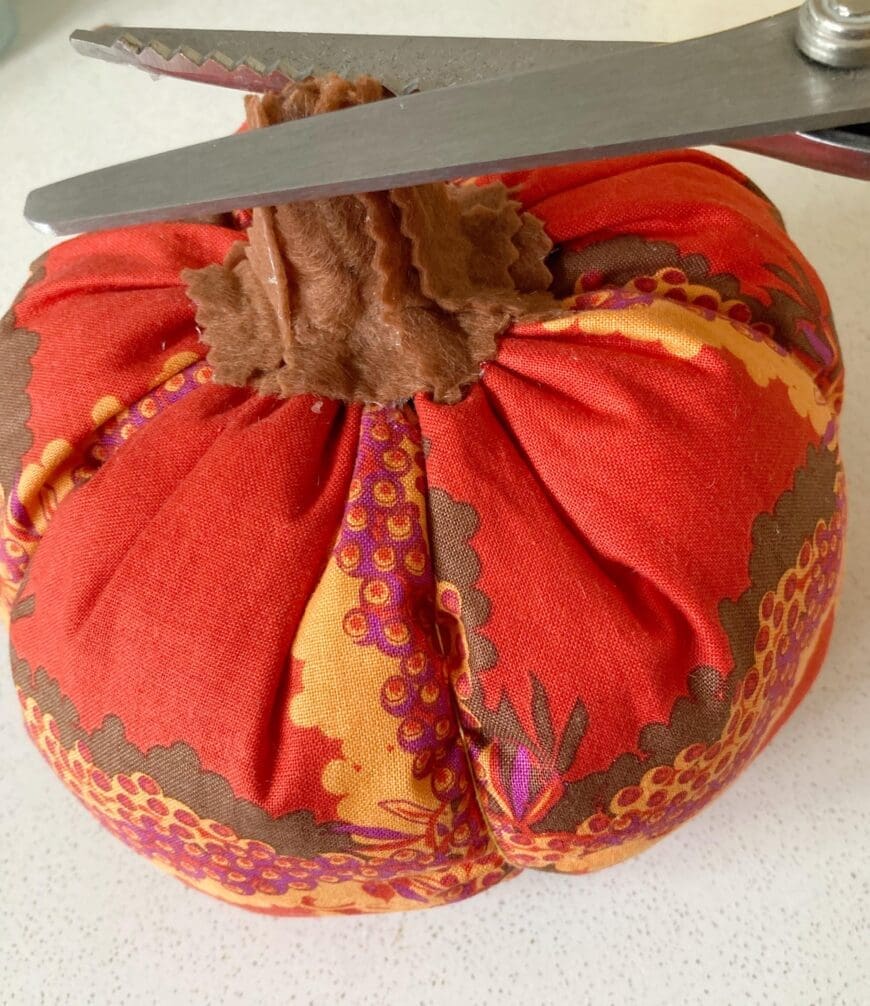
With practice, you can twist the points to make them look more natural. Trim the top of the stalk if you like.
I have also seen a wine cork wrapped in string used to make the stalk too and cinnamon sticks.
How to Make Fabric Pumpkins
Ingredients
- Fabric – Grab a pumpkin trio pack direct from Sugar Bowl Crafts with fabric, felt, stuffing and thead to make three pumpkins
- Felt
- Stuffing
Instructions
- Fold the fabric in half – with right sides together (this means you should be looking at the ‘inside’ of the pumpkin). Sew together using a half-inch seam allowance.
- Sew the bottom of the pumpkin. Knot one end of your thread and sew a running stitch across the bottom 1” away from the edge. Then pull tight to gather the end. Knott again and turn inside out. If there is a hole still visible you can go back and stitch it closed.
- Add your stuffing. This can be toy stuffing or scraps of fabric .
- For smaller pumpkins, add another running stitch to the top of the pumpkin an inch away from the selvedge (the edge of the fabric).
- Then pull the gathers leaving the raw edges visible at the top of the pumpkin. This forms the base of the stalk. When the hole is closed, tightly knot your thread and remove loose ends.
- For larger pumpkins, take a piece of felt (6cm x 20cm) and roll tightly to form a stiff ‘stick’, glue so that it doesn’t unravel (you can always use glue to stop it unravelling). Place the felt stick into the top hole, push the raw edges of the pumpkin fabric into the pumpkin so that they are hidden and pull the gathers around the stick to secure it and close the gap.
- Knot securely. This forms the structure of the stalk. There shouldn’t be any raw edge or knots visible.
- Squish the pumpkin into the desired shape. Then knot the embroidery thread by the stalk and follow a natural gather in the fabric to the base.
- Pull the thread in through the hole at the bottom and come up in the next place you want the crease to form. Then take the thread back up to the stalk and knot again at the stalk. Carry out this process 6 times.
- Cut out a minimum 6 triangles from felt that will form the stalk. Pinking shears will create a more organic look but straight edges work fine too. Cut the triangles very roughly 1 inch tall, but you can create much bigger stalks if you like them. Now glue the triangles into place. The base of the triangle should cover the base of your fabric stalk, hiding the join of fabric to the stalk. Add as many triangles as you need to cover the fabric stalk and make sure the points of the triangles meet.
That’s it! Happy Autumn!
If you like this make sure you check out some of our other autumn crafts