

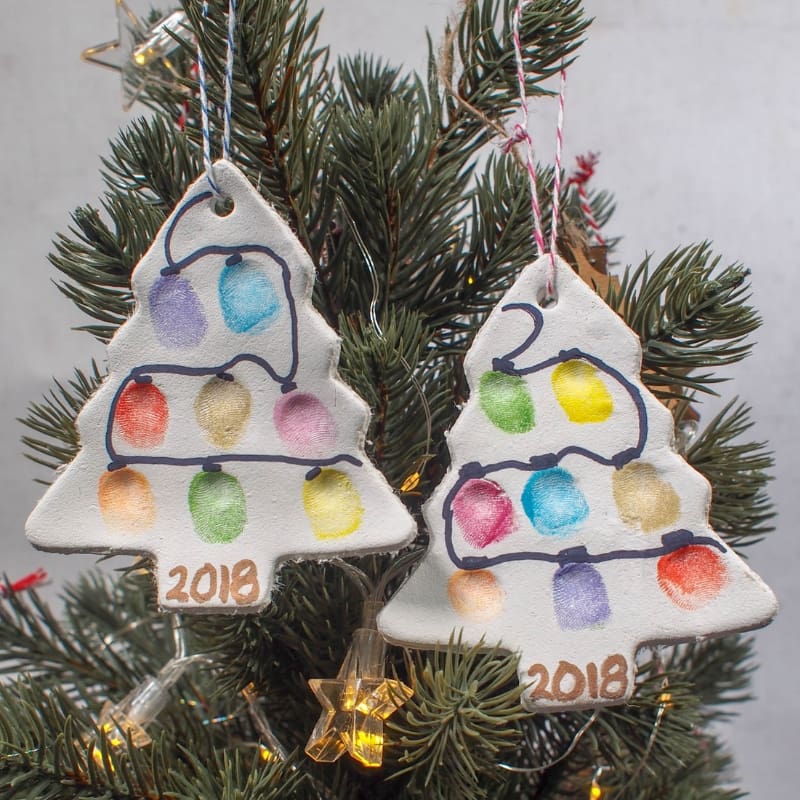
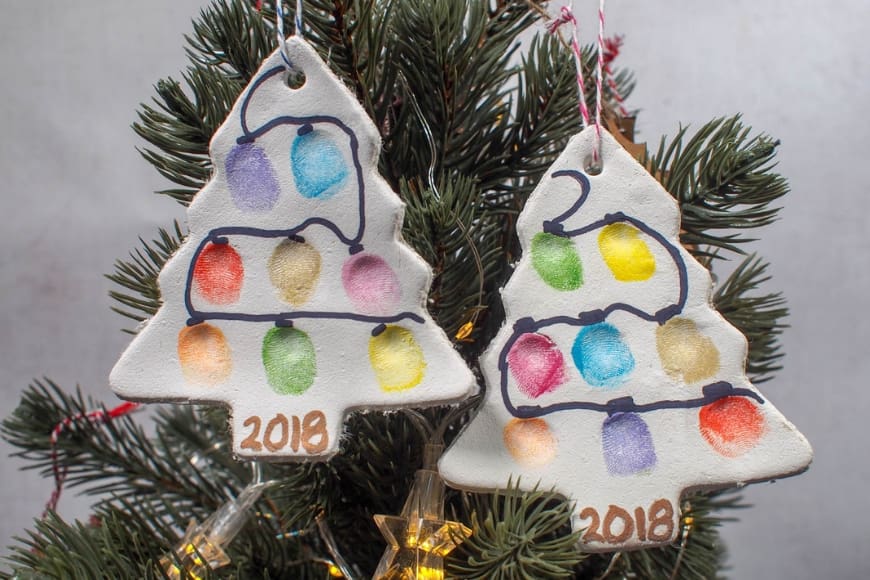
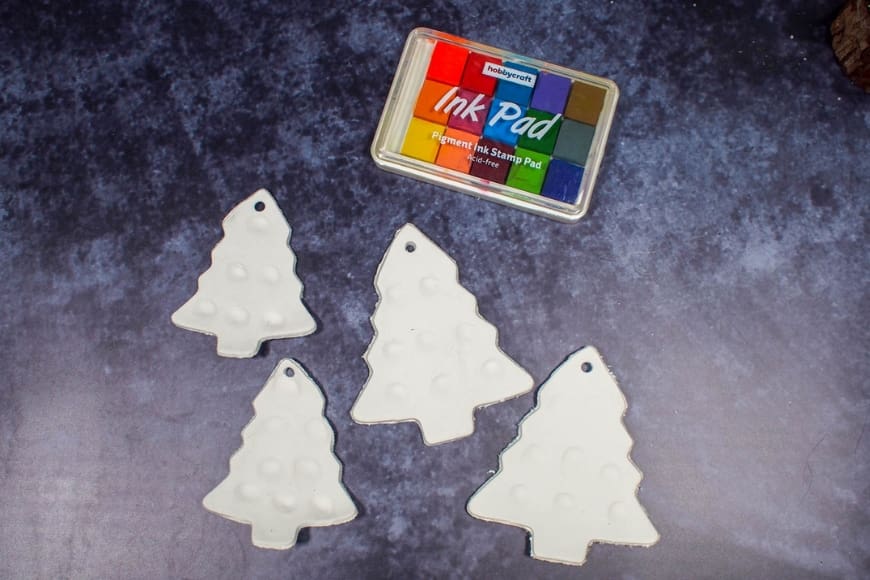
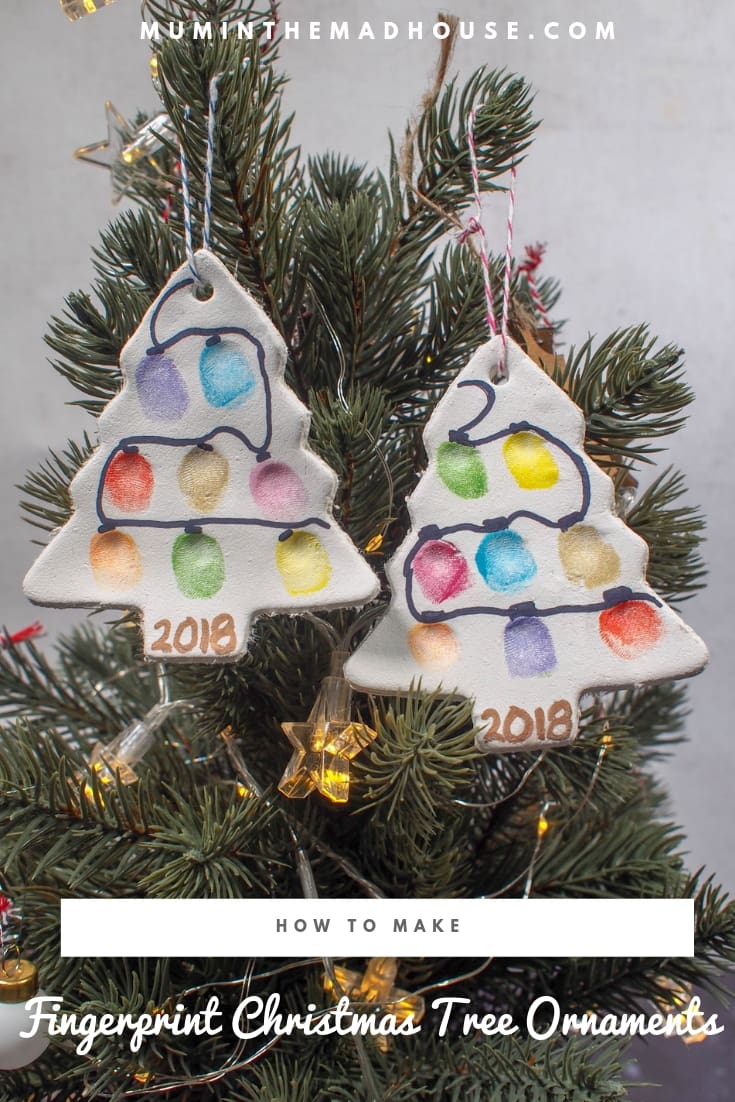
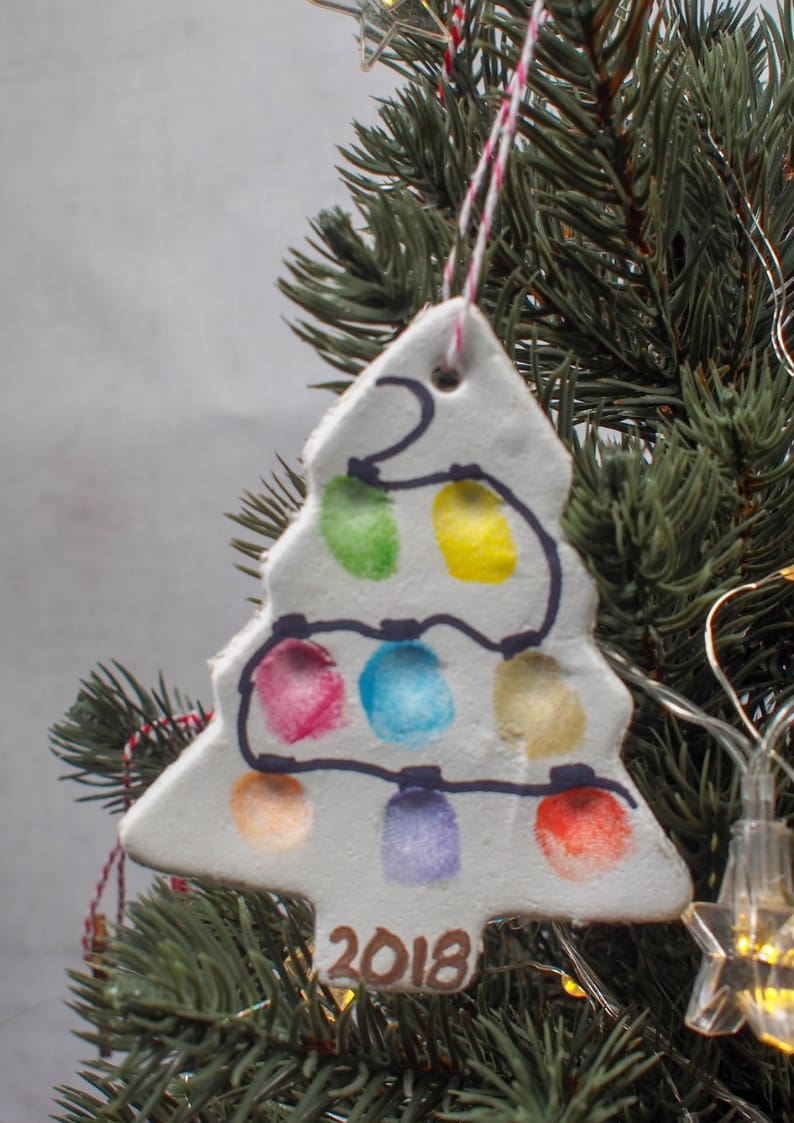
What is not to like about this fingerprint Christmas tree ornament made from air drying clay? Anyone that knows me will tell you I am a big lover of creating Christmas ornaments from air drying clay and that I am also a fan of using both kids and adult fingerprints to create keepsake decorations such as these Fingerprint Christmas Tree Ornaments. In the past, we have made fingerprint snowman ornaments and also heart ornaments. I have seen Fingerprint Christmas Tree Ornaments made with salt dough, but I wanted to use white air drying clay.
Fingerprint Christmas Tree Ornament
I love Christmas Crafts. I adore personalised and handmade ornaments, decorations and keepsakes and these fingerprint air drying clay ornaments look adorable hanging on the Christmas tree. Follow our step by step instructions below to see how to make a fingerprint Christmas tree ornament from air drying clay to bring out year after year!
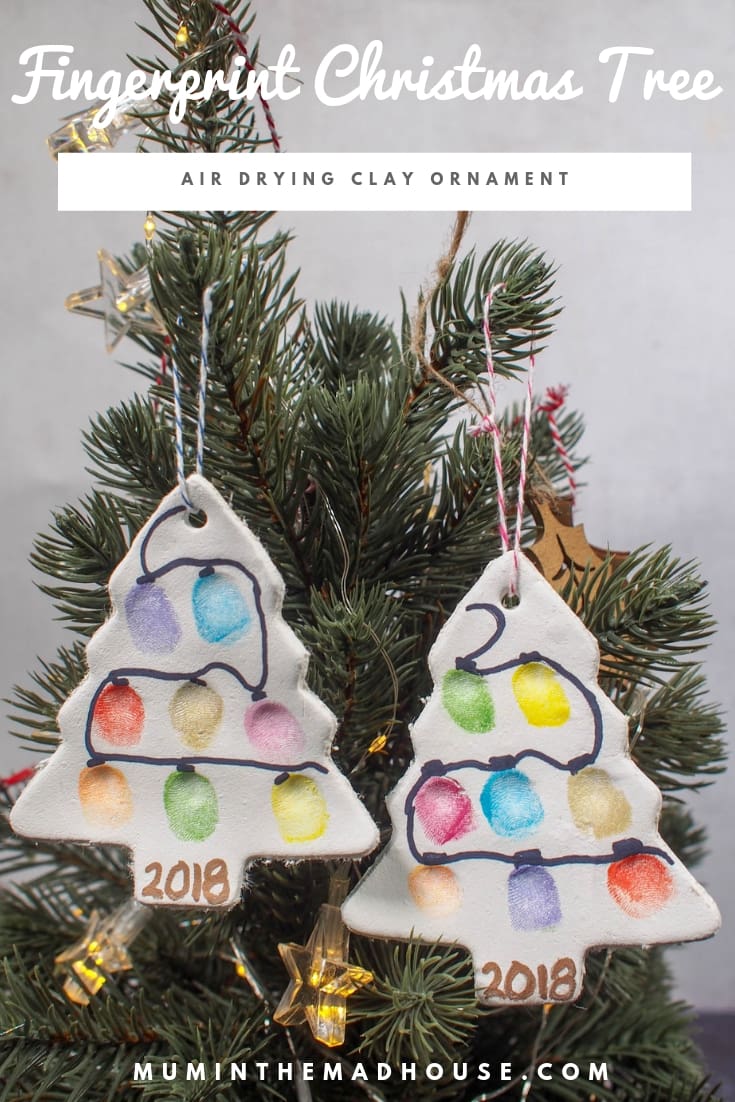
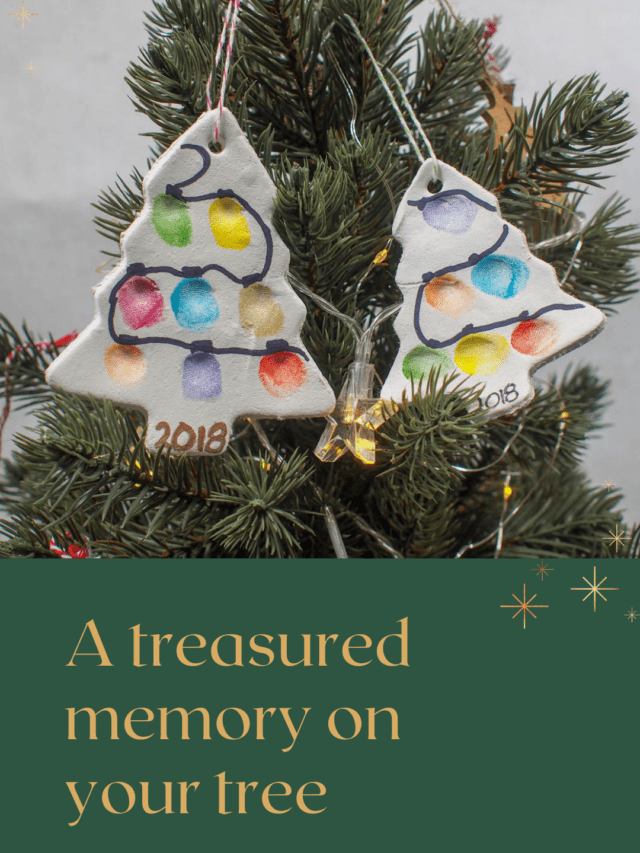
There is something really magical bringing out homemade decorations year after year, so I do try to make sure There is something really magical about bringing out homemade decorations year after year, so I do try to make sure that I always add the year we made something to our ornaments even if it is only with a black sharpie on the rear. These Fingerprint Christmas Tree Ornament make a fabulous keepsake gift from grandparents and godparents. I have come to treasure these sorts of tree decorations now my boys are getting older. These Fingerprint Christmas Tree Ornament are great for including all the family’s fingerprints, so a fabulous collaborative art project.
In addition to decorations, Christmas gifts, and souvenirs can also be full of creativity and thoughtfulness, such as custom luggage tags, which are not only practical but also a special gift that carries memories. Personalized Luggage Tags can be personalized according to the characteristics of family members.
For example, the name or nickname can be engraved on the front of the luggage tag, and the back can be added with a family photo, fingerprint pattern, or even a Christmas tree or snowflake hand-painted by the children. In terms of color, the classic red, green, or gold can perfectly match the Christmas theme, and the metal buckle design can ensure that the luggage tag does not easily fall off during the journey. Using a custom luggage tag as a Christmas gift will not only make your family feel your care but also evoke warm memories on every trip.

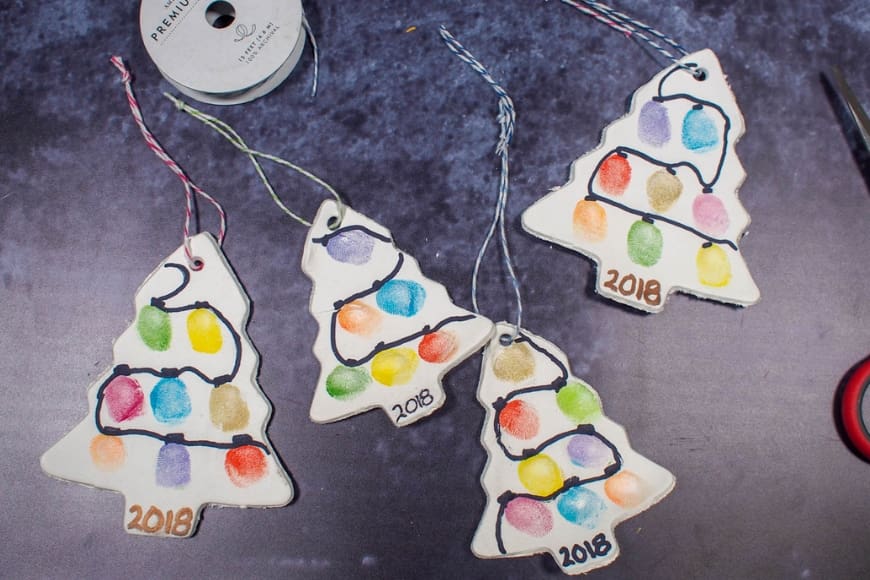
Plus using air drying clay means they coordinate with any trI wanted this tree shape fingerprint ornament to be white to coordinate with any tree decoration and theme so used using air drying clay but these would also be great made from salt dough. Find our Salt Dough Recipe here, I have a lot of salt dough fingerprint ornaments on our tree.
Fingerprint Christmas Tree Ornament
This post contains affiliate links. If you make a purchase after clicking one of these links, I will make a small commission (hopefully enough to keep me in tea all year) – at no extra cost to you! This allows me to keep creating and sharing free tutorials for you to try. Thank you!
Materials:
- Christmas Tree Cookie Cutter – ours were a gift from Stamptastic
- Air Drying Clay (UK Link/US Link)
- Icing Sugar Rolling Pin (UK Link/US Link)
- Silicone Mat (UK Link/US Link)
- Muli coloured inkpad (UK Link/US Link)
- Bakers Twine (UK Link/US Link) or ribbon
- Gold and Black Sharpie (UK Link/US Link)
- Straw or hole punch
No products found.
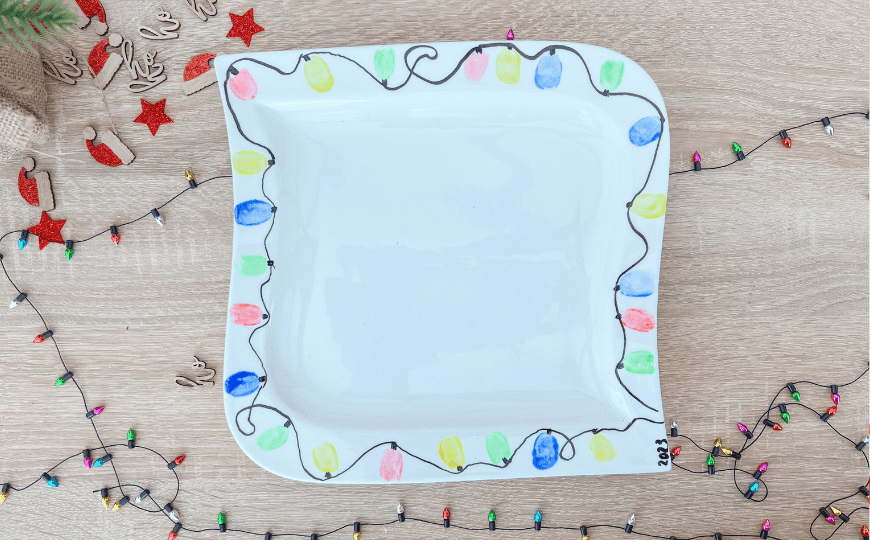
If you like these then take a look at our String of Fingerprint Christmas Lights on a plate and guess what it is Dishwasherproof!
How to Make a Fingerprint Christmas Tree Ornament
We always make a batch of either white homemade clay or salt dough for our seasonal Christmas ornament crafts. It keeps for a good four weeks in an airtight container. I find that fingerprint crafts make the perfect homemade gifts for grandparents and are also a great way of memorialising your child’s fingerprints for life.
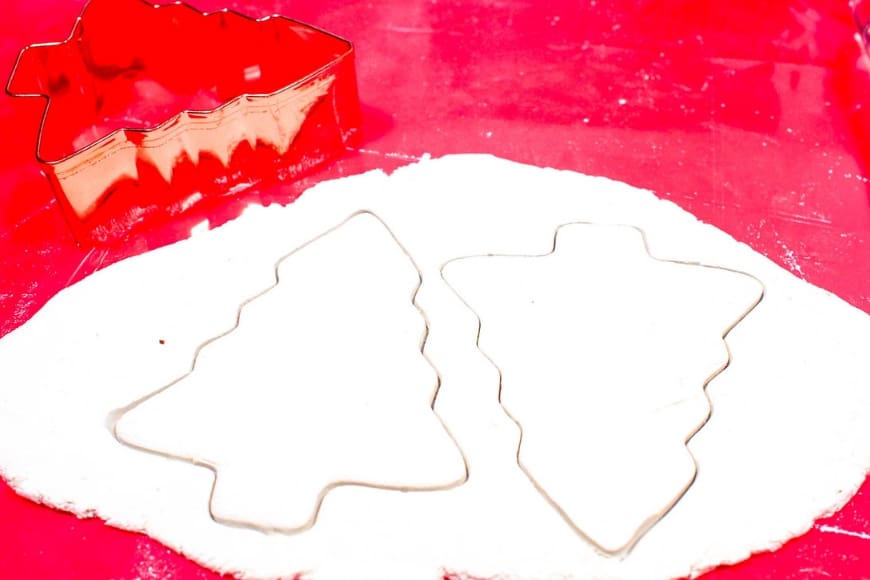
Roll out your clay about half a cm think on a silicone mat and cut out your Christmas tree shapes using a cookie cutter, ensuring you cut a hole for the twine (a straw is perfect for this). If you do not have a cutter then trace out your tree shape on cardboard as a template and cut around it with a knife.
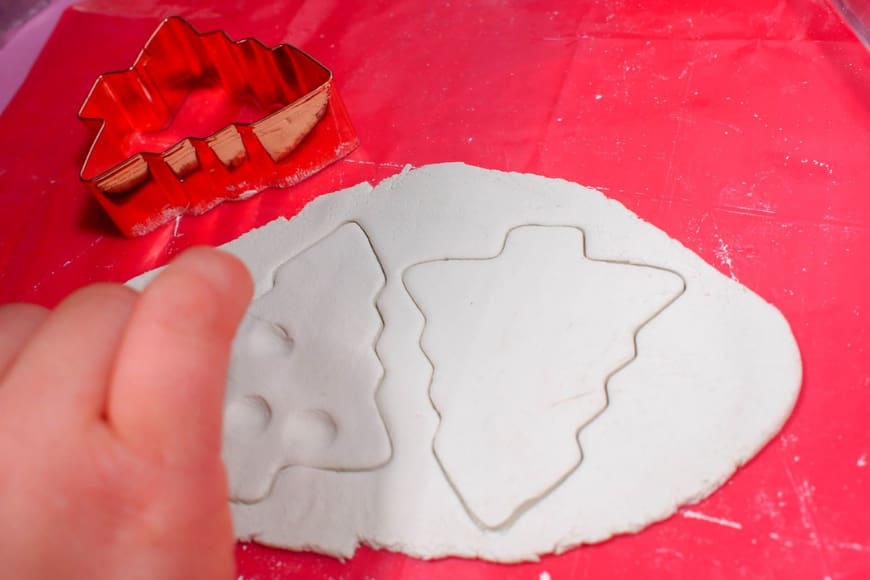
Do not remove the excess clay yet as keeping it ensures everything stays in shape. As this is a fingerprint craft, take turns pressing a finger into the clay to leave your fingerprints. If your child’s finger is too small then they can always use thumbprints.
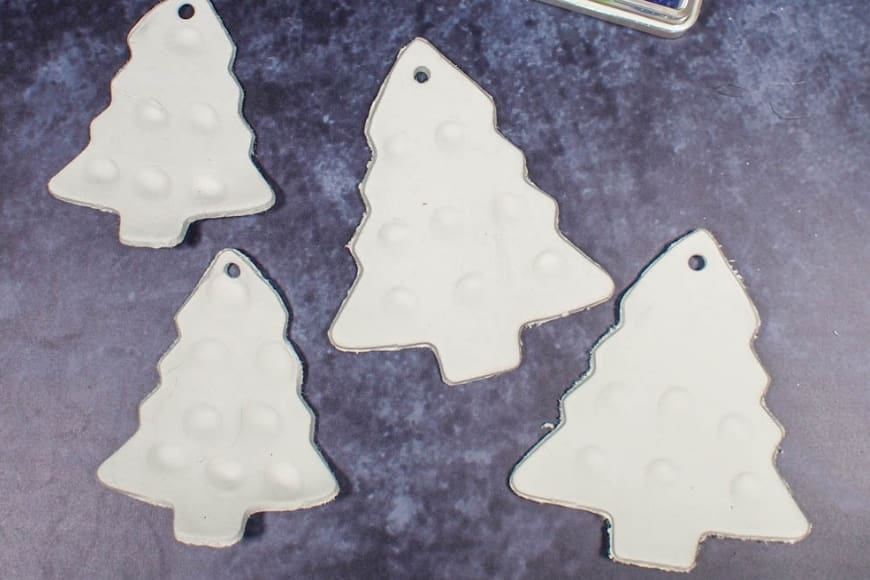
Then remove the excess clay and allow the tress to dry – this will take at least 24 hours. Make sure that you do not place them by a radiator as the change in temperature will cause the clay to crack. If you are making a salt dough ornament then you can bake at a very low temperature in the oven
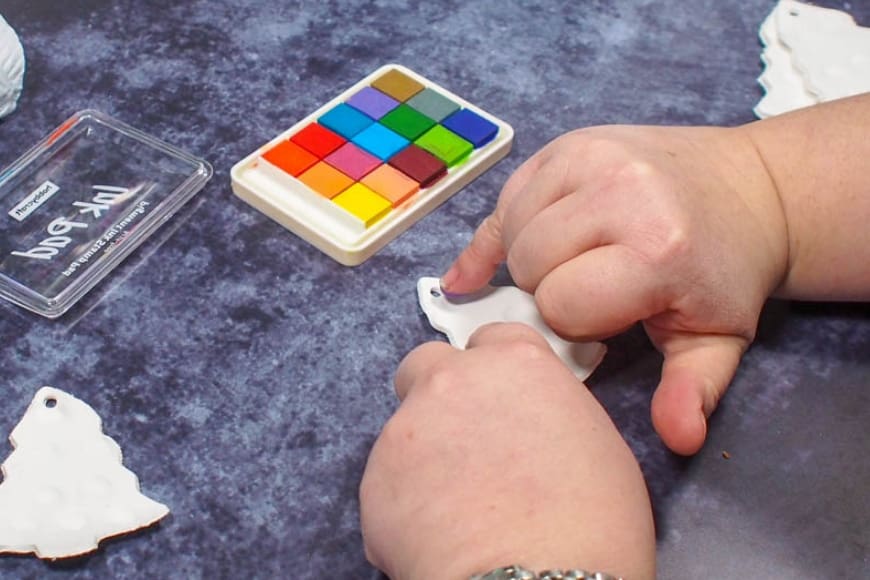
Take it in turns to colour over your fingerprint indent with ink on your finger. We all chose which colours we wanted to use for our fingerprint tree. If you have a small child or preschooler it sometimes helps to use a q-tip to dab the ink onto their fingers.
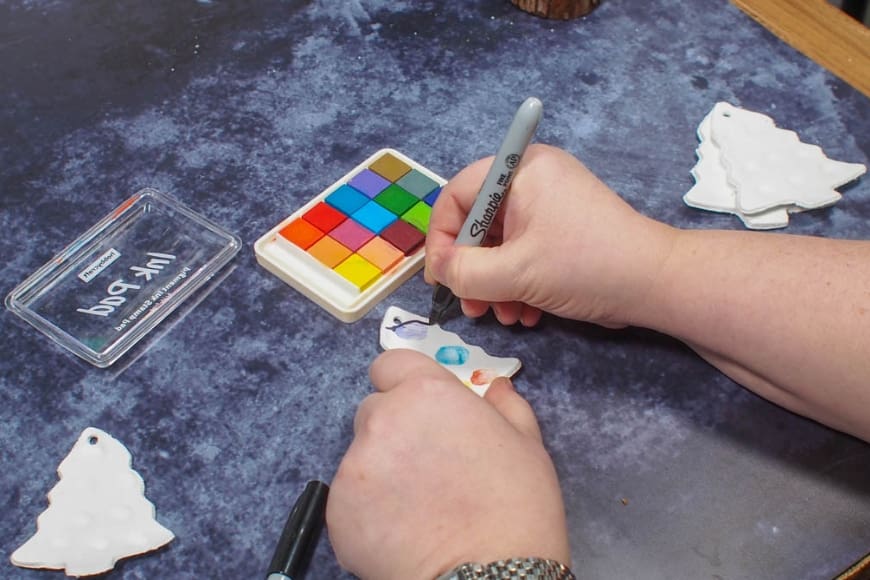
Then using a sharpie or permanent marker add a line between the fingerprints to turn them into a string of lights.
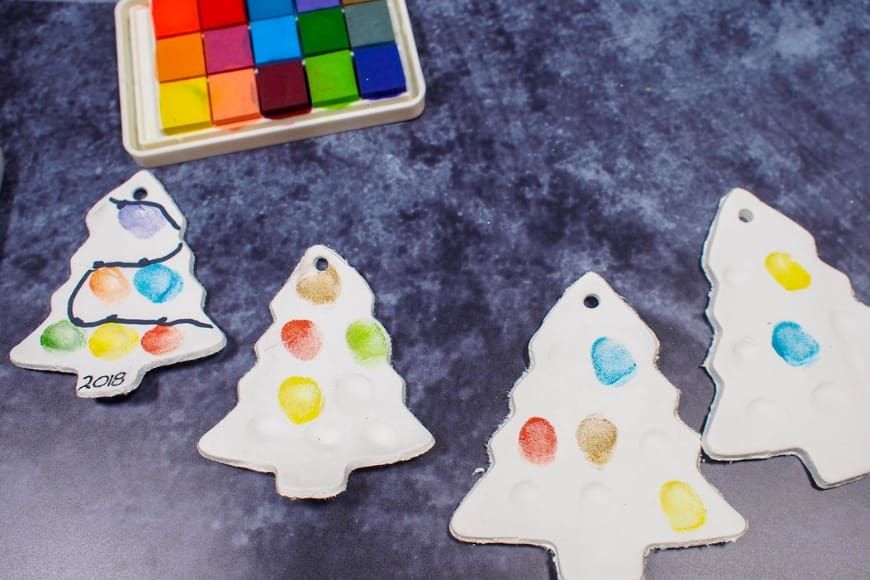
Also, add a little black blob at the top of each fingerprint as this makes them look more like lights.
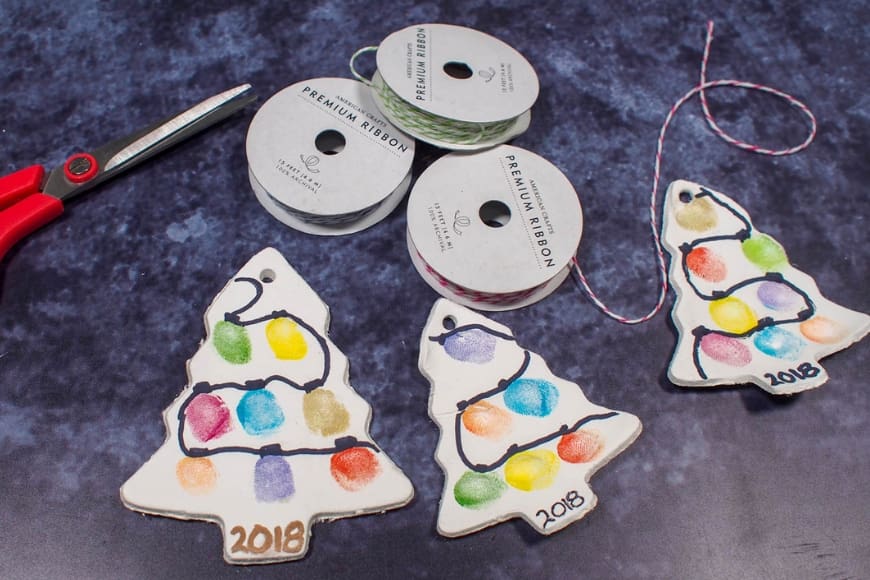
Then add the date in the trunk area using a sharpie.
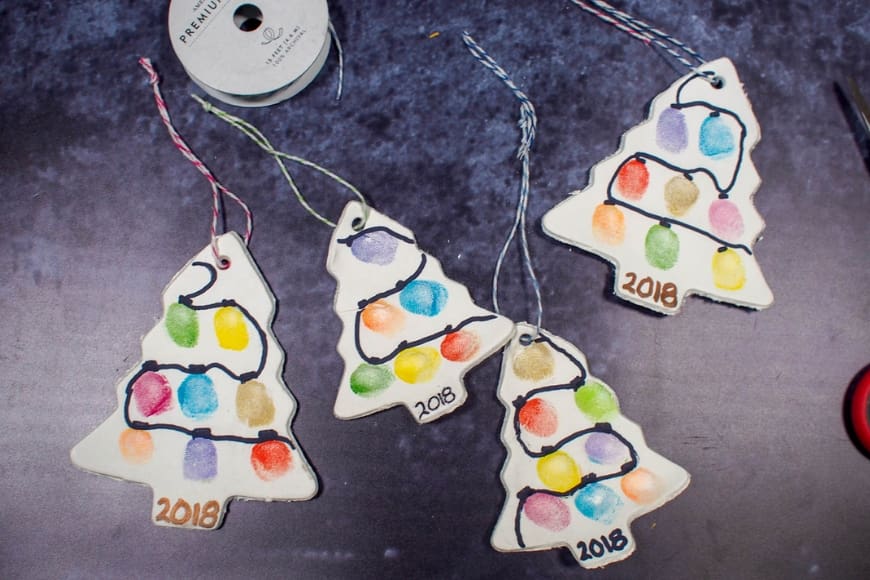
All you need to do then is add some cords for hanging off the Christmas tree.
I like the matte finish that you get with air dry clay and I have ornaments that are four years old. As long as they are stored in a dry space then they will keep for a long time. If you use salt dough for your Christmas decorations then I would be wary of leaving them anywhere there is moisture or be tempted to coat with mod podge to protect them.
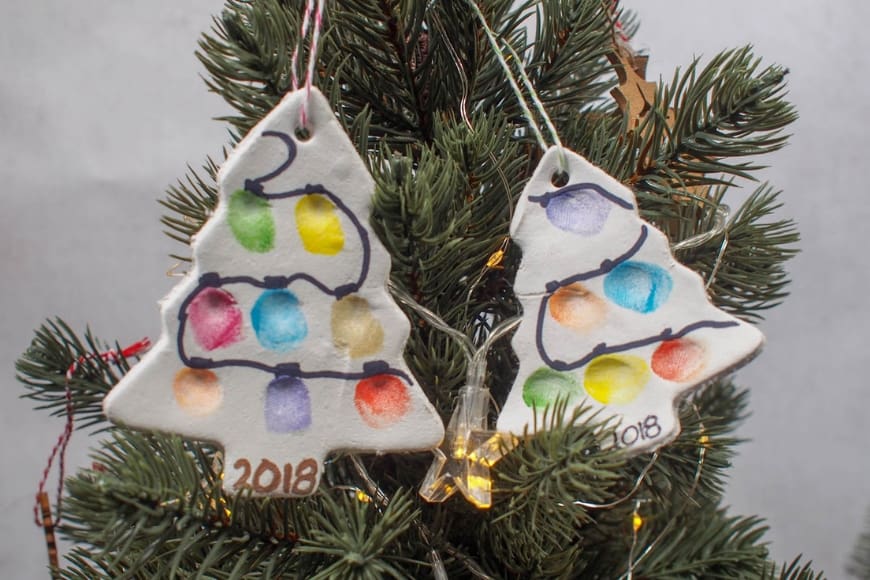
You can seal your Fingerprint Christmas Tree Ornament made with air drying clay with Mod Podge.
If you like these then check out this years DIY Rainbow Clay Christmas Tree Decorations and Simply Clay House Christmas Tree Decoration


Also, we made fingerprint wreath Christmas cards using finger painting, which was so much fun.
Comments are closed.