
I have been working on finding process art activities that my boys can enjoy now they are tweens and these floating chalk prints certainly hit the mark. I feel strongly that process art is really important for kids of all ages and sometimes more so when they reach 9/10.
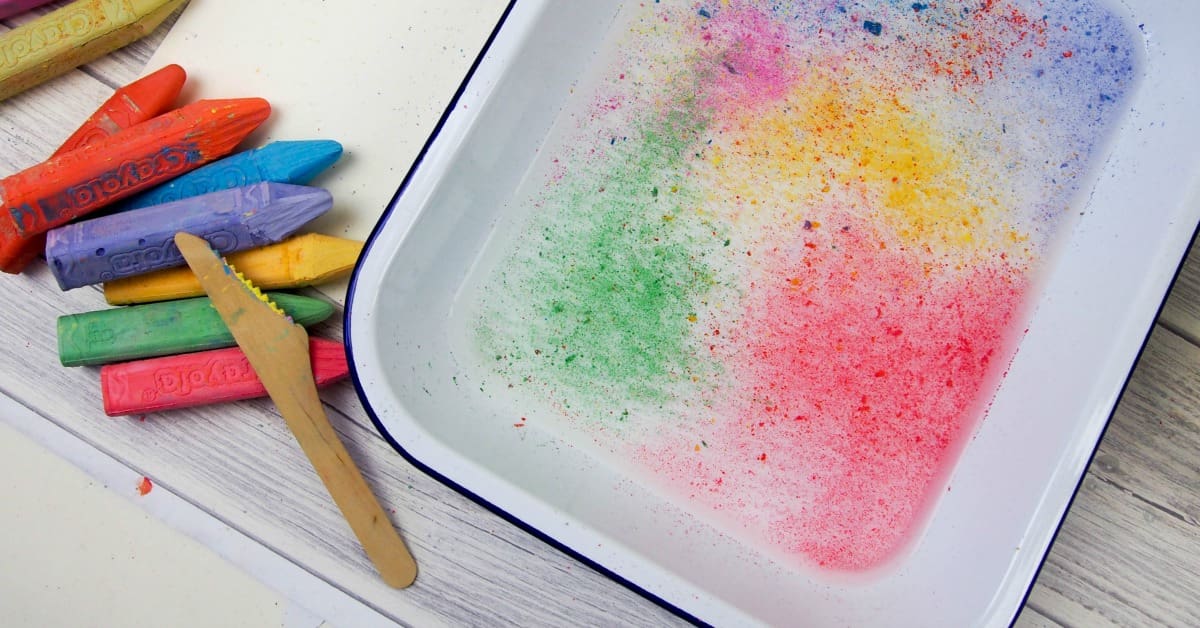
This activity would be an ace way yo use up old chalks and we tried with different makes and ended up using our big pavement chalks. They were easier for the boys to handle and powdered more easily.
Floating Chalk Prints
This post contains affiliate links. If you make any purchases after clicking one of these links, I will make a small commission (hopefully enough to keep me in tea all year) – at no extra cost to you! This allows me to keep creating and sharing free tutorials and content for you. Thank you!
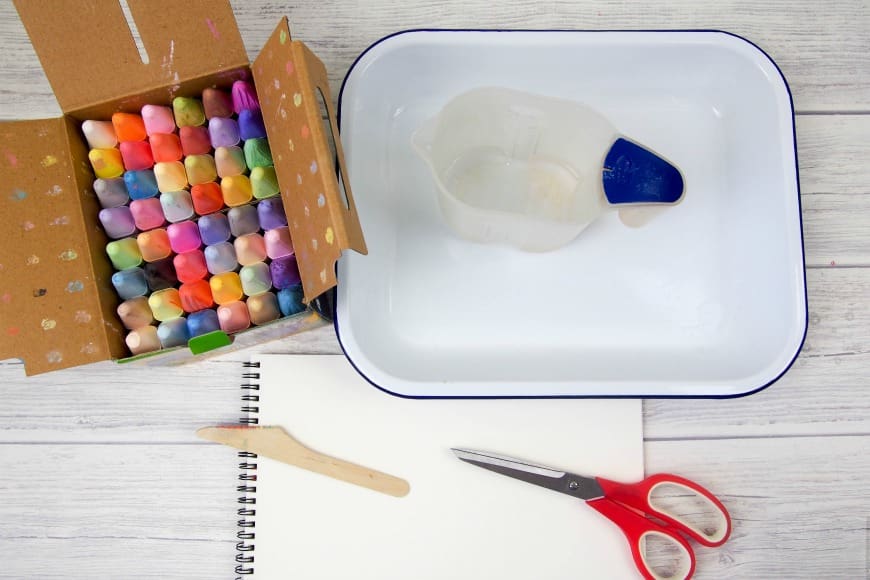
Materials
- Tray – We used a roasting tin!
- Water
- Chalks
- Scraper (we used a wooden knife)
- Paper (we used cartridge paper)
No products found.
These are a real blast from my past and I remember making them when I was at school. We used lots of colours but I do love them with a restricted palate like Picklebums used.
How to make floating chalk prints
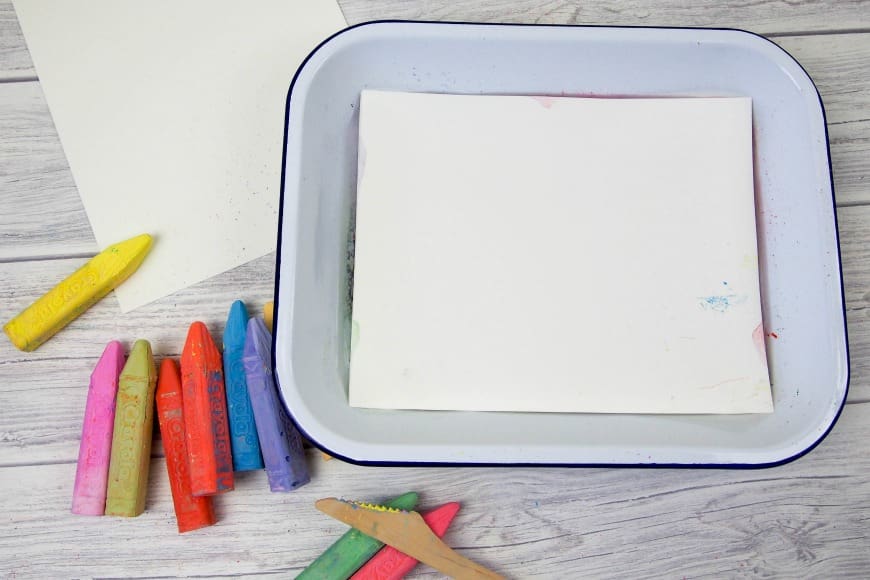
First off you need a container that is big enough to take your paper. We used the largest roasting tin that we had and then add in about an inch (2.5 cm’s of water)
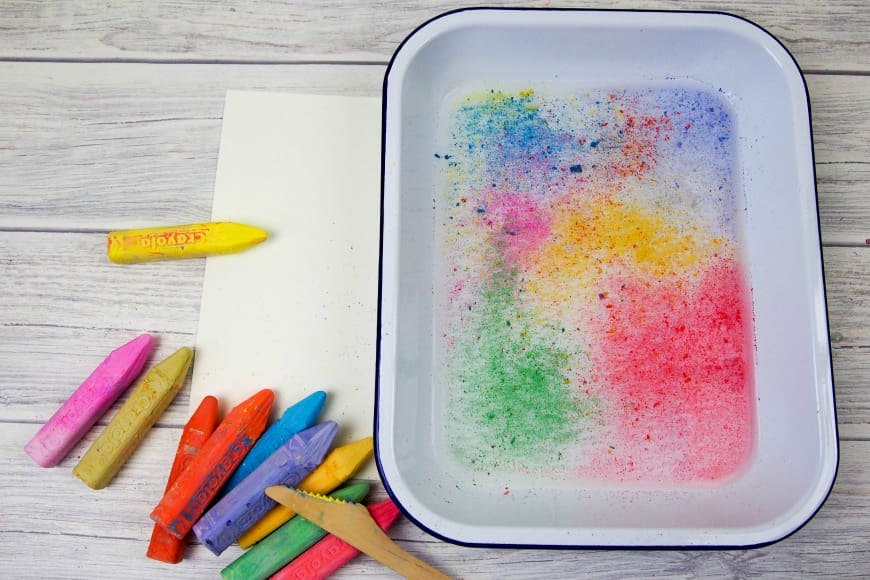
The you need to scrape the chalk into the tray. Taking scare not to break the surface tension, so that means not touching the surface of the water. We used a disposable knife to scrape our chalks, but you can use an old credit card or if you are doing this with younger children then use this method and crush your chalk first for them to sprinkle. In fact, when I was at school we always did this with the scraps of chalk in the box and we crushed them.
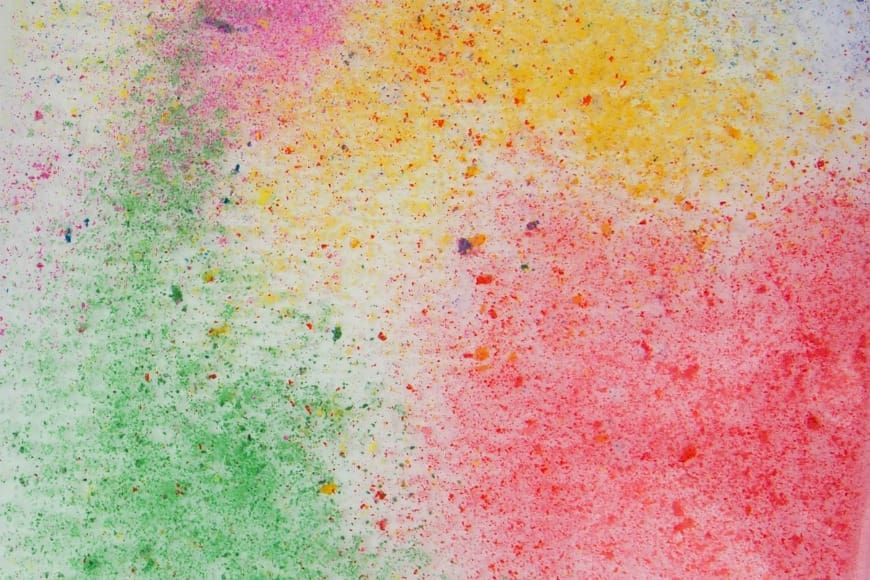
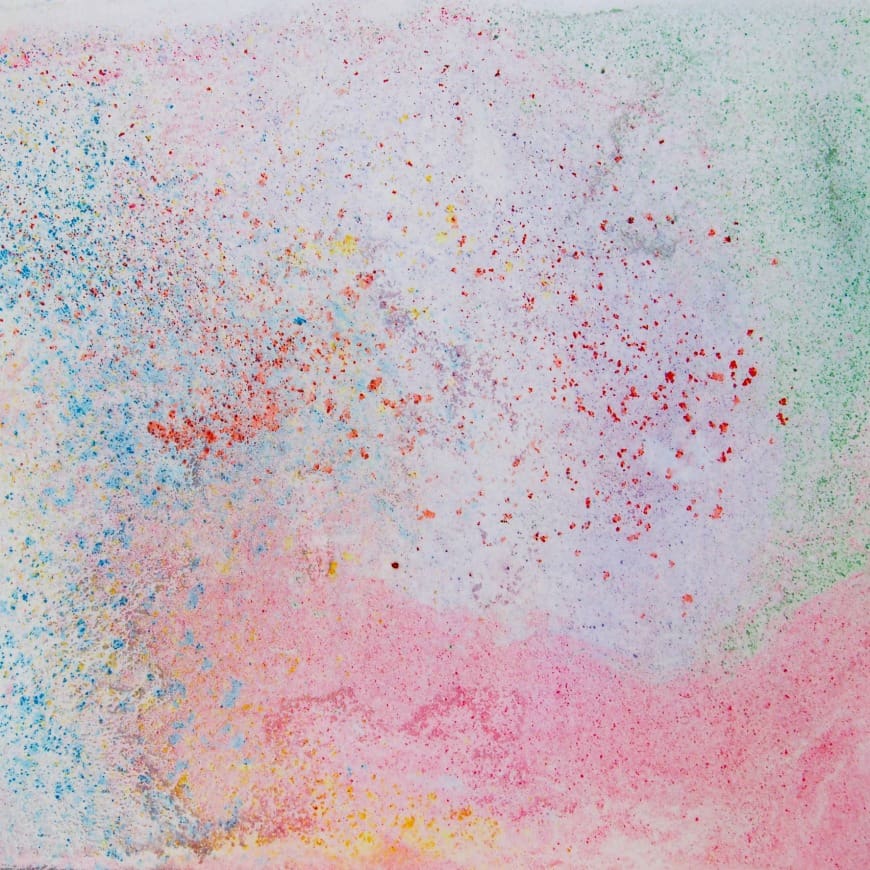
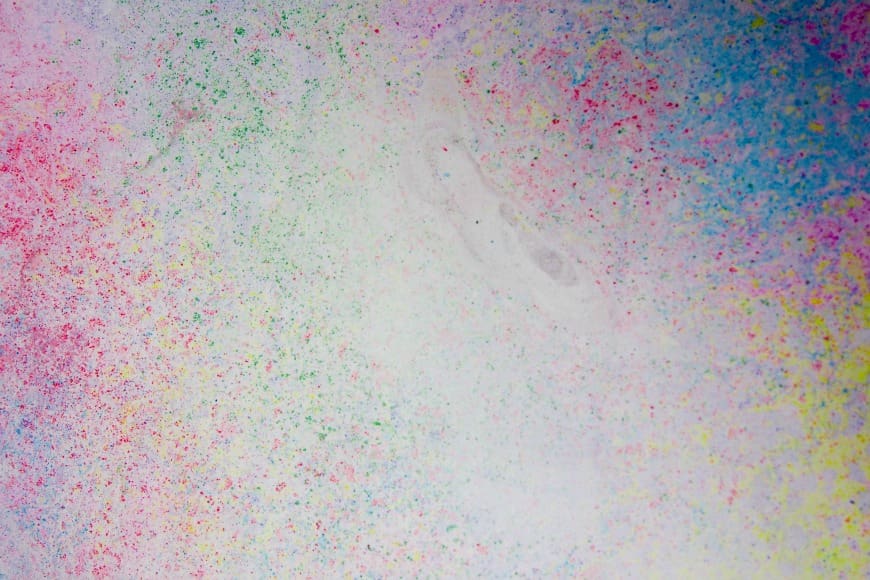
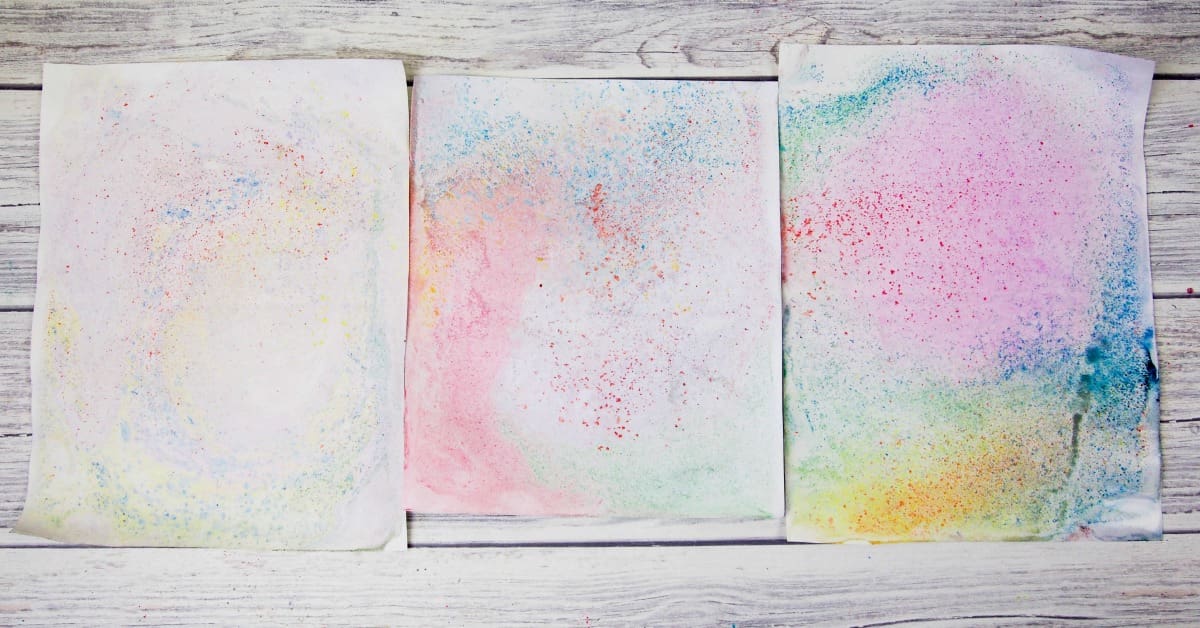
Then place the paper in the water center first. Slowly let the edges go onto the water mixture to keep bubbles from forming on the paper. Then grab the corners or the paper closest to you and drag the paper up towards yourself. This ensures you are dragging more chalk onto the paper as it’s lifted and so the kids can see the effect when they lift the paper.
Lay the paper flat and allow to dry.

The boys found this process art activity pretty exciting. It was fun seeing how the prints turned out each time.
The science bit
Isn’t it great when a creative activity turns out to be a learning experience and that was just what this turned out to be. Mini wanted to swirl the chalk to change the pattern, but as soon as he touched the water and broke the surface tension all the chalk sunk to the bottom, which was how we got around to talking about the fact that water a liquid has surface tension, which allows the chalk to flat on top.
I went on to explant that the service tension allows some objects to flat on the surface of the water, even though they are denser than water and in the ability of some insects like water striders to run on the water.
So water is made up of molecules, two hydrogen atoms, and one oxygen atom and this is why is it known as H20. The two hydrogen molecules make water sticky and create that surface tension.
Have you tried making chalk prints on paper before?
Comments are closed.