

Ghosts in a Jar Halloween Craft is a paid collaborative post with Bostik. Fancy catching some ghosts for your Halloween decoration, well we have you covered and these are really special ghost catching jars that stop them dematerialising. Yes, ghosts can go through walls, but these jars are magical and keep them captured and out of mischief!
I have seen ghosts in a jar made using liquid starch before, but as that isn’t something easily found here in the UK, I decided to use Mod Roc plaster of Paris bandage after seeing Kids Craftroom’s Ghost Lights a few years ago. In fact, I have had the plaster bandage in my stash as I was planning to make some really big ghosts using balloons for a frame, however, everything looks better in a jar and also it stops little hands picking them up as they are pretty delicate.
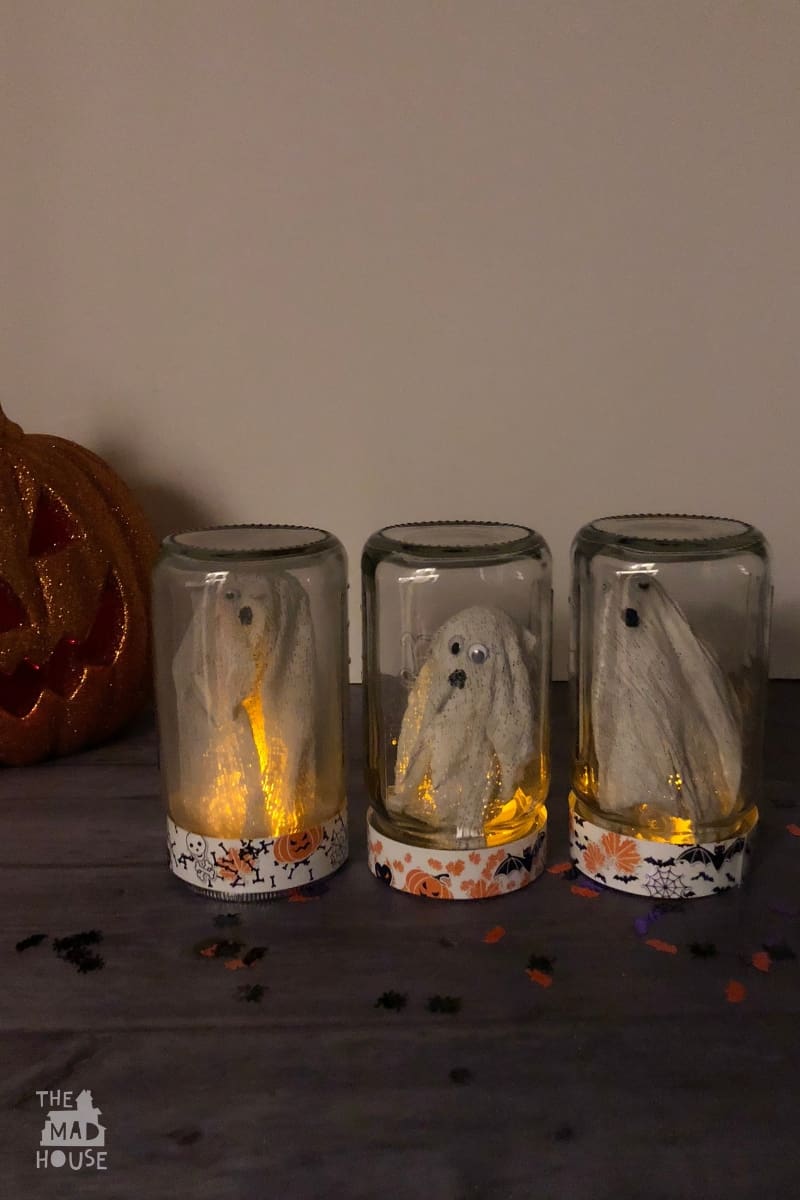
Ghosts in a Jar Halloween Craft
Materials
This post contains affiliate links. If you make a purchase after clicking one of these links, I will make a small commission (hopefully enough to keep me in tea all year) – at no extra cost to you! This allows me to keep creating and sharing free tutorials for you to try. Thank you!
- Mason jars
- Mod Roc (you might see it called Mod Rock or Art Rock, Plaster Gauze or Plaster of Paris Bandage) (UK Link/US Link)
- small polystyrene balls (mine were egg-shaped but worked fine)
- Wooden skewer
- Blu Tack or pink tack in our case! (UK Link/US Link)
- Pipe cleaners (UK Link/US Link)
- black craft paint or black sharpie (UK Link/US Link)
- Googly eyes (UK Link/US Link)
- Halloween paper or use our free printable
- Bostik Extra Strong Glue Dots on a roll (UK Link/US Link)
- Jar Wrap – free printable
- LED Tea Lights (UK Link/US Link)
No products found.
How to make your own Ghosts in a Jar Halloween Craft
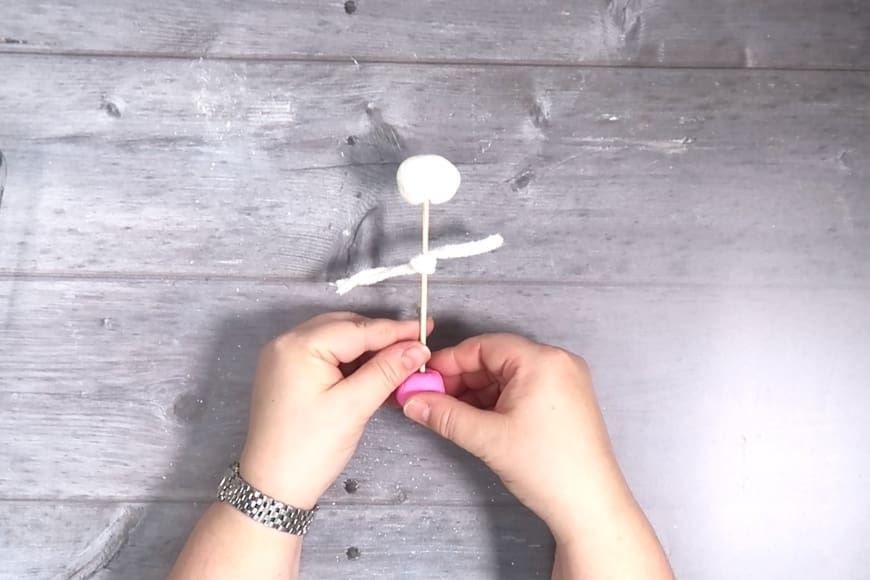
First off you need to make a stand for your ghost – a template to put the bandage over whilst it dries. We used an egg-shaped paper mache ball, screwer and pipe cleaner. We weighted this by using a ball of Blue Tac (or Pink Tac in our case). Using pipe cleaners allows you to shape your ghost easily.
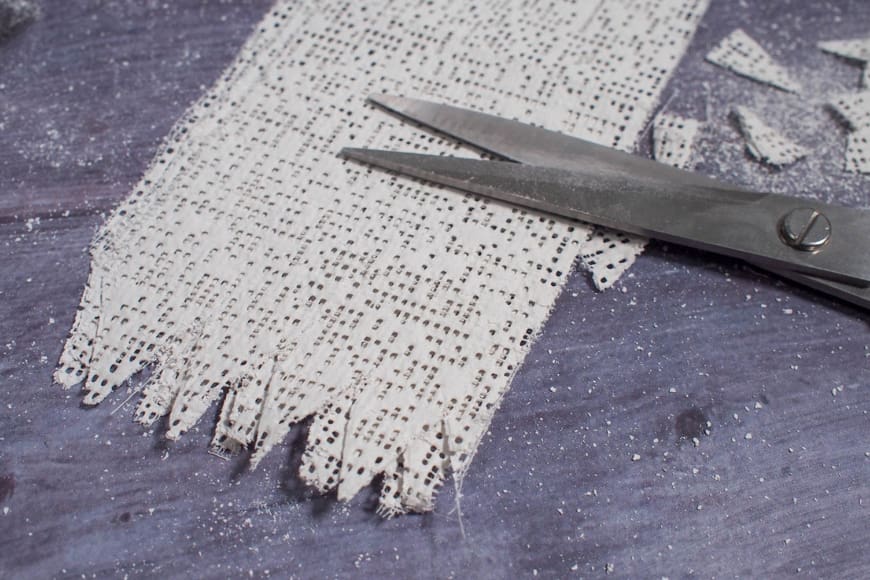
Cut the Mod Roc into sections a little longer than the height of ghost stand. Cut zig-zags along each end to give the ghost ragged bottom.
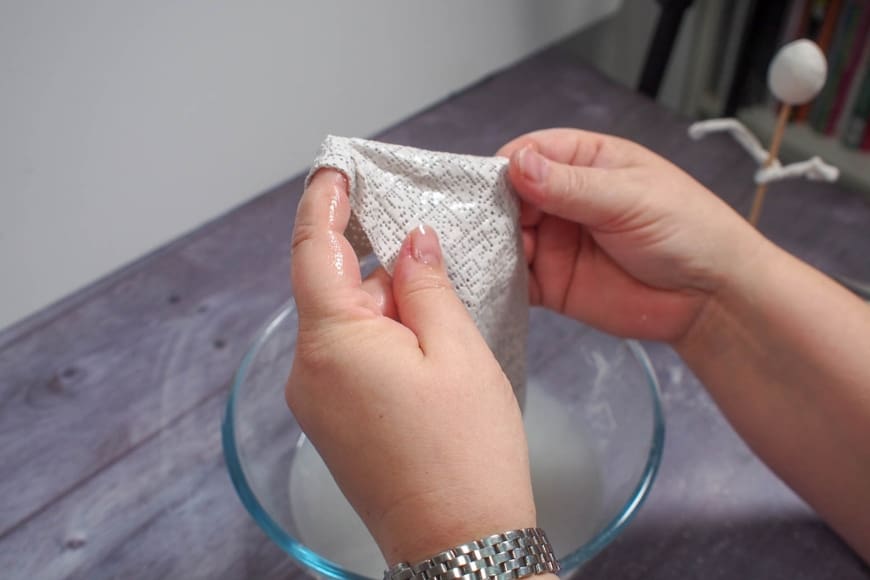
Dip one piece of Mod Roc at a time into a bowl of tepid water and quickly pull it out. Before gently squeezing to remove most of the water (this will help it dry faster).
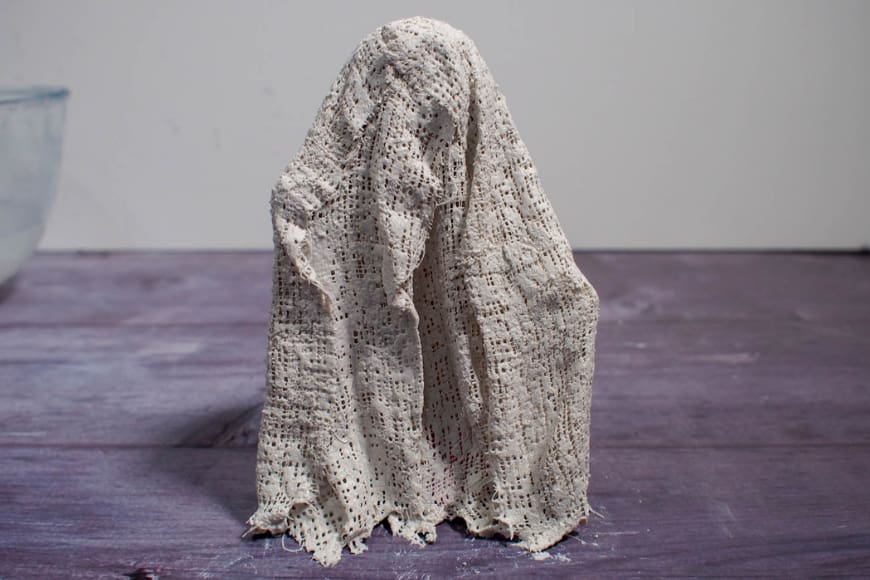
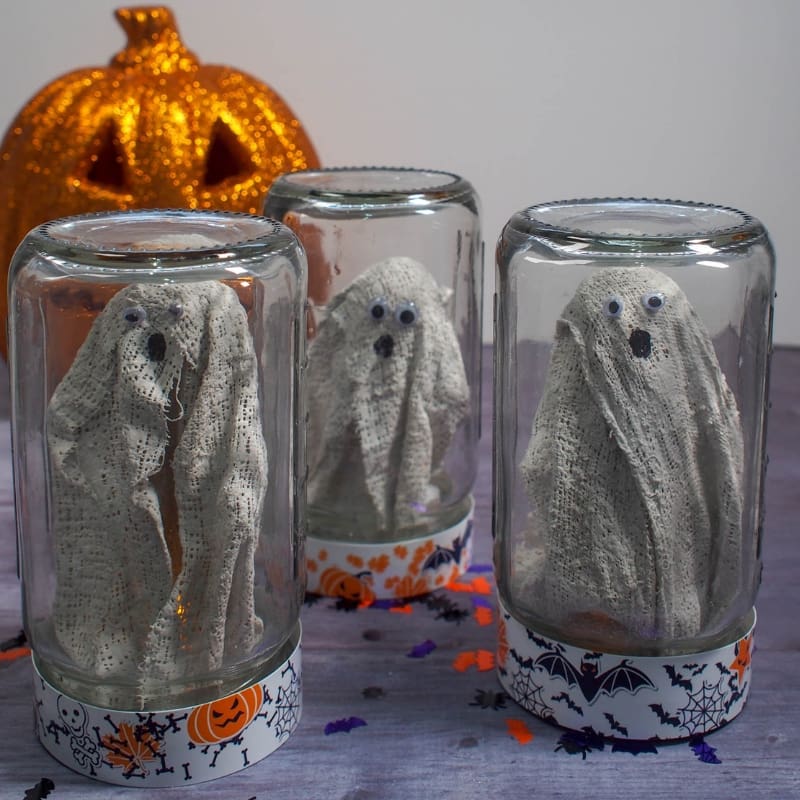
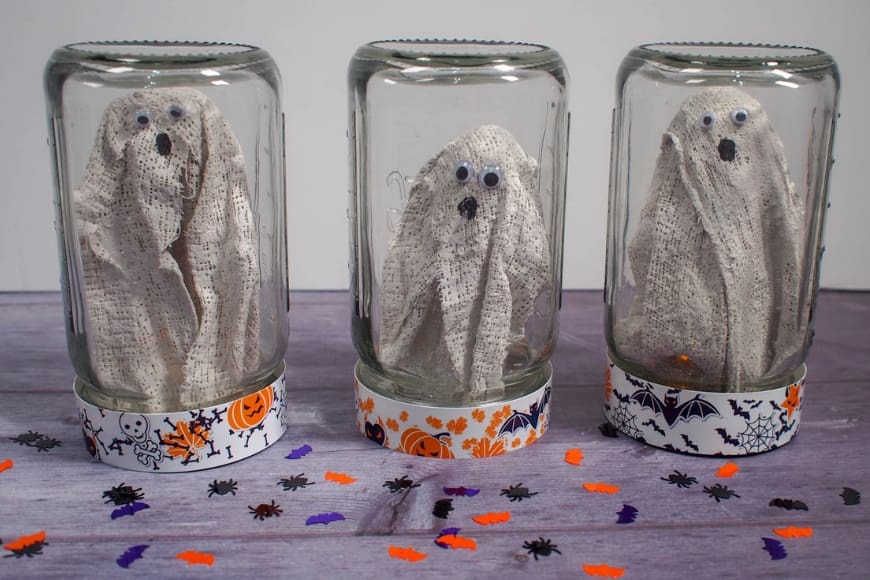
Drape the wet Mod Roc onto your frame. We used three sheets for each of out ghosts. Then set aside and allow to dry before removing your frame. I couldn’t get the heads out of two of the ghosts, but as they were light it made no impact.
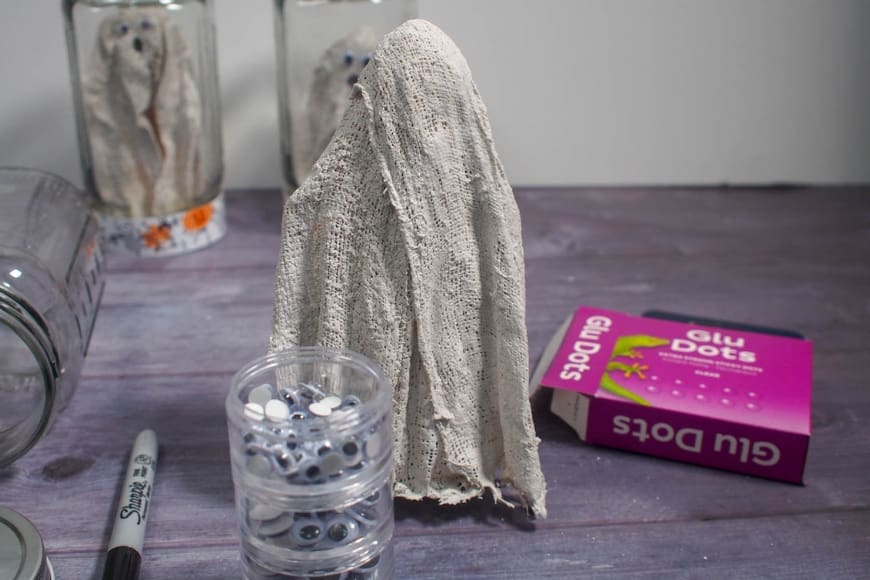
When your ghosts are completely dry, you need to glue on the eyes. I love using glue dots for this as it adheres permanently and immediately.
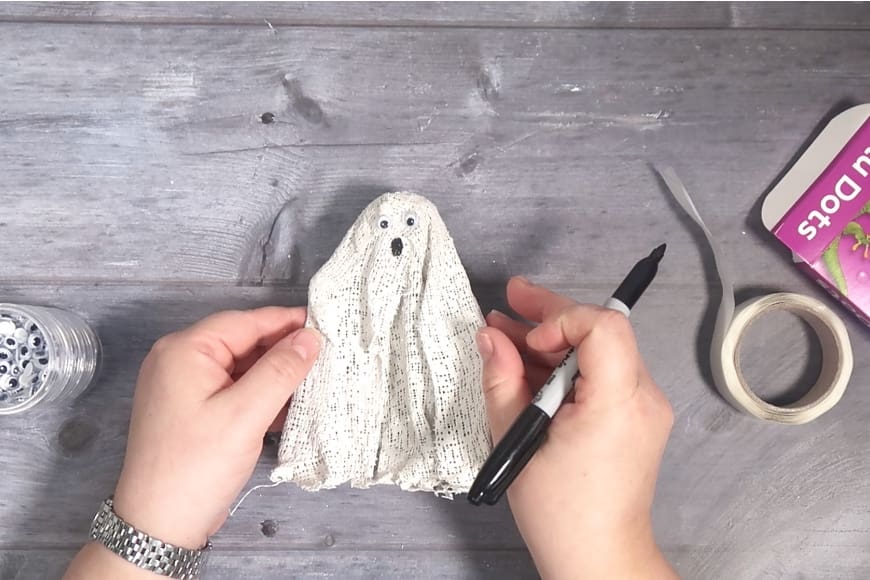
Then you can draw on their features. We use a permanent Sharpie marker for this.
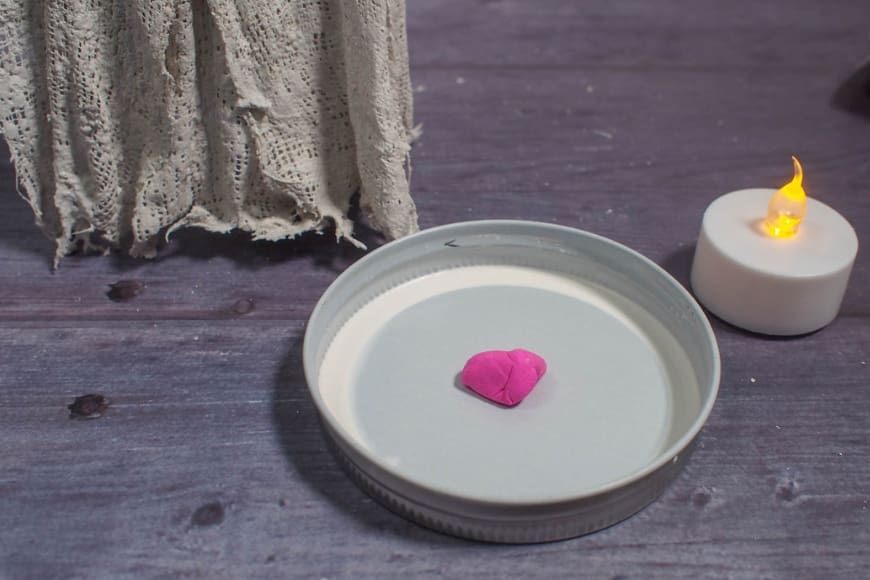
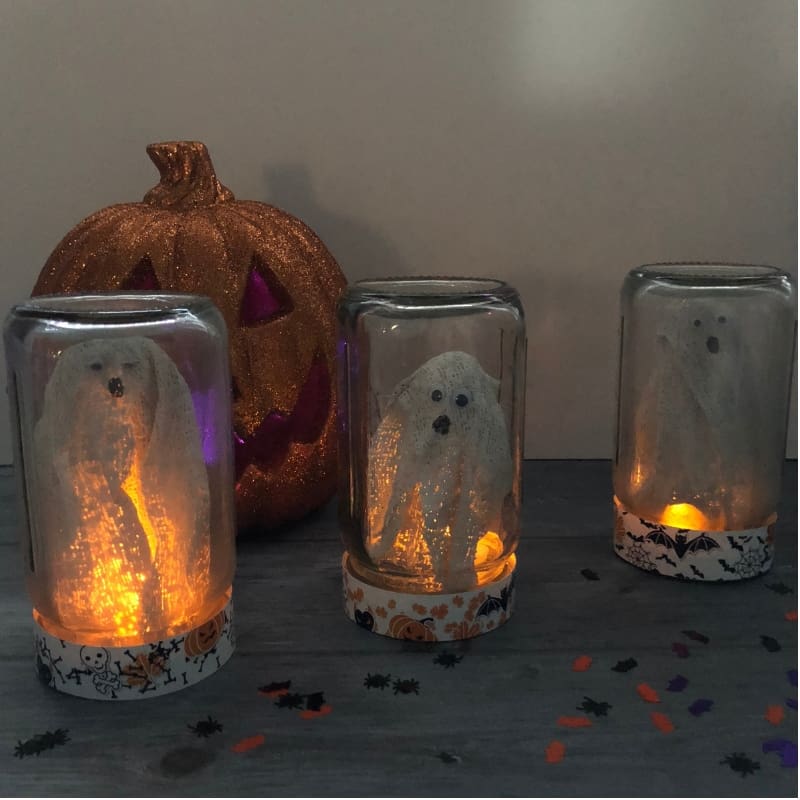
Then take a small amount of Blue Tak (or Pink Tac) and stick the battery operated tea light to the inside lid of the jar.
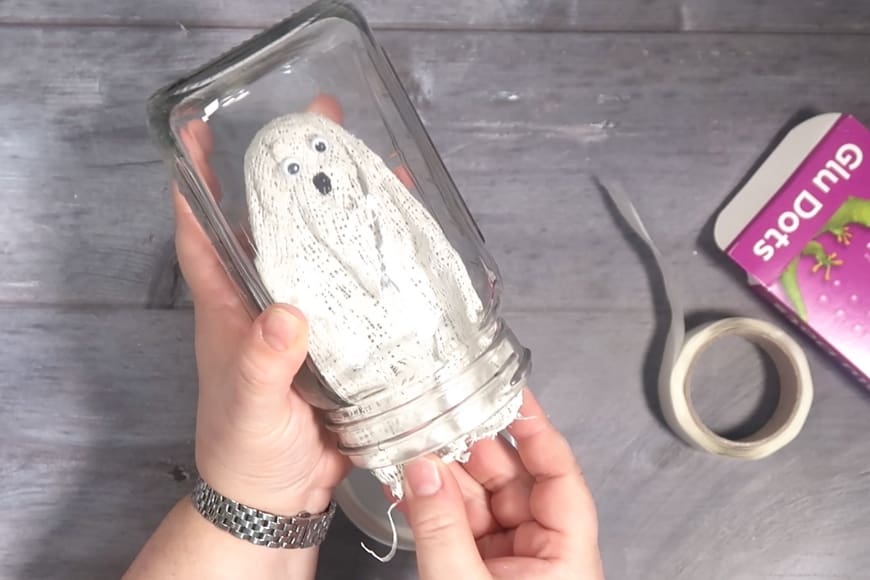
Then you need to slide your ghost into the jar before screwing on the lid.
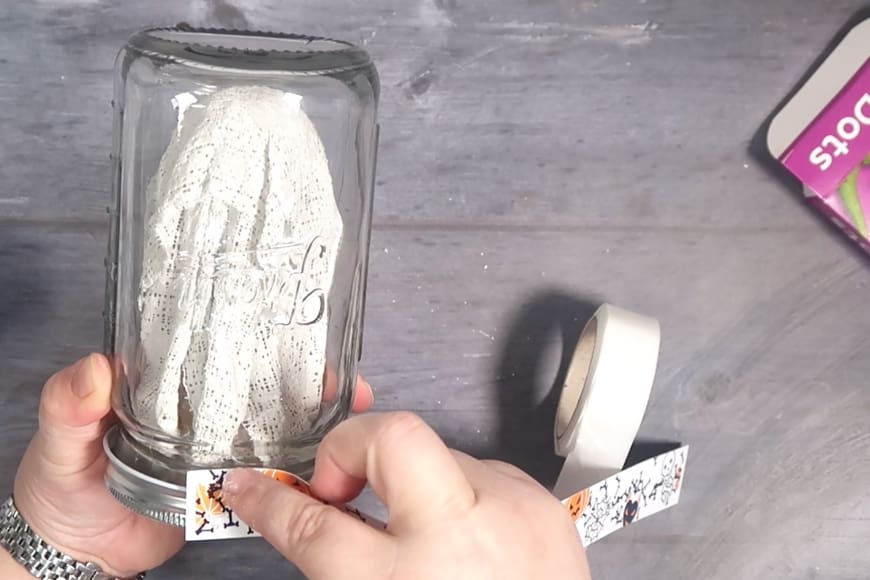
I decided to add a strip of Halloween paper around the base to finish the kars. I even designed a printable for you to use. I just trimmed it to size and wrapped it around the jar lid and secured it with a glue dot.
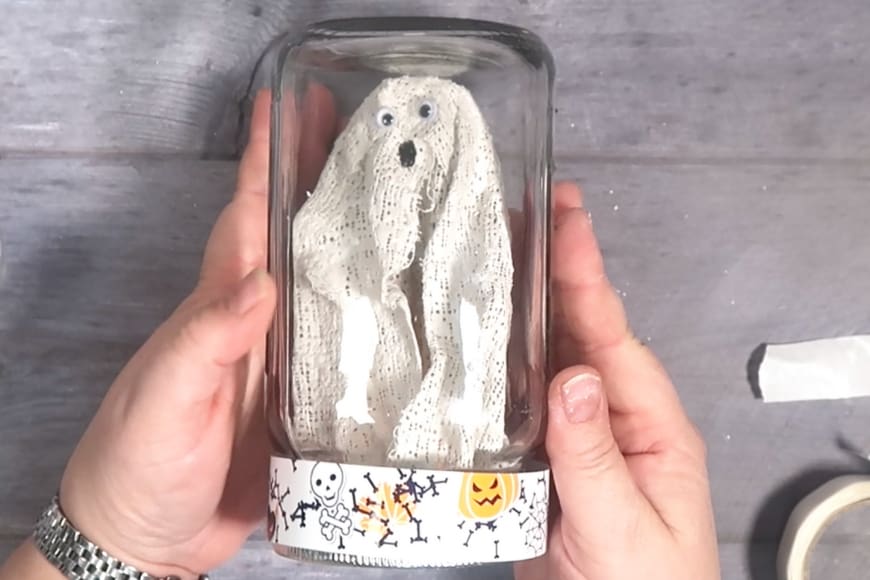
I adore how these trapped ghosts in a jar turned out.
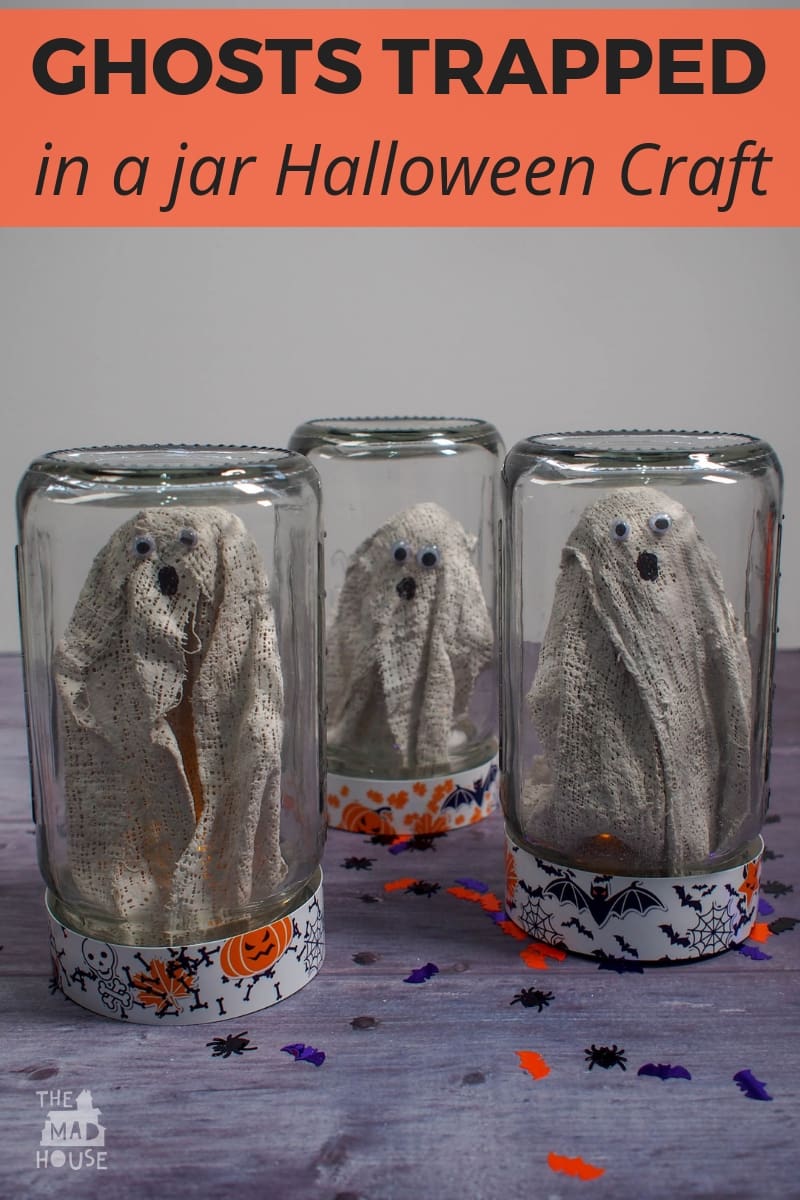
They look fab in the day but really come into their own when it gets darker and the flickering LED tealight creates a spooking glowing ghost.
We have also done a video if you prefer your tutorials in that form.
Why not take a look at our other Halloween Lanterns:
Comments are closed.