

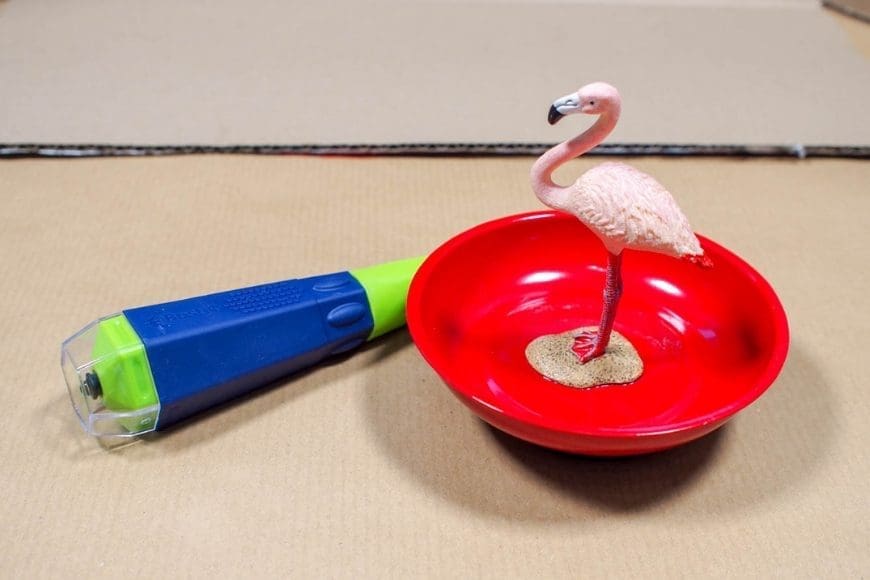
As a sewer I know just how handy a Magnetic Pin Bowl is and I have a brilliant tutorial to make a more personalised magnetic pin bowl. I mean who wouldn’t want a bright pink flamingo pin bowl that was magnetic and kept all my pins safe! I have been lusting after a magnetic pin bowl for my sewing for ages, but at around £15 for a pretty pink or blue polka dot one, they were out of my price range, especially when you can pick up a deep red car parts dish for less than £4!
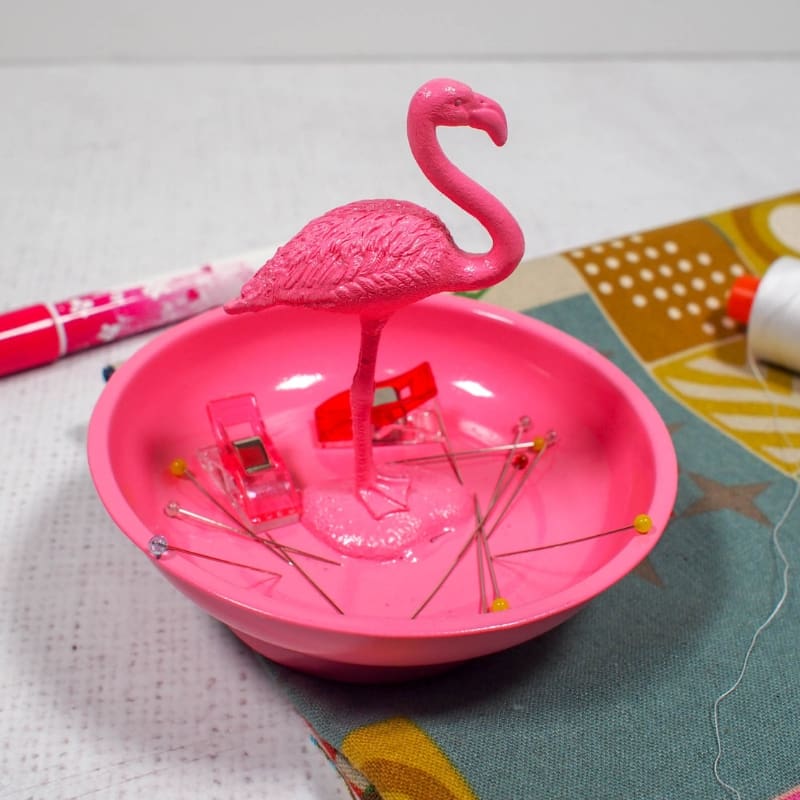
So I bought one and decided to pimp it up to make it more me by adding a plastic animal (from when the boys were little) and spray painting it. I am delighted at just how amazing my Magnetic pin bowl has turned out and I use it all the time when I am sewing (check out my sewing machine here).
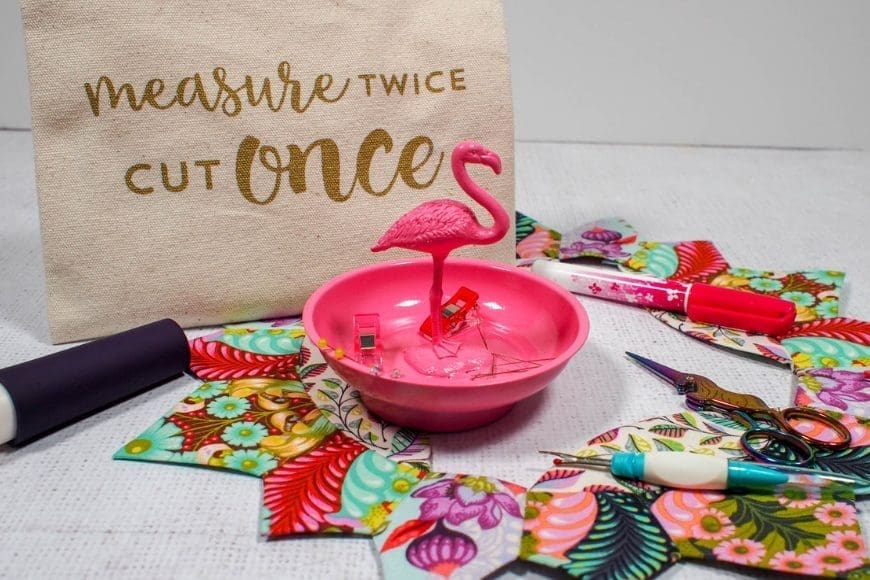
How to make your own Magnetic Pin Bowl
This really is a simple make and the secret is to add lots of thin layers of paint which is what takes the time. Well not the painting, but letting each layer dry.
Materials:
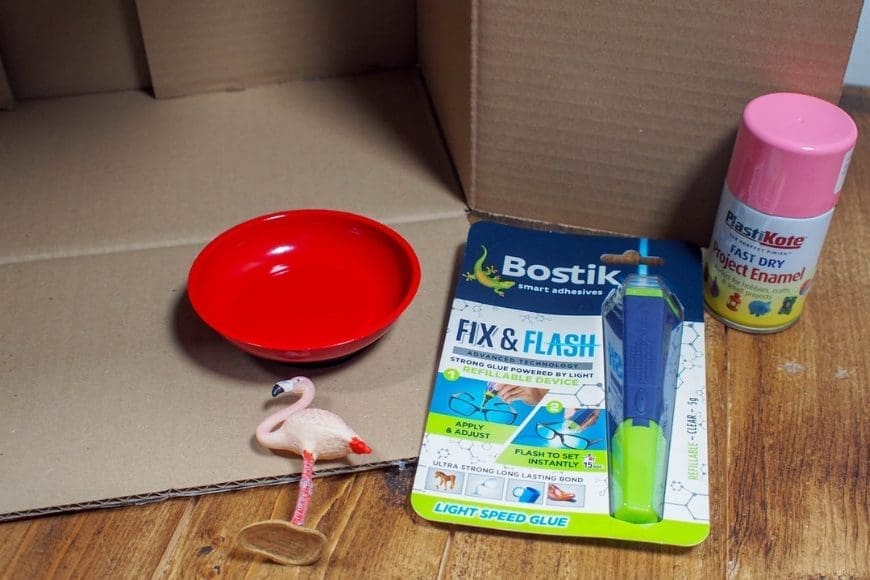
- Magnetic bowl – Car parts ones are cheaper
- Bostik Fix and Flash
- Enamel Spray Paint
- Animal of your choice (this flamingo a gift and mine is a sloth)!
- Cardboard Box
This post contains affiliate links. If you make a purchase after clicking one of these links, I will make a small commission (hopefully enough to keep me in tea all year) – at no extra cost to you! This allows me to keep creating and sharing free tutorials and content for you. Thank you!
How to make a Magnetic Pin Dish
Start by making sure that both the animal and the bowl is clean and dry.

One of the reasons I haven’t already done this project even though I had the materials was the fact that I thought I would have to use 2 part epoxy glue and I wasn’t keen. Thankfully Bostik
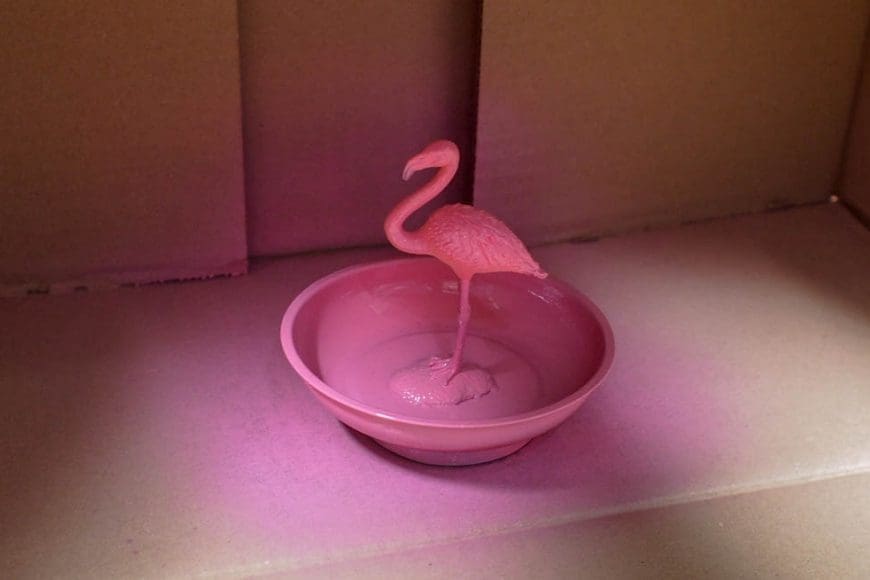
Then you need to spray the magnetic pin bowl your chosen colour. I used quick dry enamel paint. The secret is to do lots of light layers. I pop the item in a cardboard box on its side and always spray in a well-ventilated area.
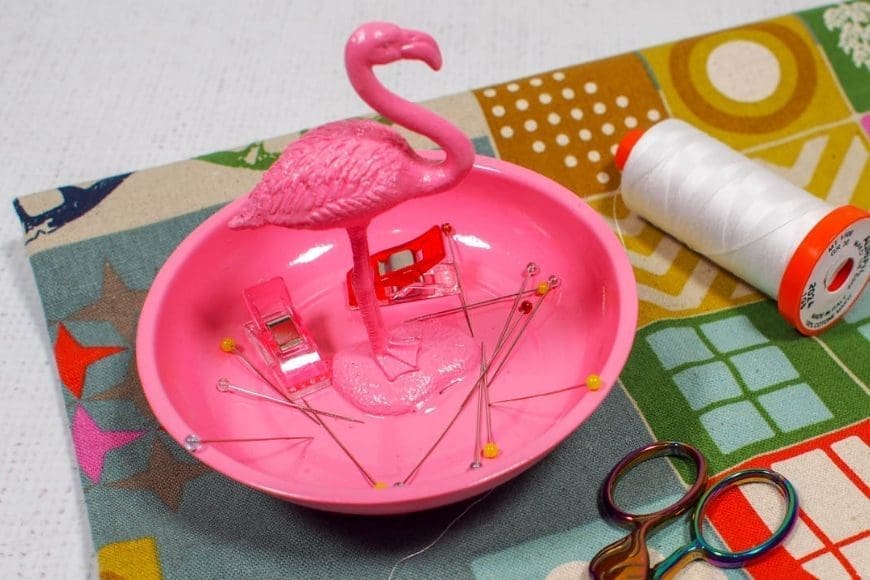
I love how it turned out and it is so useful. You don’t have to use it for pin and needles. It would also be perfect for hair grips too.
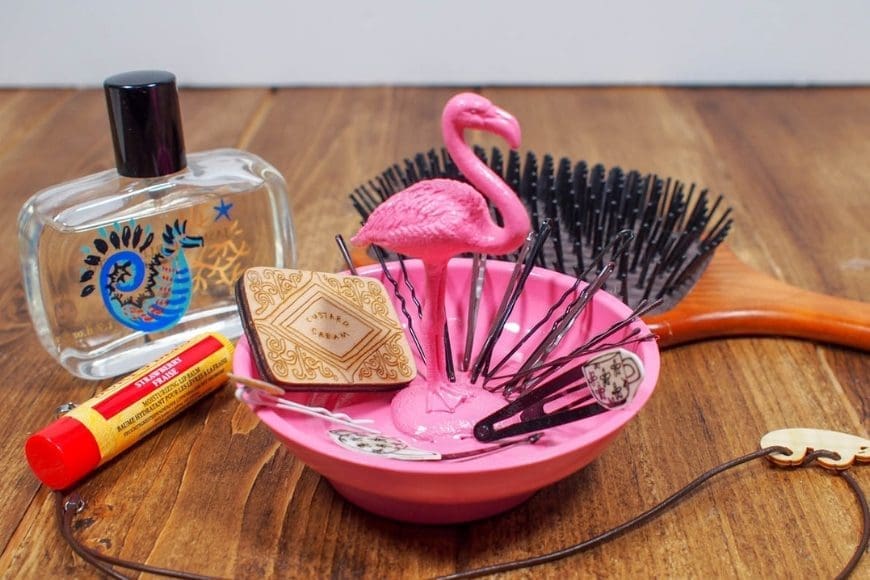
Hair grips and broaches work really well and they are so small that I usually lose them.

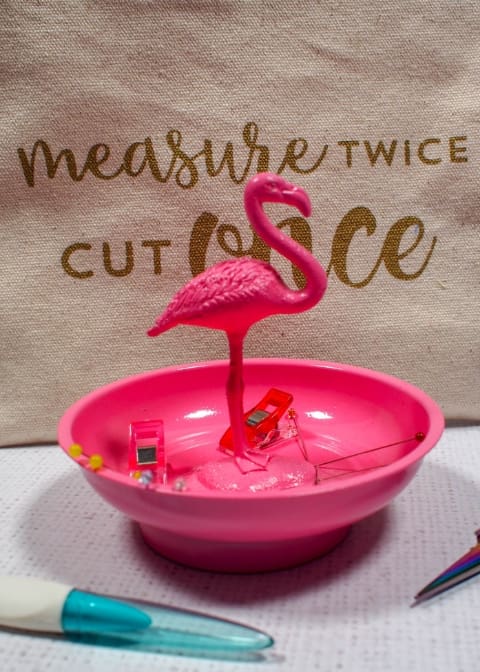
And voila – my happy little magnetic pin bowl – so much more aesthetically pleasing than the simple red car part one I was using.
Comments are closed.