

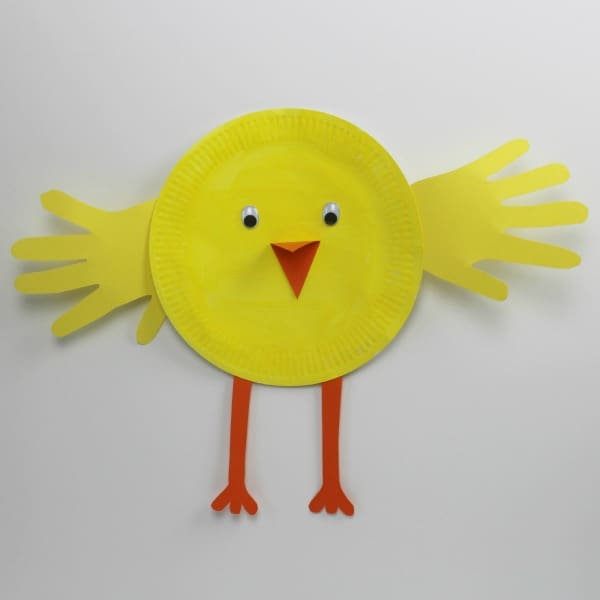
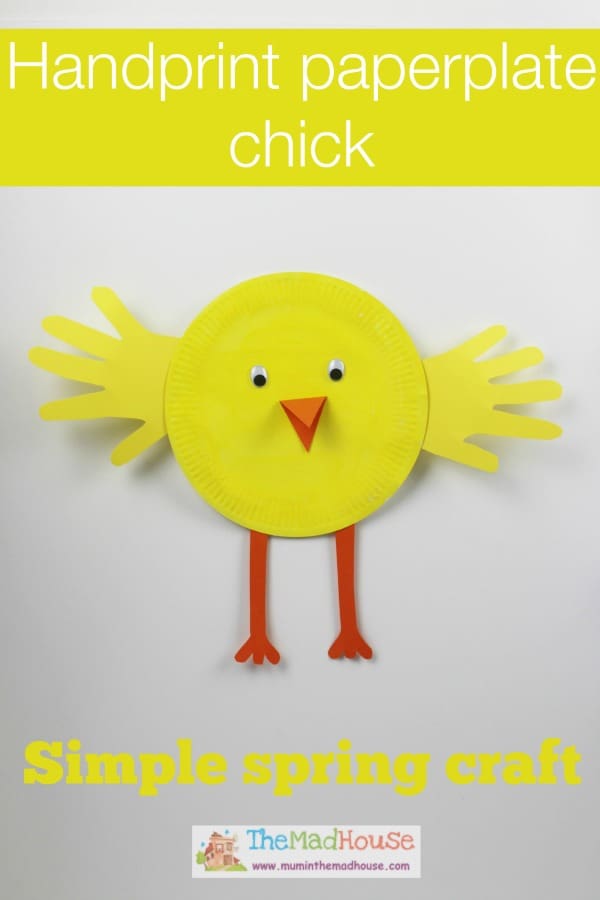
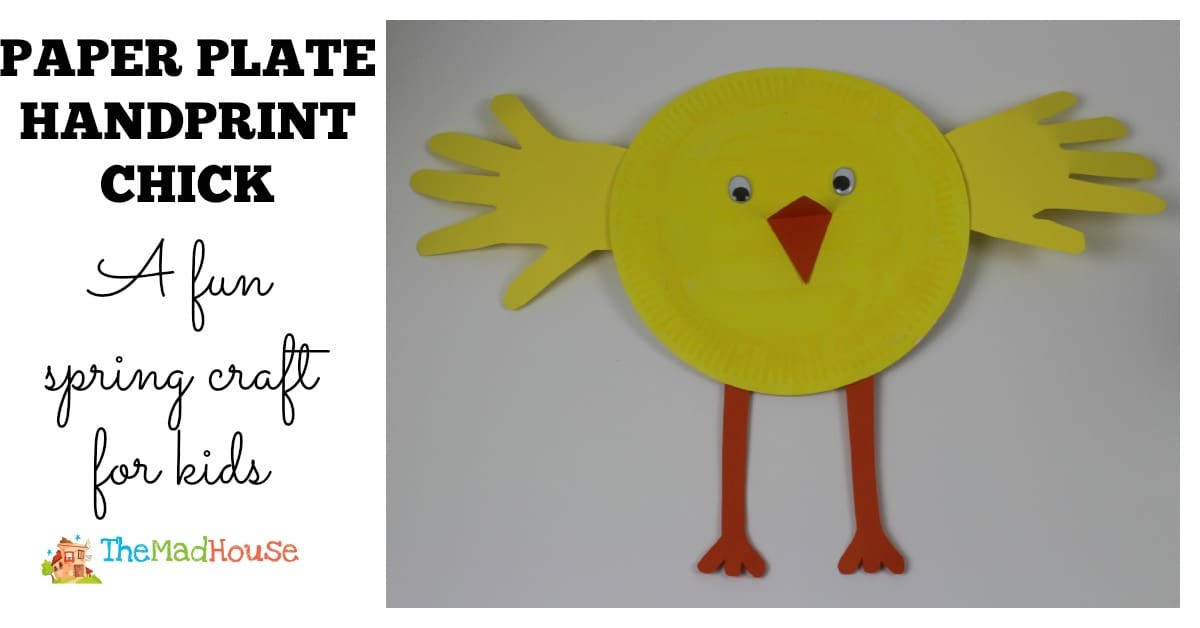
Spring is my favorite season and yellow my favorite colour, so this Paper plate hand print chick really makes my heart sing. It is a simple craft, but is a fun way to include your child’s hand print in to crafting. Chicks are a perfect signifier for spring or Easter and if you are a chick fan then you might like my easy chick cards or pompom chicks.
We didn’t have any yellow paper plates so we decided to paint our white plates yellow, which added in another step, but we love painting and remember it doesn’t have to be perfect. this is your child’s craft, so let them take the lead depending on the age they are. If you are not a fan of paint you could use crayon, pens or even oil pastels to colour in your plate. The beauty of this paper plate chick craft is that it is made from items that you are likely to already have in your craft box.
Paper plate handprint chick
This post contains affiliate links. If you make any purchases after clicking one of these links, I will make a small commission (hopefully enough to keep me in tea all year) – at no extra cost to you! This allows me to keep creating and sharing free tutorials and content for you. Thank you!
Materials
- Paper plates
- Sticky tape
- Glue gun, glue dots or double sided tape
- Orange card or craft foam
- Yellow card of craft foam
- Googly eyes
- Pencil
- Scissors
No products found.
Instructions:
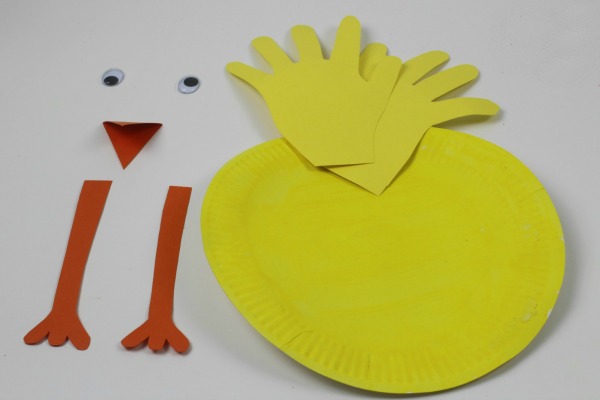
- If you have white paper plates then paint them yellow and allow them to dry.
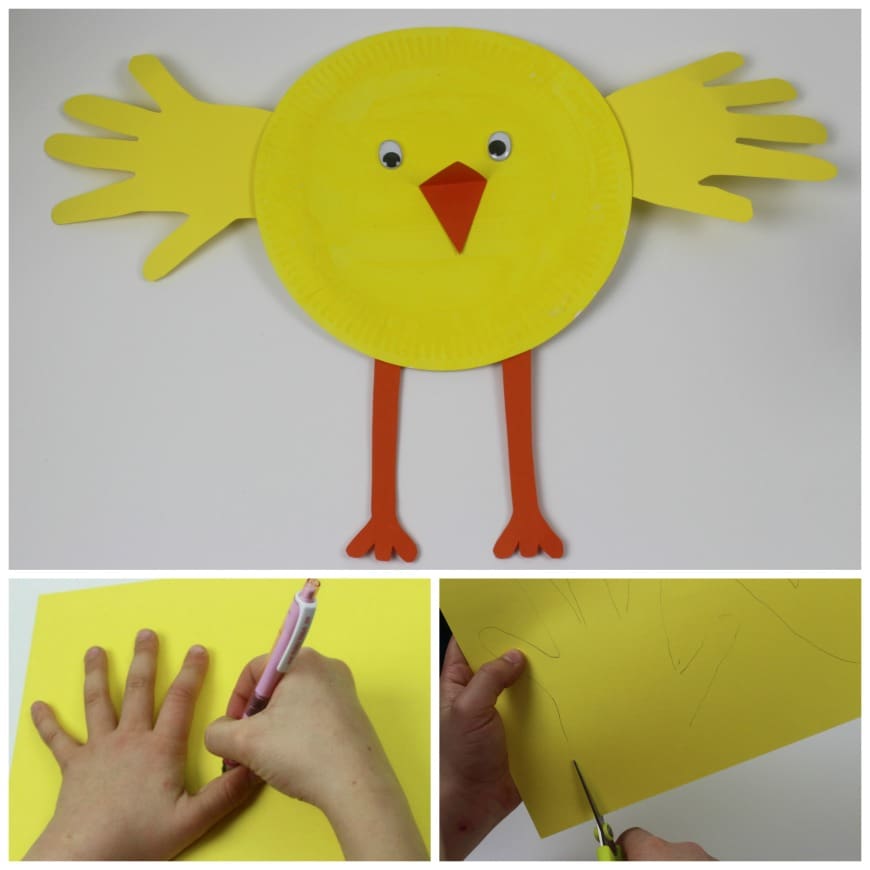
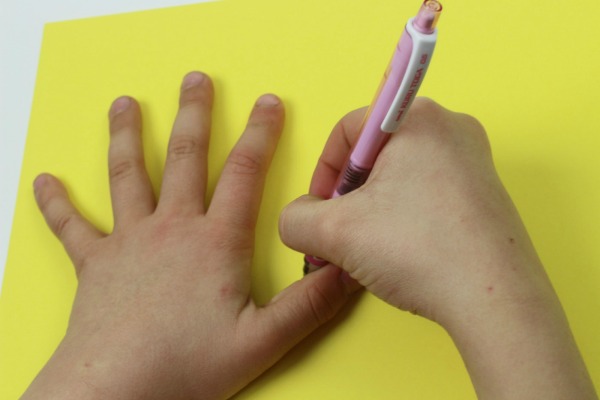
- Draw round your children’s hands on to yellow card or craft foam with a pencil. Children love drawing round their hands, it is a great fine motor skills and can be challenging for smaller ones so they may need help. My eight year old finds it really ticklish and also find drawing round his prominent hand really hard, so I took the opportunity to discuss being right and left handed.
- Once the hands have been drawn then it is time to cut them out which is a fantastic skill for older children and again something you can help out younger children with too.
- Then we sketched out the chicks legs on to orange card before cutting them out.
- On the rear of your plate attach the chicks lags with sticky tape and your childs hands will become the chicks wings.
- Turn the plate back over so the painted side is upright and now is the time to add your googly eyes.
- To finish off your chick needs a beak, so cut out a diamond shape in the orange card or craft foam and stick on with either glue or double sided tape.
- Oh and make sure you right your childs name and the date on the back and then you can look in years to come and compare their hand sizes.
Comments are closed.