

I have always loved the silhouettes you see of people and they have always intimidated me. But I decided that I needed to get over my fear and figure out how to make a silhouette much easier to make and bam I decided to have a go at making them on my Cricut Explore
The fact that is was coming up to my MIL’s birthday really spurred me on to give silhouette making a go.
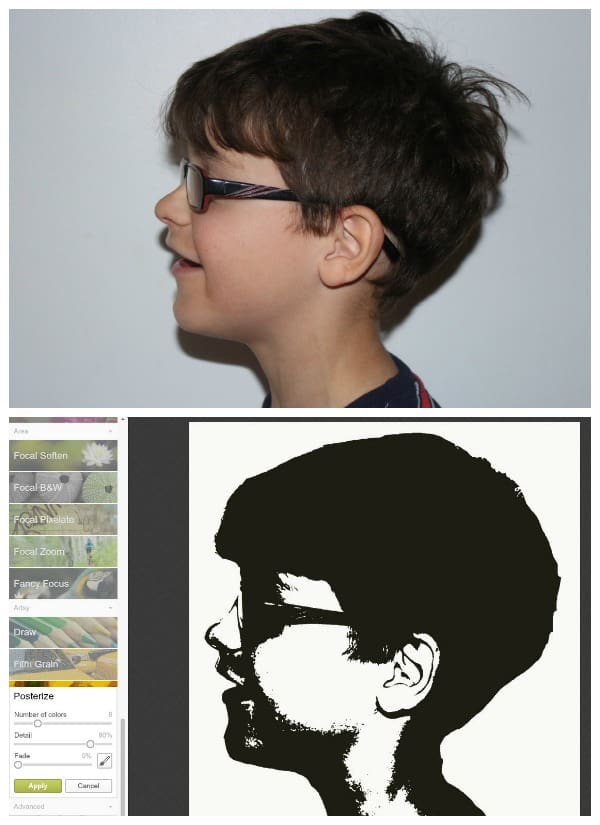
How to turn a photo into a silhouette using picmonkey
Firstly I took pictures of the boys in profile against a light coloured wall.
Then in picmonkey using the posterise setting I transformed it, using two colours and 100% detail.
Mini had a shadow due to his hair, so using the clone tool I erased it out and pow I had a pretty decent silhouette.
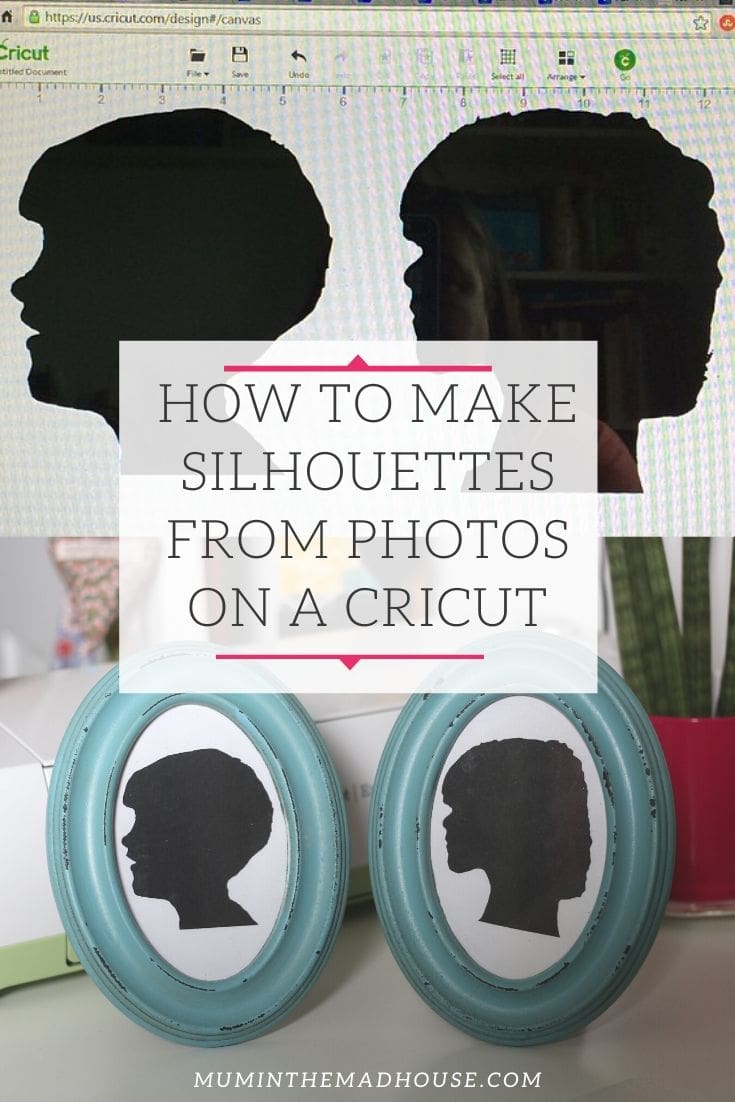
Uploading an image to the Cricut Design Space
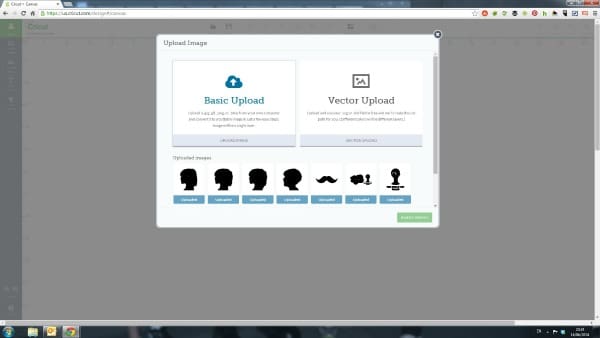
Go to design room and start a new projects. Then click on the upload on the left hand side and then we want basic upload for the silhouette.
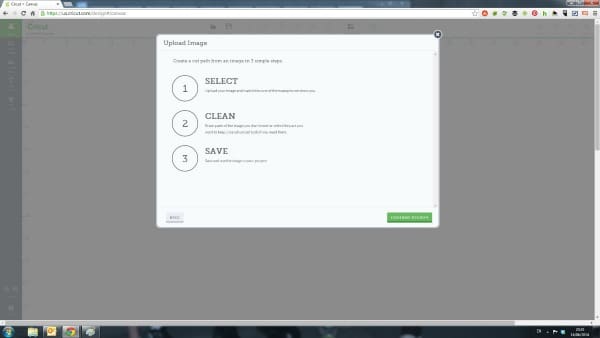
Before you upload the image you get a page showing you the steps for uploading, just click on to “continue to step one”.
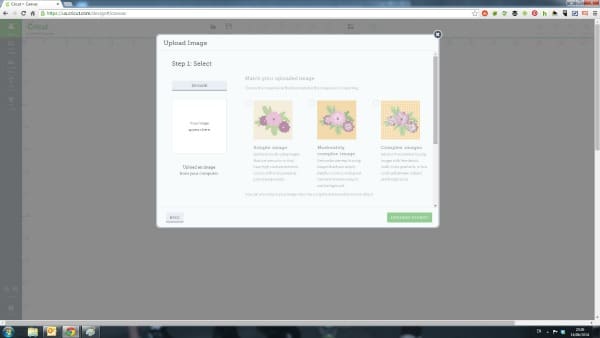
You need to then click on browse at the lest and pick the image you want to upload, which will appear in the box.
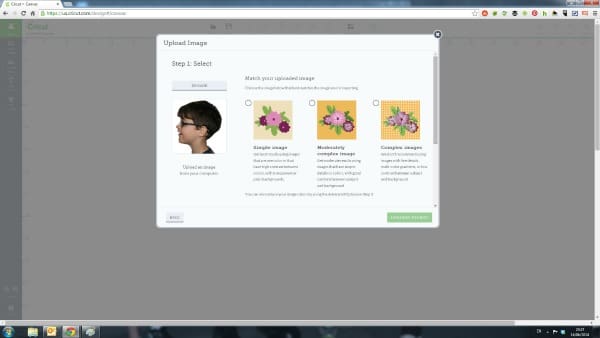
Click on simple image and then continue to step two
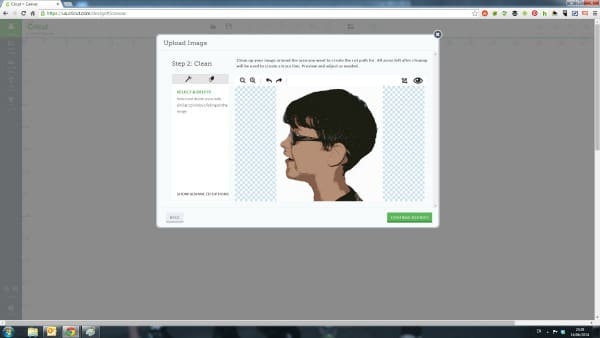
You image will them appear larger on the screen in a square with the sides hatched out. This is the area that is going to be empty.
As our image is high contrast, we are able to just use the select & delete wad on the areas we want to disappear
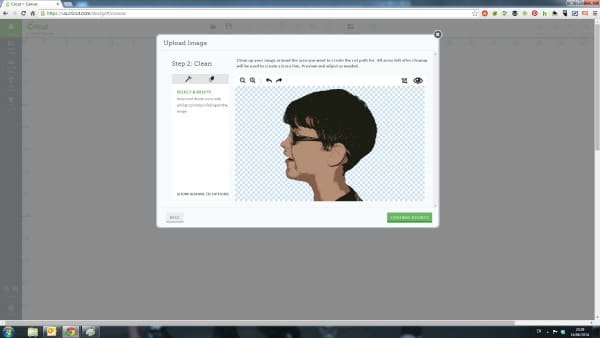
Once we only have the part of the image on screen we want, then it is time to continue to step 3 which is saving the image
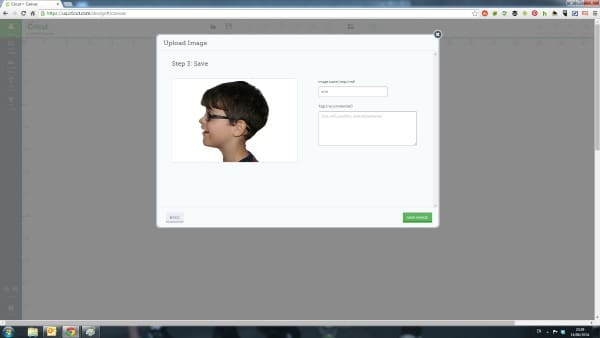
This is where you give your image a name and tags (especially if you are going to upload lots of images).
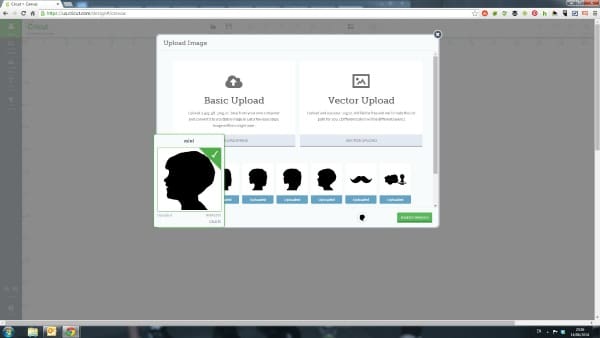
Then you get to tick the image you want on your design space to work on and insert image
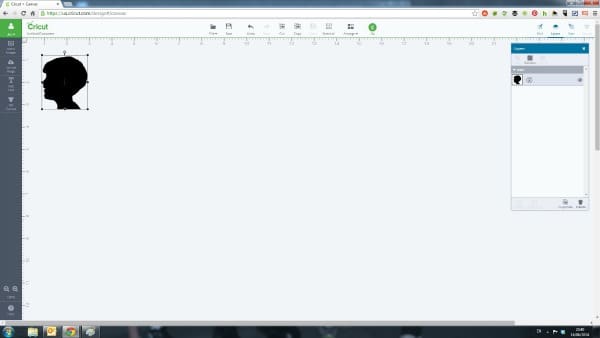
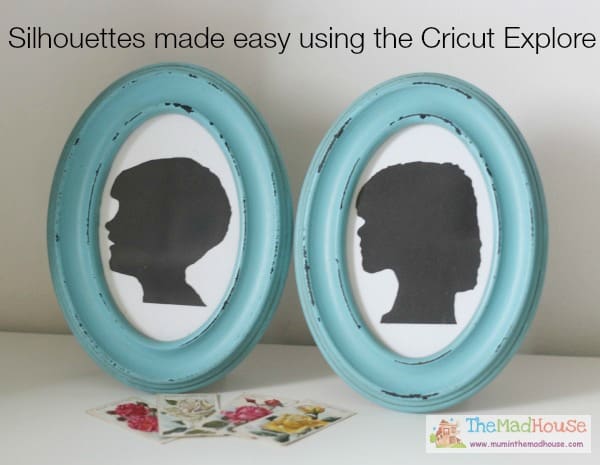
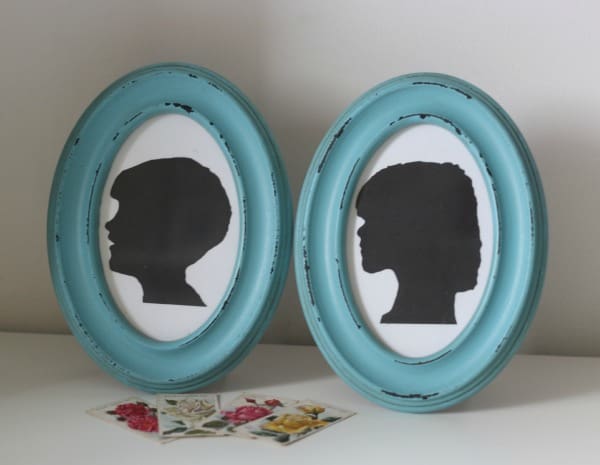
Then the silhouette is in your design space to edit the size if you want to. I bought my frames from Dotcomgiftshop and they were under £6 each as I wanted a traditional style to go with my MIL’s home. The card was matt black from Viking Direct and is 240 gsm heavy cardstock.
The beauty of the new Cricut Explore
is it does a fantastic job of cutting all the minutiae making the silhouettes look so fantastic.
We love these so much, that I made another set for our home and as I had already imported the images to Design Space it took all of five minutes to load the paper and print them off.

Comments are closed.