
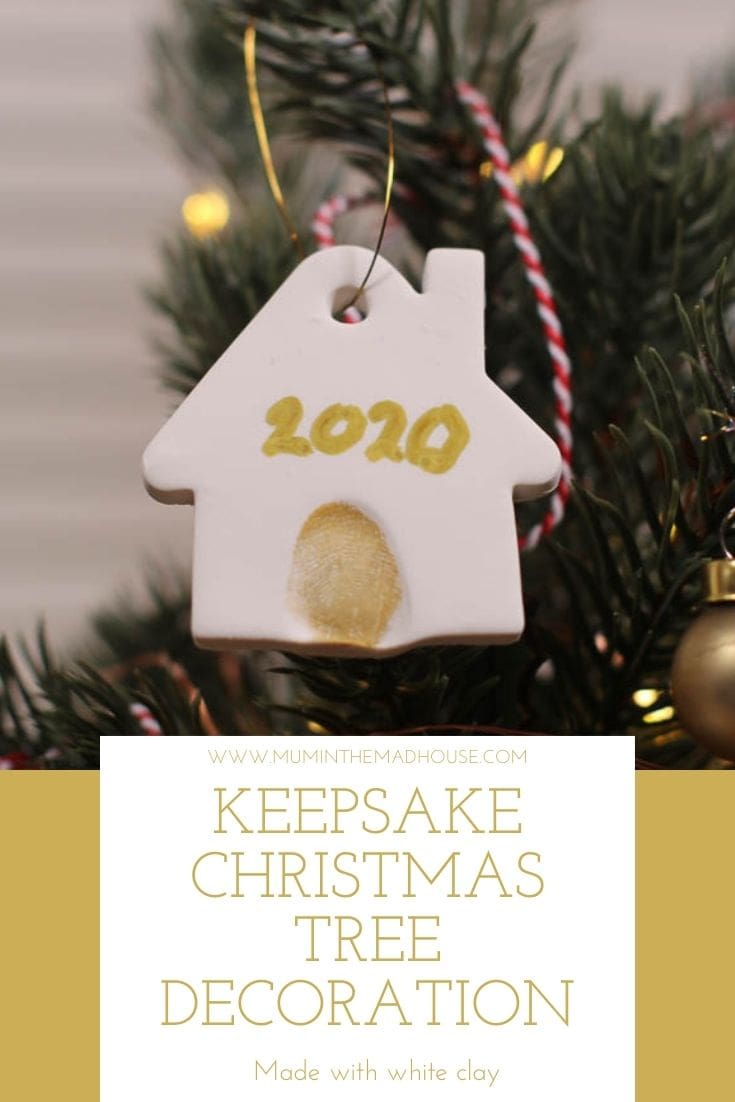
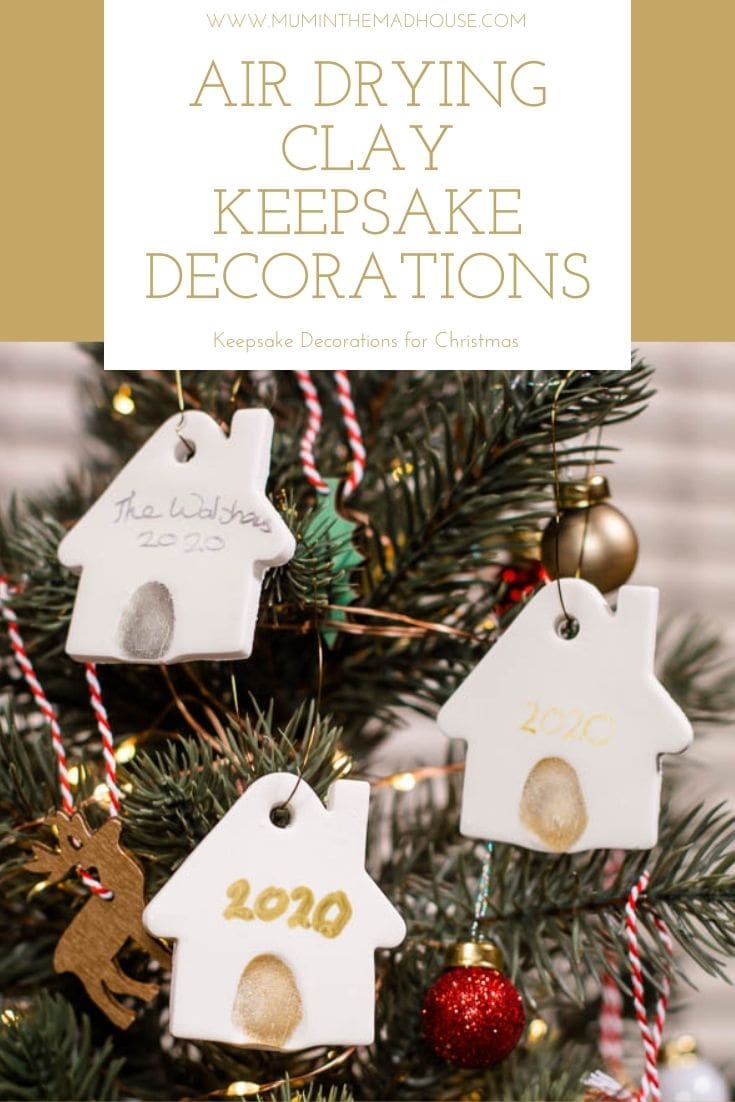
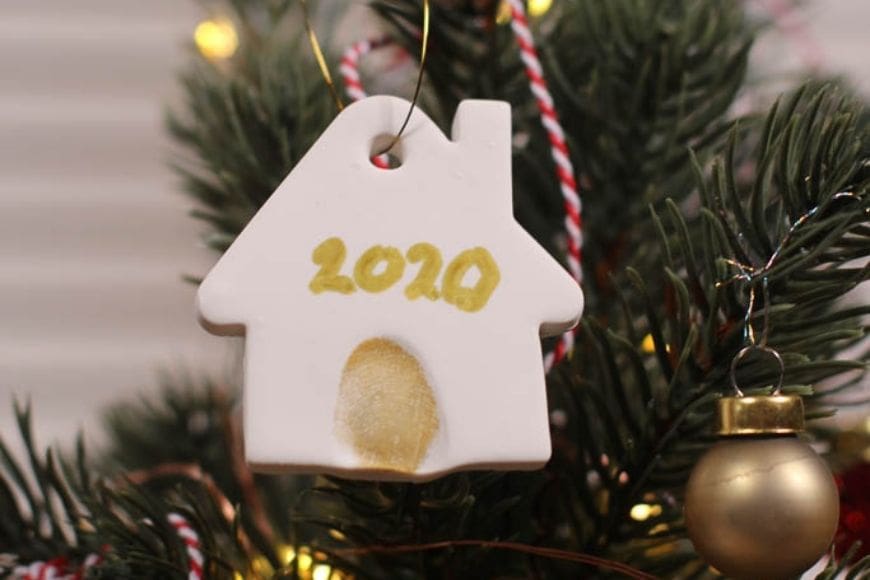
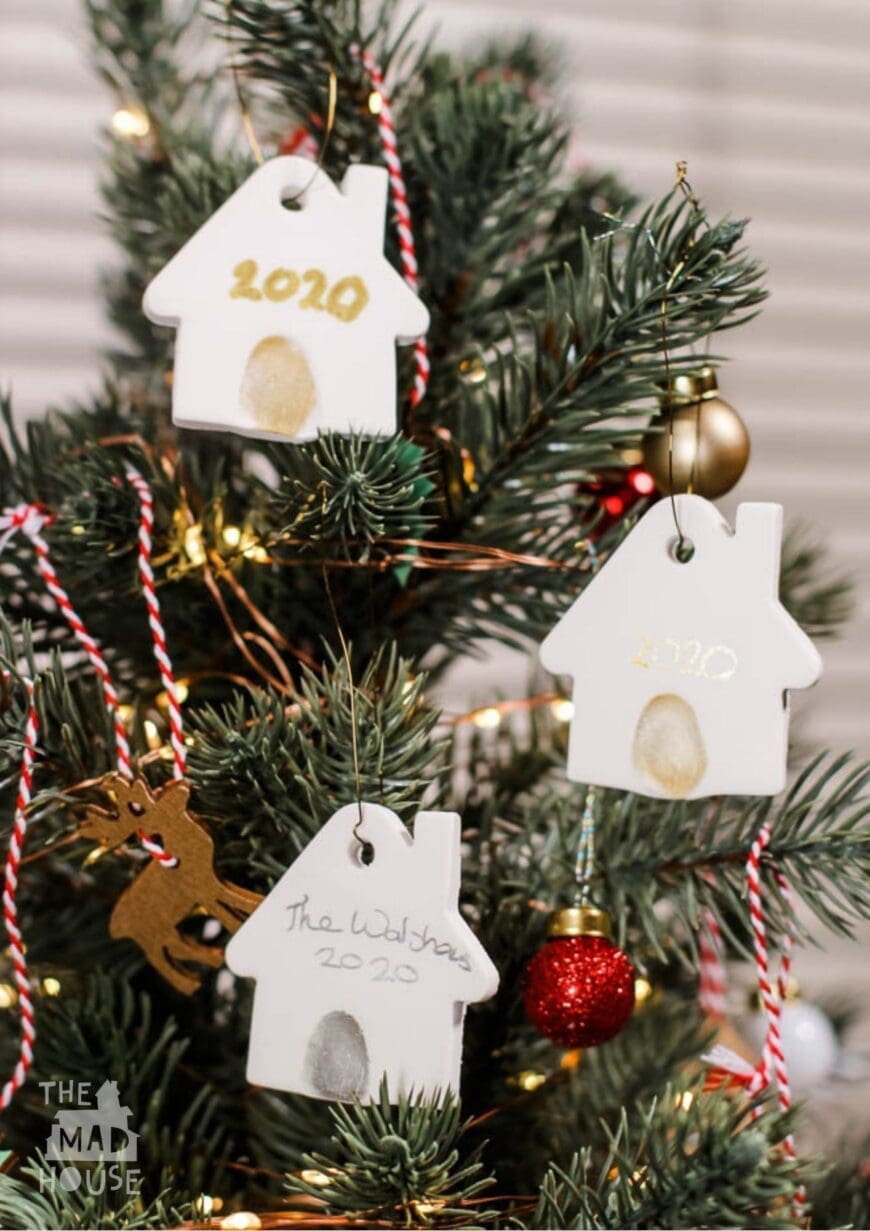
This Simply Clay House Christmas Tree Decoration is the perfect way to memorialise a year – the year we stayed home. It is a super simple way to use air dry clay to make a permanent reminder to bring our year after year and place it on our family Christmas tree.
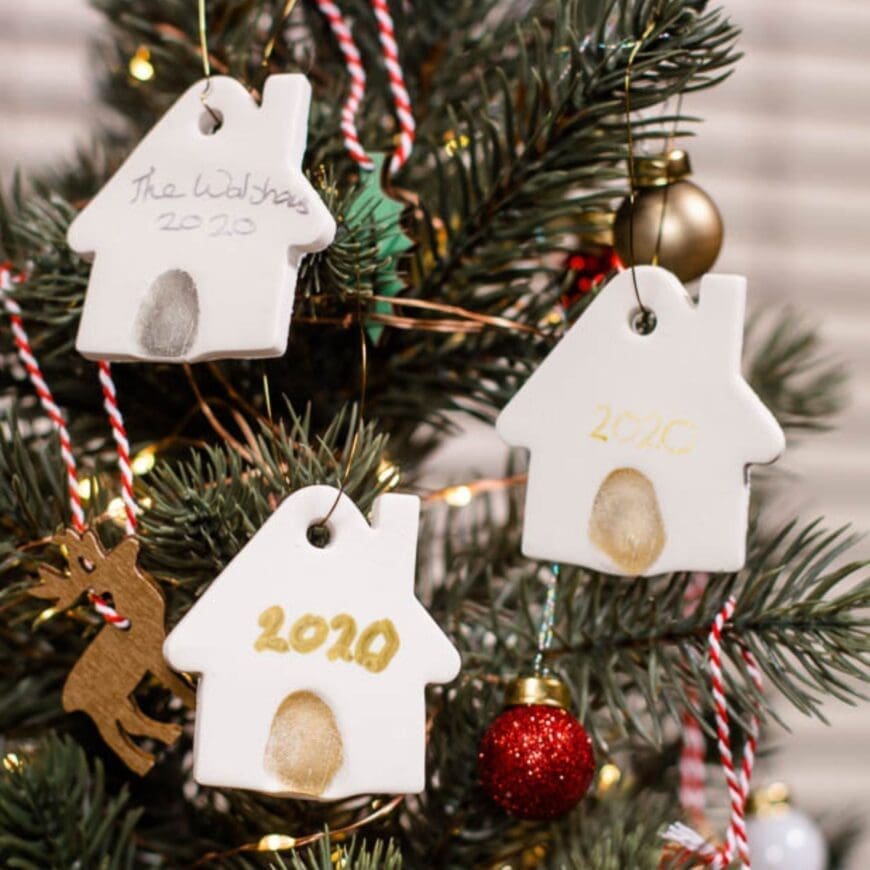
I am a sucker for Homemade decorations and Christmas craft. I love making with the kids and bringing them out each year and reflecting on the memories that they bring. They bring so much joy and 2020 was the year we stayed home so these Clay House Christmas Tree decorations are perfect.
This year has been a strange one and unhappy for some. For me, it has been mainly a blessing as it brought me more time with my teenagers which wouldn’t normally happen.
Our homes became a haven during this crazy year, they kept us safe and warm. My home was filled with love, laughter and sometimes quite a lot of chaos and I wanted to make something that I could remember the year with and I love air dry clay Christmas ornaments,
Types of clay perfect for Christmas Tree Decorations
This post contains affiliate links. If you make a purchase after clicking one of these links, I will make a small commission (hopefully enough to keep me in tea all year) – at no extra cost to you! This allows me to keep creating and sharing free tutorials and content for you. Thank you!
- Air Drying Clay (UK Link/US Link)
- Polymer Clay – Staedtler FIMO (UK Link/US Link) or Sculpey clay (UK Link/US Link)
- Microwave Drying Clay (US Link/UK Link)
- Homemade 3 Ingredient white clay
- Homemade two-ingredient white clay
- Homemade White Salt Dough
No matter what type of clay you use, you need to check out the drying process and never leave them to dry over a direct heat source like a radiator as they will crack. Some you can place on parchment paper and bake in the oven (in fact that is essential for polymer clay).I let my air drying clay set on wax paper as it is super easy to remove when dry and if I am in a hurry then I use microwave drying clay to make my Christmas tree ornaments.
These House shaped Christmas Tree Decorations would make a great gift for someone spending their first Christmas in their new home.
How to make House Clay Christmas decorations for the tree
Materials:
- Clay of your choice!
- House cookie cutter (UK Link/US Link)
- Metallic Ink Pads (UK Link/US Link)
- Gold Wire (UK Link/US Link), ribbon, thread or peices of twine for hanging from the tree
- Cookie circle cutters (UK Link/US Link)
- Straw or skewer
- Adjustable Rolling Pin (UK Link/US Link)
- Silicone Sheet (UK Link/US Link)
- Metallic Pens (UK Link/US Link)


These House clay Christmas Decorations make a fabulous keepsake gift for grandparents and godparents. I have come to treasure these sorts of tree decorations now my boys are getting older and this year I have made extra for our friends and family.
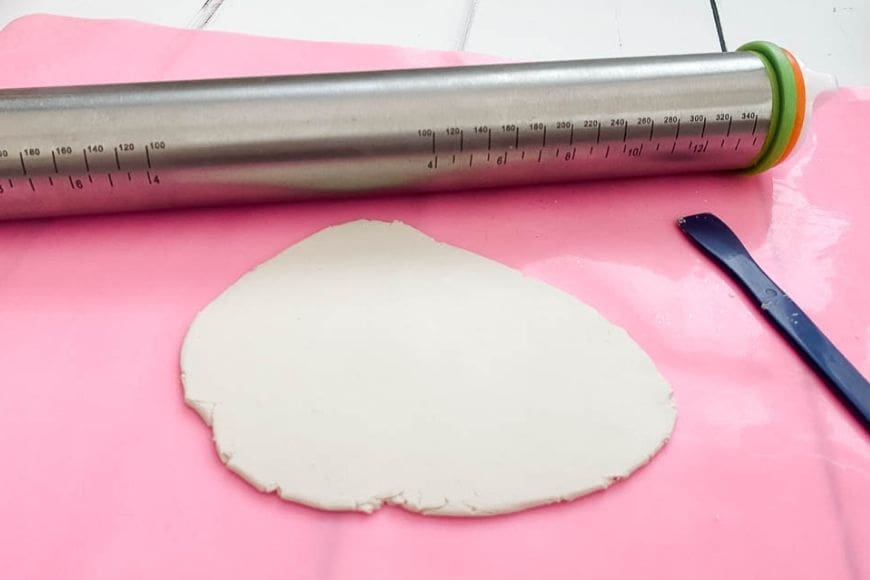
Start by rolling out your chosen clay to about 1/4 inch in thickness. I use a silicone mat to ensure smoothness and do a small amount at a time turning it over.
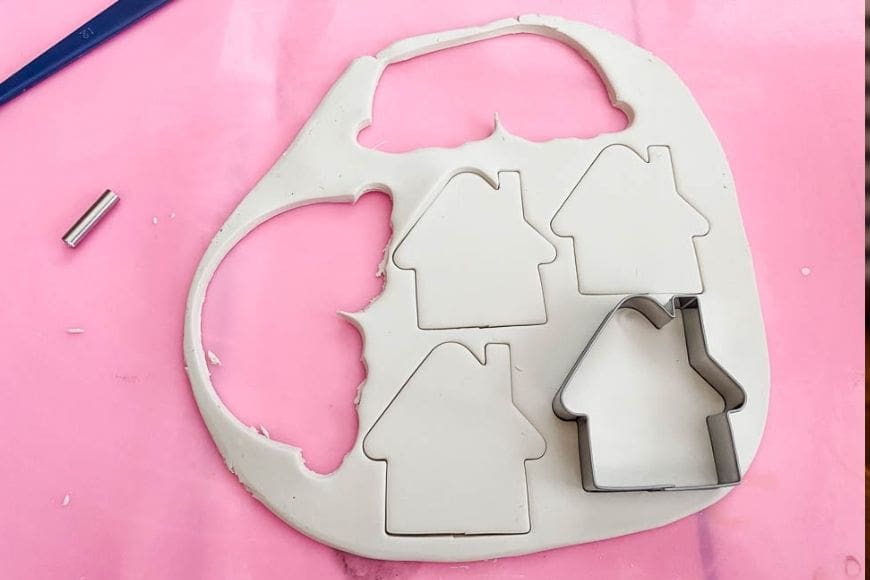
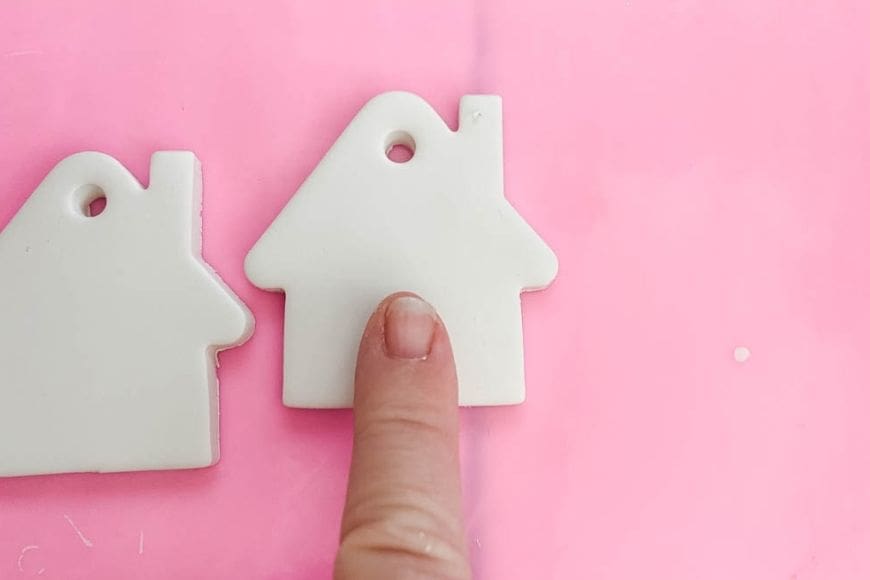
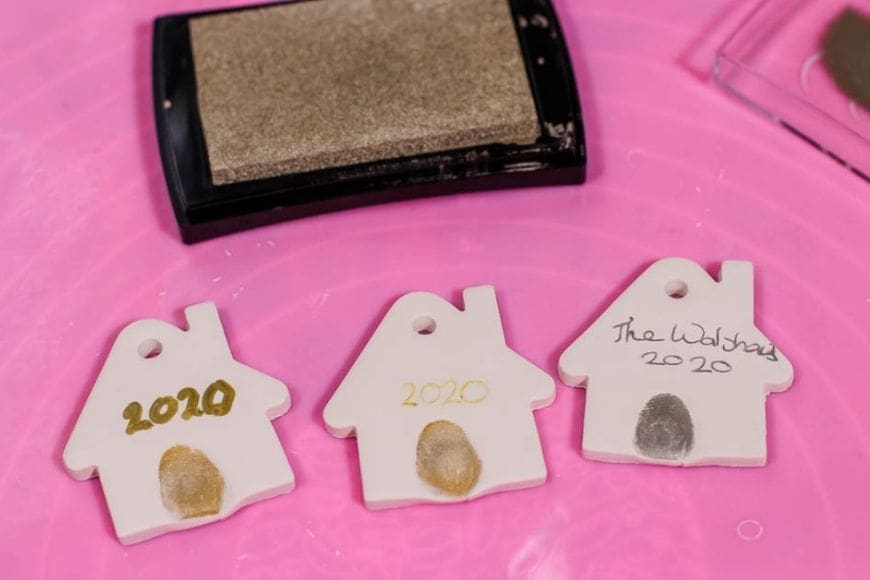
Use your cookie cutter to cut out the houses. Remove the clay from around the houses and press a finger in to make an indent and then make a small hole with your round punch or straw and allow to dry.
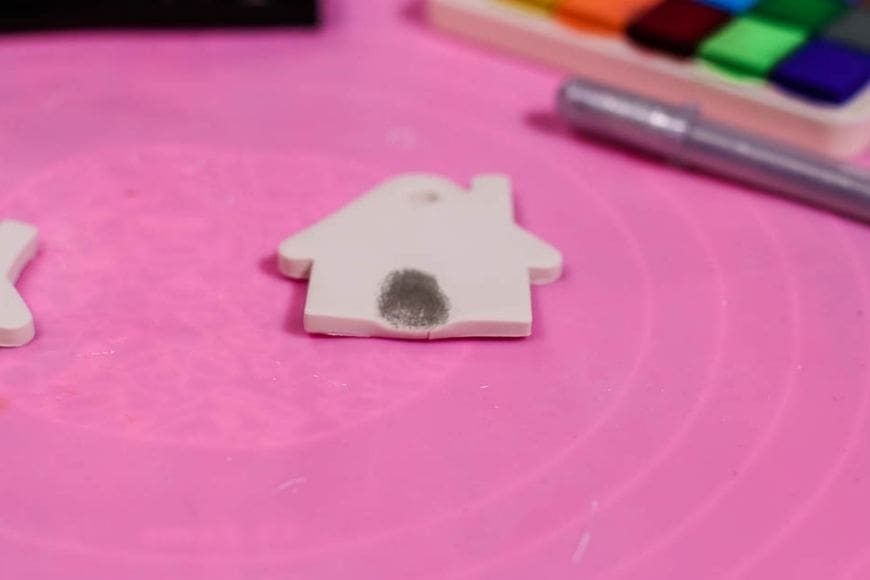
Once dry it is time to decorate. Colour over your fingerprint indent with ink on your finger. We chose metallic colours. If you want to paint your houses then use acrylic paints, but I like the contrast of the metallic and the white.
You can then add a date or family name
I use a nail file to remove any rough edges on the clay once it has dried to create a smooth surface. Then you can add your loop to hang your decoration from the tree. We used wire for these, but we used a piece of twine and beads for our white clay Christmas fingerprint ornaments.
Depending on the clay you have used, if you want your decorations to last a lifetime then I would encourage you to spray varnish your creations. We are fans of Rustoleum Crystal Clear (UK Link/US Link) and it comes in gloss or matt.
I also think that tiny stamps would work really well on this, especially if you want something a little less handmade and rustic!
If you like this make sure you check out other clay decorations:
- Fingerprint Christmas Tree Ornament – Air Drying Clay
- DIY Rainbow Clay Christmas Tree Decorations
- Gold and White Air Drying Clay Christmas Decorations
- DIY Festive Clay and Cork Trees
- Clay Mittens Christmas Decoration
- Festive and Beautiful Christmas Clay Crafts
- Air drying clay ornaments
- Glow in the Dark Clay Snowflake Ornaments
- DIY Clay Star Candle Holders
- Make an adorable white clay Christmas fingerprint ornament
- White clay dough. Corn Flour dough, a fab alternative to salt dough
- DIY Christmas Tree Luminaries
- DIY Fingerprint Snowmen Christmas Ornaments
- Cornflour dough tealight holders for Solstice
Comments are closed.