

Melt and Pour Soup is a fabulous craft material and so easy to use with just a few simple steps and with this beginners guide to melt and pour soap will give you lots of hints and tips for making fabulous soaps. I love that you don’t need to invest in lots of things as most of what you need you will already have in your kitchen and can keep using for both cooking and soapmaking. Unlike traditional soap making you don’t use sodium hydroxide or potassium hydroxide so there are no caustic substances to worry about and no need to wear masks or gloves.

Traditional Soap is made by combining oils and fats and sodium hydroxide lye. which causes a chemical reaction called saponification. Melt and pour soap has already gone through the saponification process. meaning you don’t have to worry about handling the chemicals, or getting the right balance and also you don’t have to cure the soap. It’s ready to use as soon as it’s cool and hard.
If you are interested in learning about traditional botanical soap making then my go-to is Garter Stitch Farm. Kat and Kevin offer online botanical soapmaking courses and I can vouch for the quality of their soap as we have used it and I have gifted it too when they used to sell it.
The Beginners Guide to Melt and Pour Soap
Melt and pour soap is an excellent option for beginners. All you have to do is melt the premade base, customize it with your favourite colours and scents, then pour it into a mold. As soon as it is set you can use it. Once you get used to the process, you will move on to more advanced techniques like layers and swirls in no time. I would suggest that you read those this beginners guide before you start to make your soap.
Materials and Ingredients
- Soap Base of Choice
- Fragrance (we like essential oils but you can buy specific fragrance oils).
- Mica Powder
- Rubbing Alcohol
- Soap Colourant
Melt and Pour Soap Base Options
You can get a wide variety of melt-and-pour soap basis nowadays, including goat milk and shea butter. The benefits of melt and pour soap bases are the same as cold process soap but without any of the risks and are much quicker to make. The melted soap base is designed to have all you need and to have a fragrance and colour added if you wish.
- Goat Milk Melt and Pour Soap Base – White in colour, this has a creamy texture and goat’s milk has been added to soap for centuries. It is ideal for sensitive skin.
- Shea Butter Melt and Pour Soap Base – I love that you can get this both SLS-free and included. As a mum to a child with eczema this is perfect for sensitive skin.
- African Black Melt and Pour Soap Base is one of the most chemical-free and natural soap bases we have seen on the market. It contains no SLS, SLES, MPG, Parabens or Sulfates and is made from raw shea butter and coconut oil making it perfect for sensitive skin.
- Argan Oil Melt and Pour Soap Base is another base that is SLS and SLES Free.
- Clear Glycerin Melt and Pour Soap Base is an SLS free base but not opake making for bright and vivid colours with a see-through quality.
- Jelly Melt and Pour Soap Base – This is such a fun and unique soap base, soap with the wobble of jelly that is transparent and so much fun. This is perfect for making with kids and for them to have fun getting clean with,
- Shea Butter and Oatmeal Pour Soap Base – This is a white soap base containing shea butter for added moisture and oatmeal for a gentle exfoliating effect.
- Triple Butter Melt and Pour Soap Base – An SLS and SLES free white soap base made with mango butter, shea butter and cocoa butter and create a beautifully soft lather.
Fragrance
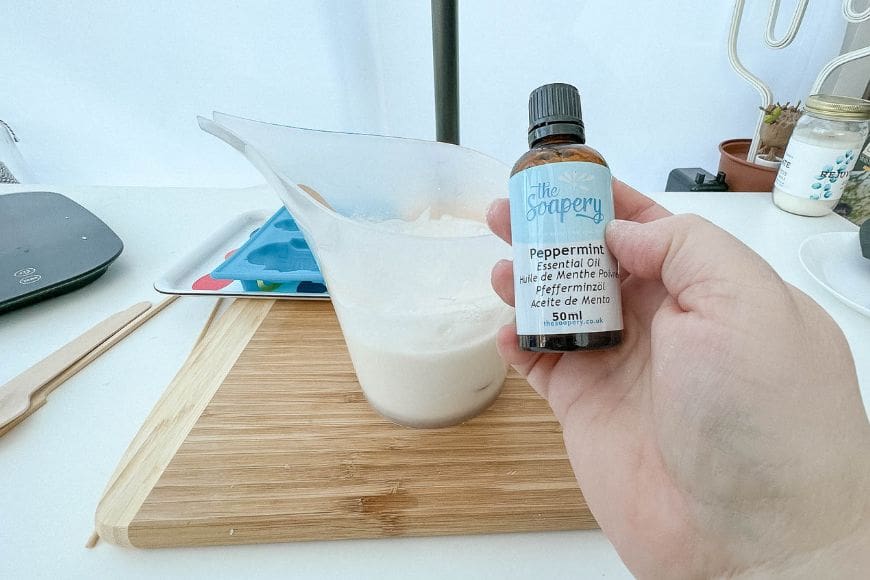
You can scent your soap with fragrance oils or essential oils. For melt and pour soaps it is recommended to use 50g (in weight of essential oils or approx 58ml) per kilo of soap. When choosing fragrance you need to ensure that it is designed to be used on the skin. If you are unsure then check with the manufacturer before use.
Colourants
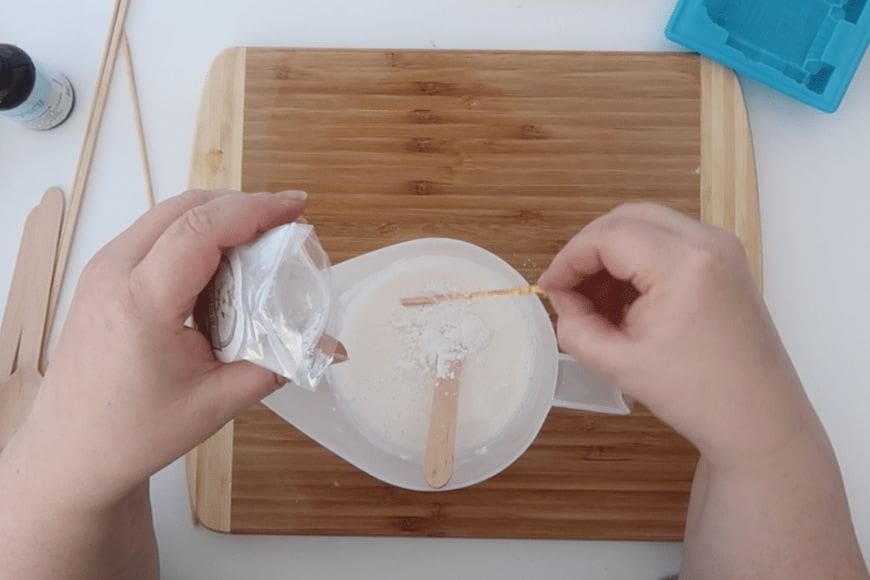
We like using cosmetic Micas and colour blocks. They are easy to use without diluting the base, but they look fantastic in the finished bar of soap. You know everything that is going into your soap and want it to be safe and gentle on the skin which is why we would avoid using food colouring and wax crayons to colour your pour and melt soap. Also, food colouring can stain and you wouldn’t want that!
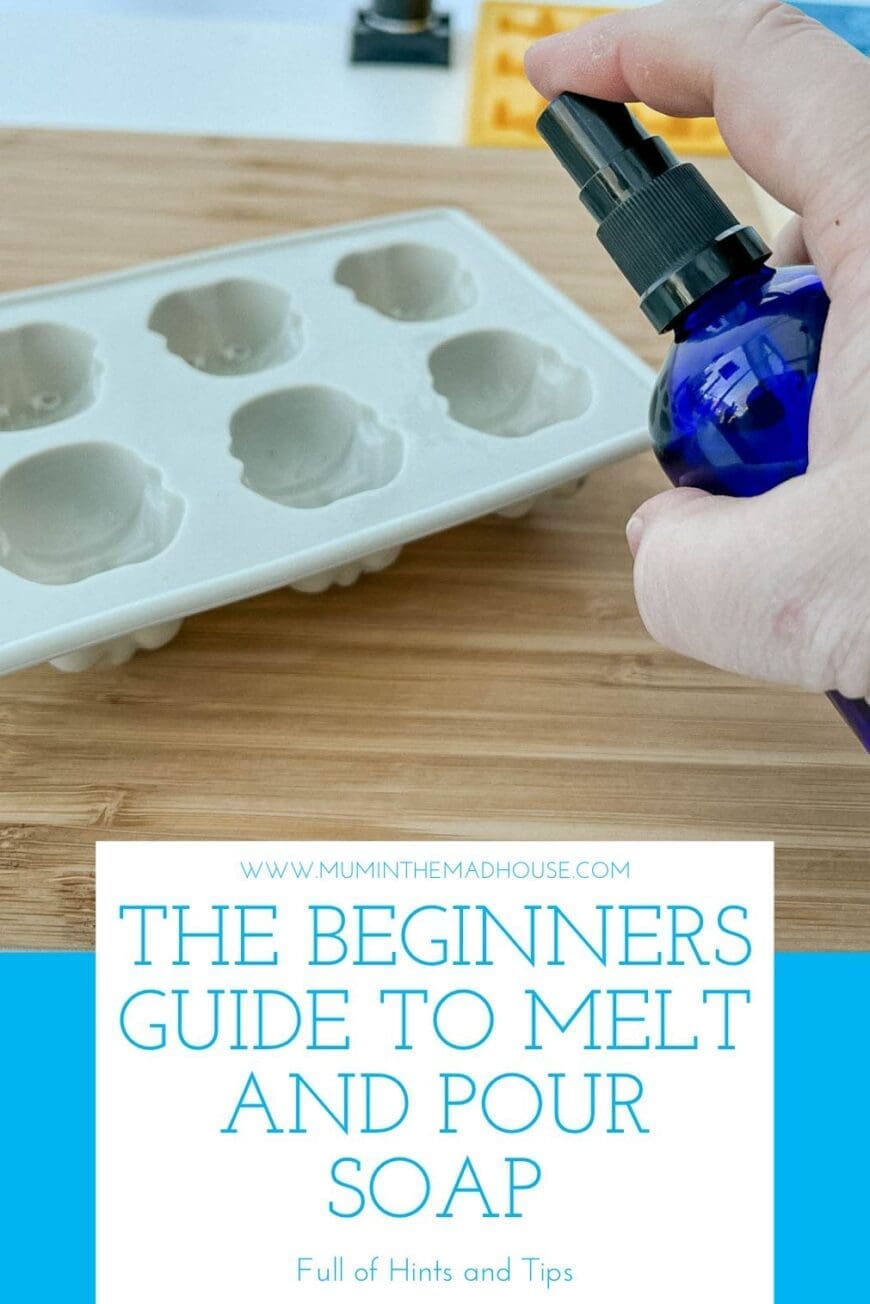
TIP– Rubbing Alcahol, sometimes called surgical spirit is a brilliant addition to your soap making kit. If you pop it in a spray bottle them it is used to help remove air bubbles in your soap and also to prepare the molds to ensure the soap base fills every nook and cranny .
Equipment Required
- Jug
- Small Spray bottle
- Knife
- Spoon
- Chopping board
- Microwave
- Bowl
- Pan (optional)
- Silicon Molds
- Cling Film (optional)
To make life simpler gather together all your equipment as depending on the air temperate where you live the soap will harden fast. Most of the equipment you need you will already have in your home, including a jug, knife, small spray Bottle, pan or microwave. We prefer melting our soap base in the microwave rather than using a double boiler (A bowl placed over a pan of water) for ease.
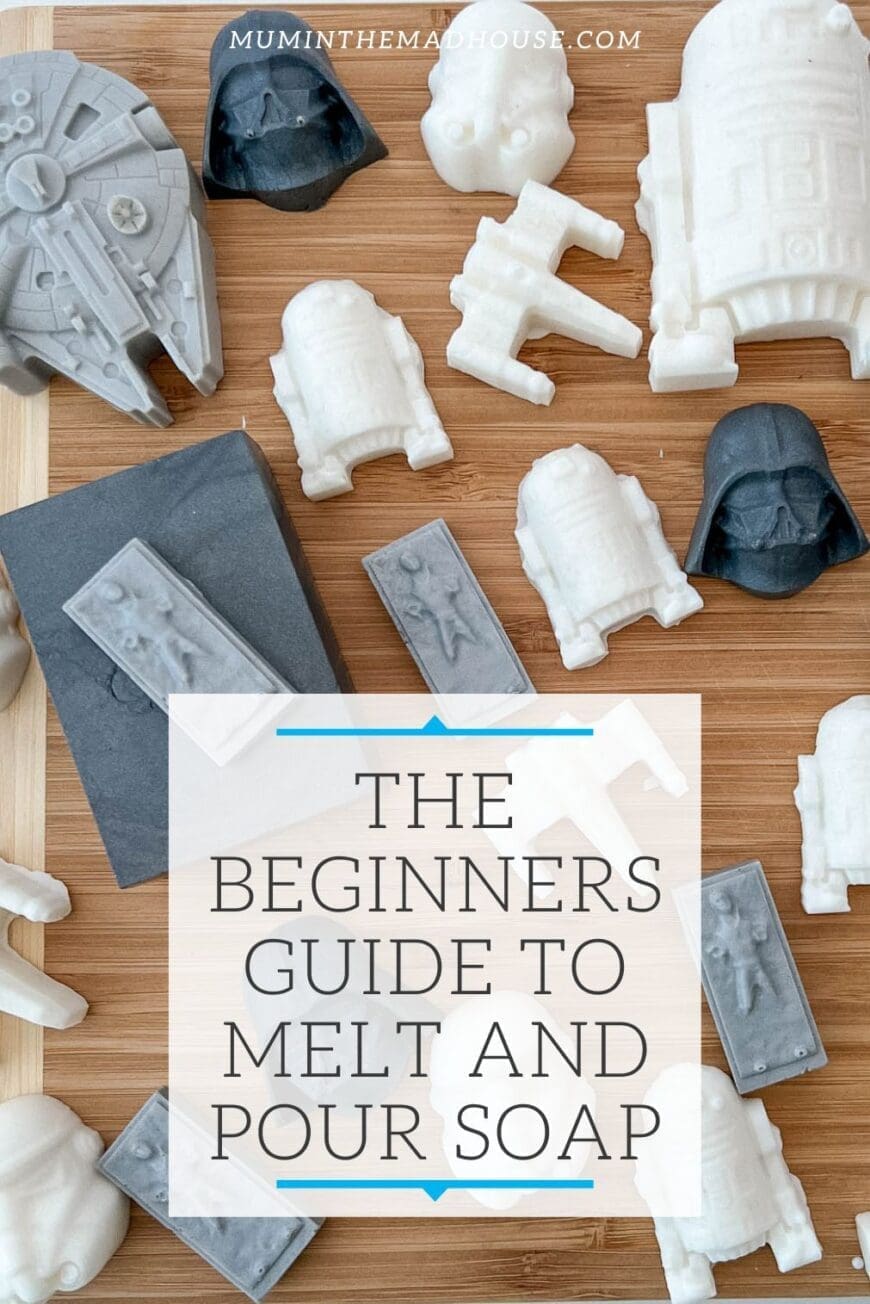
You can now purchase some amazing soap molds off Amazon. We have a full set of star wars moulds that we use for soap making and ice cubes. You can use these smaller molds in conjunction with a bar shape to make a larger bar of soap or even sink them into some clear soap.
How do you know how much base to melt? Start by pouring water into your soap mould and then weighing how much it takes. Add an axtra 5% just to be sure.
How to melt your soap base
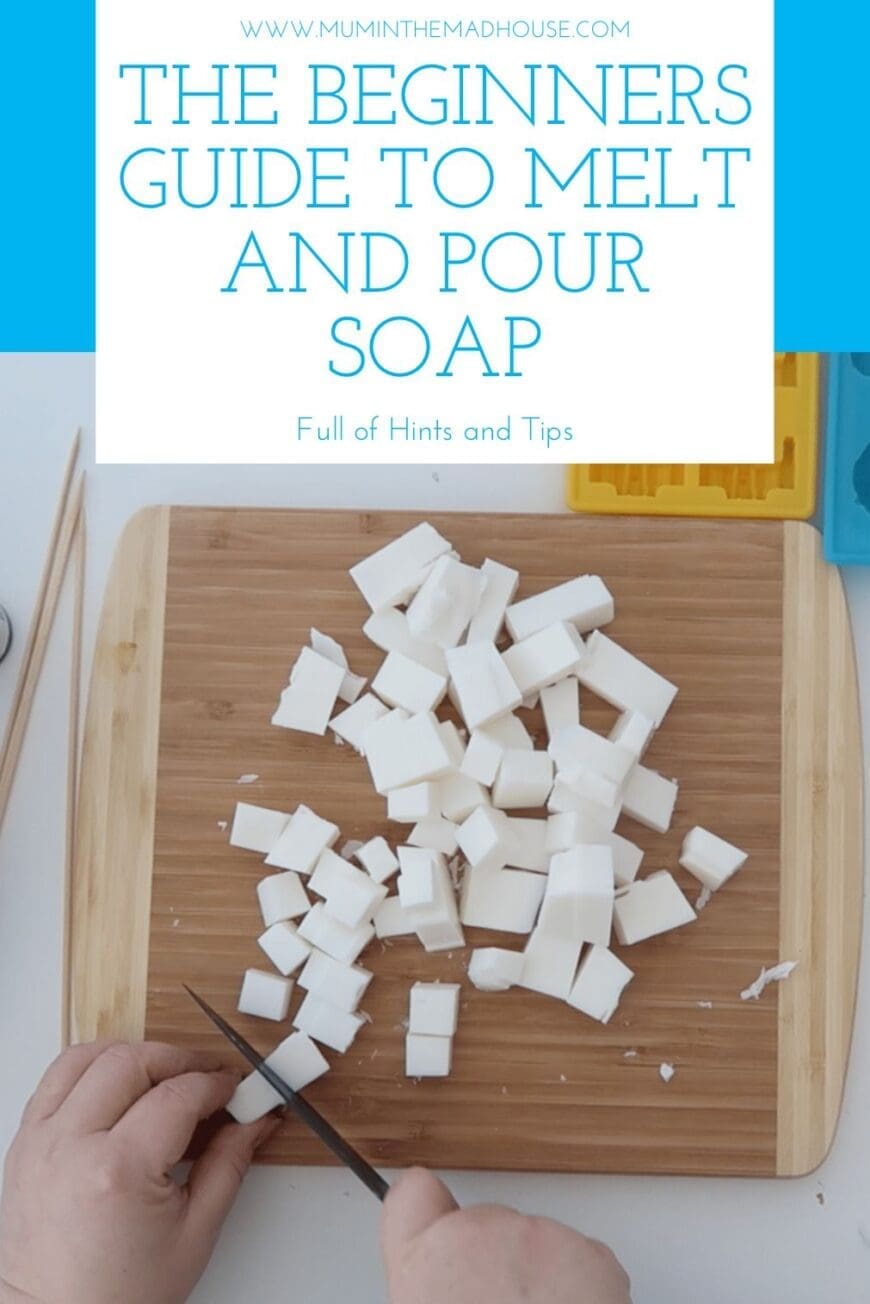
We love to melt directly in the jug in the microwave on a medium setting (it saves on washing up and is kid friendly). Start by chopping up your soap base into small chunks (the smaller the chunks the quicker they melt). Heat your base on 30 second bursts in the microwave until it’s fully melted. You can gently stir between bursts to make sure the clumps are all separated.
Optional – Once fully melted, spray a little rubbing alcohol to disperse the bubbles and place the clingfilm over the top of the jug which will help prevent skin from forming on the melted soap whilst you prepare the colour and fragrance.
Start by adding your colour to the soap. If using Mica powder then take care to stir well through and remove any lumps without adding air to the mix and add the cling film over the jug when complete.
The ideal temperature to add your fragrance is 60 degrees c, so you can check if you have a thermometer. If bubbles form whilst stirring, give it a spray with rubbing alcohol.
Adding to your Molds and Setting
Depending on your intricate your mold is you can prepare it by spraying with your rubbing alachol and then you want to pour your melted soap in the mould gently and idealy in one smooth pour.
I like placing my moulds of to a tray and then I can move the tray. Setting times vary depending on where you are in the world (the air temperate) and the size of your block. The soap should be hard enough to unmold in a few hours. You can hurry this along by putting the mold in the refrigerator, but don’t put it into the freezer. Sometimes it can be easier to move them if they have been refrigerated.
There is no more waiting involved and the soap can be used straight away! Wrap them in cling film or greaseproof paper to stop them attracting water. until you use them.
Please note: This beginners guide to melt and pour soap tutorial is designed for personal use only. You will need to follow all legal responsibilities before selling any products that come into contact with skin.
Pingback: DIY Star Wars Melt and Pour Soaps - Mum In The Madhouse