
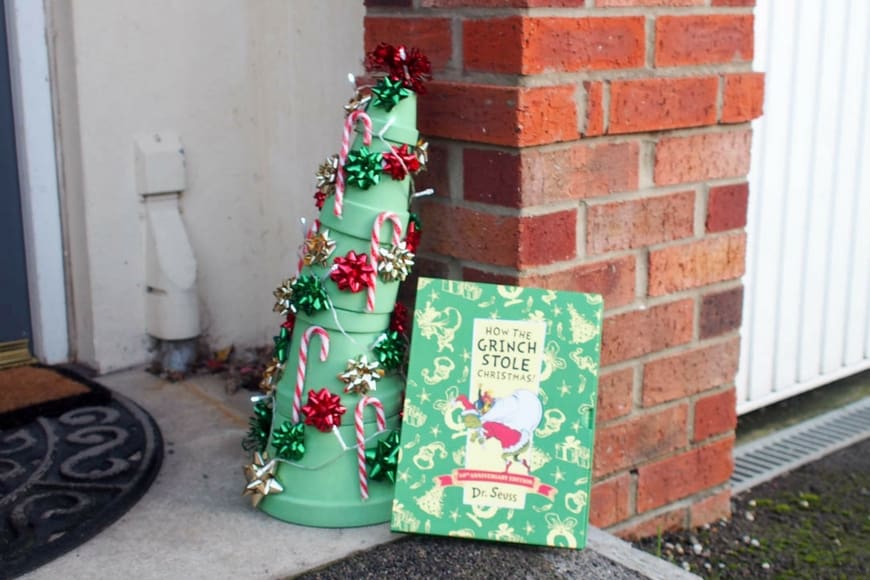
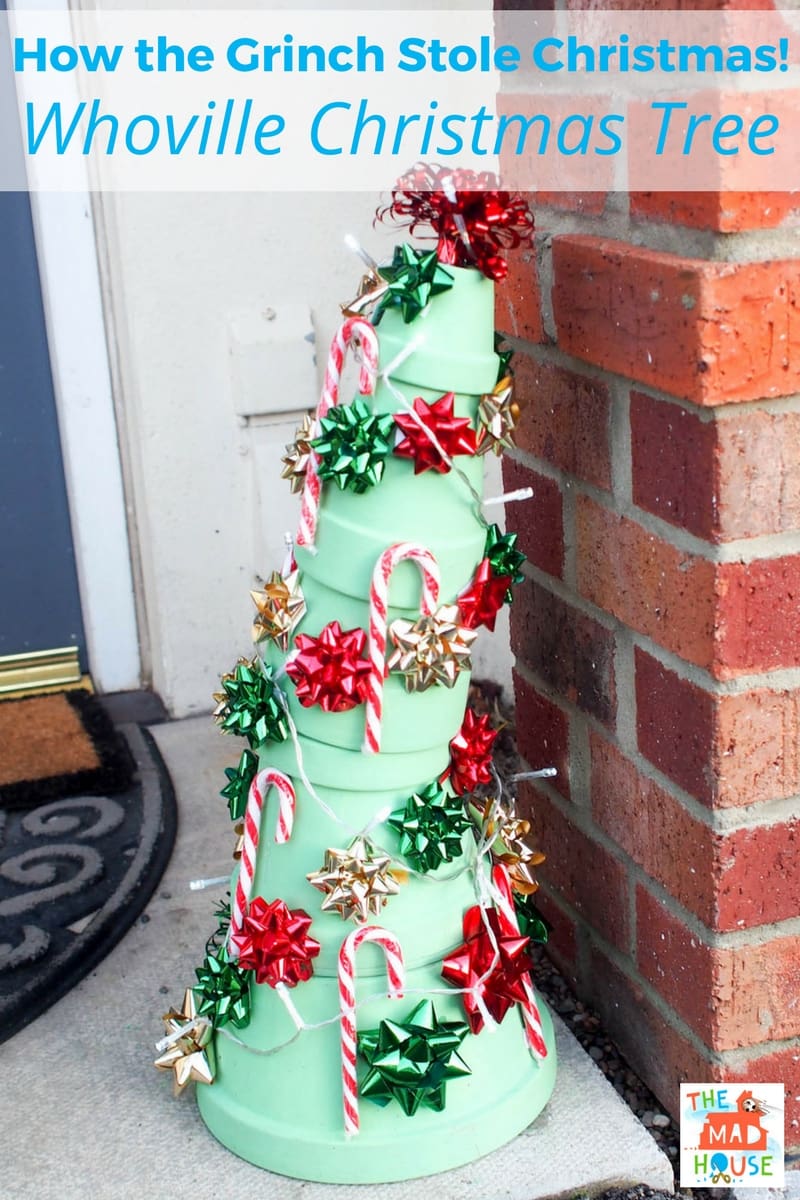
This fabulous Whoville Christmas Tree is inspired by the classic Dr.Suess How the Grinch Stole Christmas (UK Link/US Link)! Do you know that it is 60 years since it was first published and HarperCollins sent me a fabulous 60th anniversary edition of the book which totally was the inspiration for this Green Ginch tree!
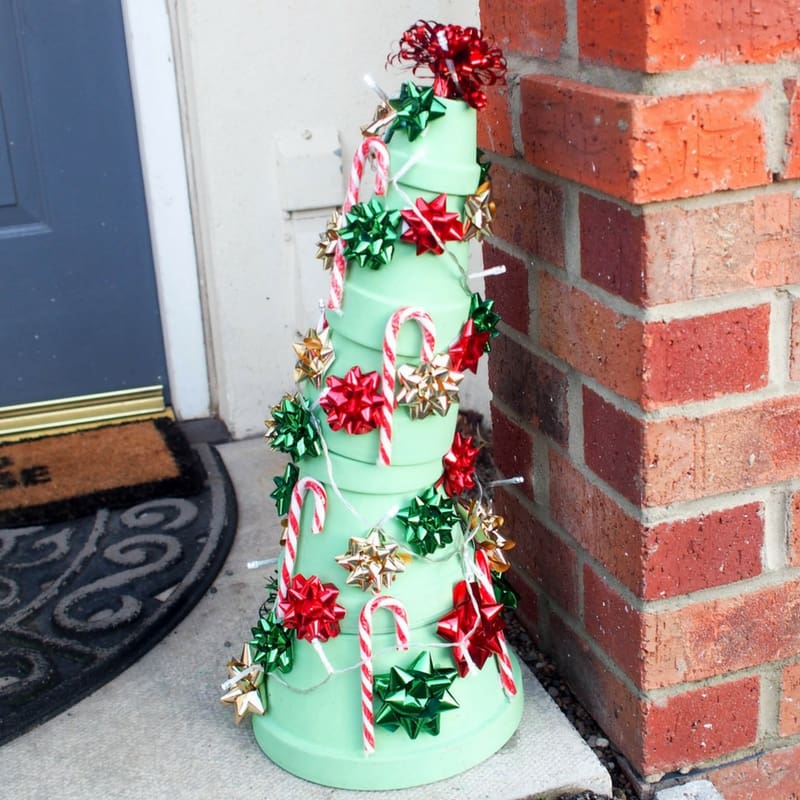
We decided to make a Whoville Christmas Tree to brighten up the outside of our house and since we put it out at the weekend everyone who has visited has commented on it and loved it even the delivery men who can be a little Grinch-like at this time of year! It is really easy to make and perfect for doing with the children. Maxi and I made ours, in fact, he did most of the work.
Whoville Christmas Tree
This post contains affiliate links. If you make a purchase after clicking one of these links, I will make a small commission (hopefully enough to keep me in tea all year) – at no extra cost to you! This allows me to keep creating and sharing free tutorials and content for you. Thank you!
Materials:
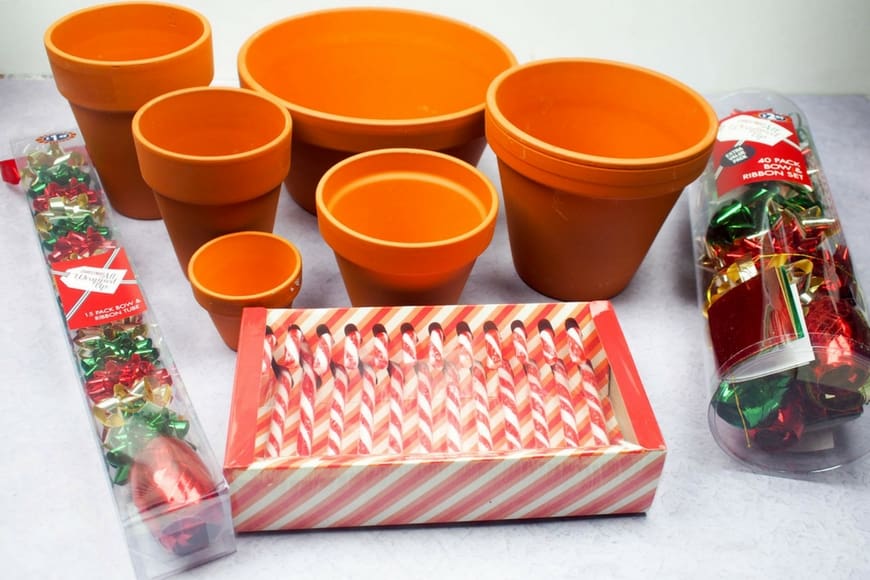
- A selection of Terracotta Plant Pots (Depending on the size of the tree you want) (UK Link/US Link)
- Green Paint (UK Link/US Link)
- Spray varnish (If putting outside) (UK Link/US Link)
- Battery operated outdoor lights (UK Link/US Link)
- Candy Canes still in their wrappers (UK Link/US Link) – if this was to be used year after year then use candy cane decorations.
- Hot glue gun (UK Link/US Link)
- Metalic Bows for present wrapping in Green, Gold, and Red in various sizes. (UK Link/US Link)


How to Make a Whoville Christmas Tree
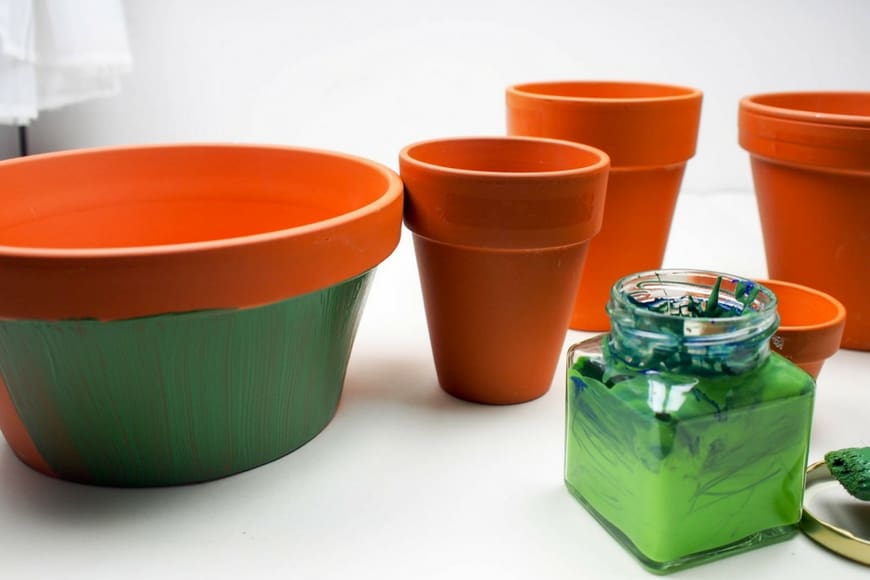
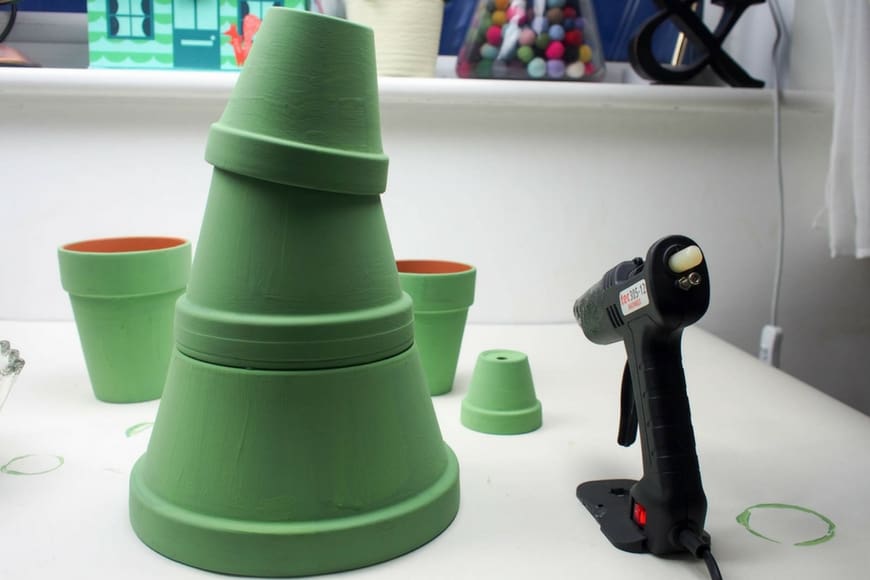
So what makes a Whoville Christmas tree? Wel for me it is the fact that it is wonky at the top and also that it is all decorated in red and green and has candy canes on. I do not know if this is the film, book or from visiting Universal Studios in Orlando when it was decorated for Christmas. Terracotta pots are great for this and the secret is grabbing a selection and seeing if they all stack together. We opted for some short ones and some longer ones so that they stacked well and also some standard sized ones too.

We painted ours in ready mixed green tempura paint, but you could use emulsion or acrylic paint. We needed two coats of the paint. You do not need to paint the bottom of your plant pots except for the smallest. once painted set aside your poys to dry.
Then line up your pots ready to stick together.
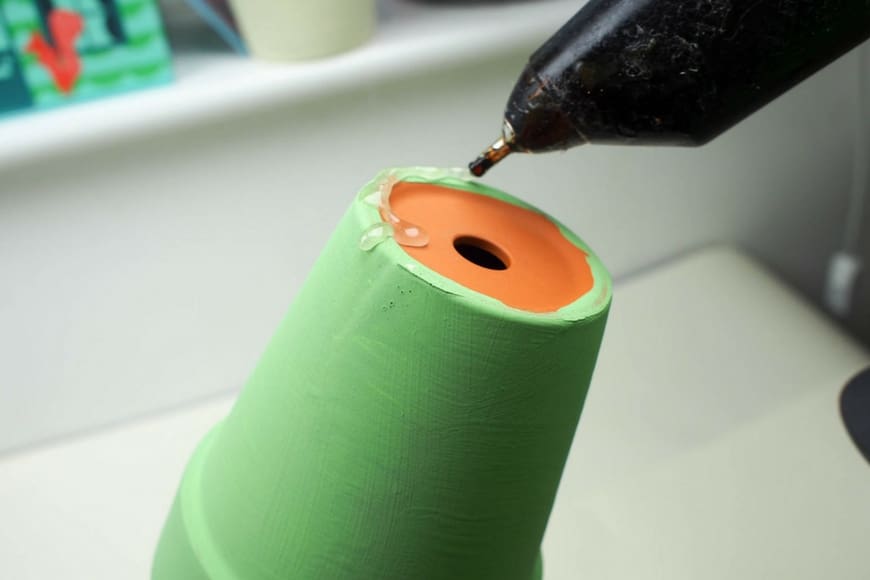
We used out hot melt glue gun and didn’t skimp on the amount we used. You could also use Sugru. If you are planning on popping this outside then you need to varnish it.
Then start decorating your tree. We chose to use the glue gun to attach our ribbon decorations rather than the adhesive pads.

Once all the bows were on Maxi added some candy canes. Again these were hot glued on and we left the plastic on them!
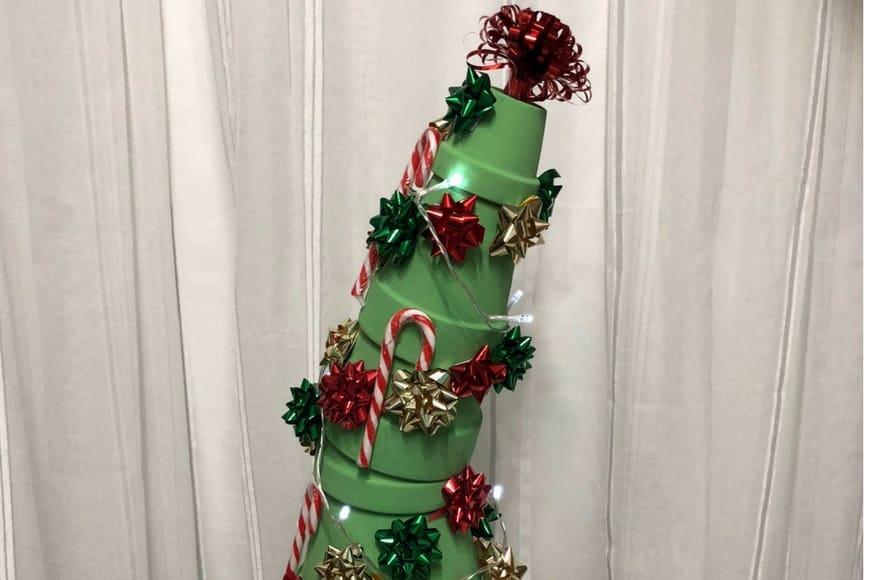
The add your lights.
Make sure you check out our other Christmas Crafts here and follow Mum in the Mad House on Pinterest.
Comments are closed.